Showing posts with label Packer. Show all posts

Tuesday, 7 March 2023

Ubuntu with packer on vSphere

Building Ubuntu Server 22.04 on vSphere with Packer

While using my home lab, I regularly need a fresh Ubuntu Server to install test software. Rather than use the built in templating in vSphere, I wanted to use Packer to build an image so that I can include the regular software I use and have it always be up to date when I start using the server.

I initially built the template using JSON, but since HCL is now the preferred language, I converted the template to HCL and used some new features like dynamic blocks. I’ve parameterised all of the vSphere values and included some values to be injected into the VM such as username, initial user password and some ssh keys in authorized_keys for the user.

If you want to follow along, clone the git repo…

git clone https://github.com/bobalob/packer-vsphere

cloning the repo

…and install packer. if this isn’t available on your distribution, download from hashicorp

sudo apt install packer
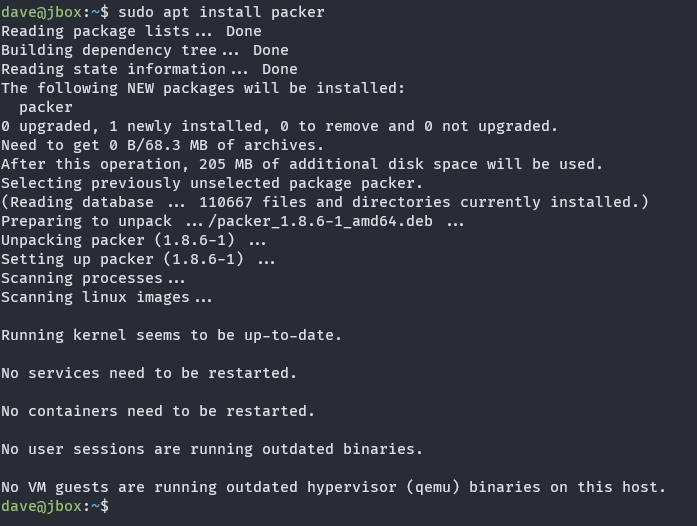
install packer

Here’s the main template. The source section defines the virtual machine ready to boot in vSphere and the build section defines what will happen after the OS has been installed.

The boot_command sends keys to the VM via the remote console and essentially types a boot command into the grub boot menu. This instructs the machine to load the user-data file from packer’s in built dynamic HTTP server. The user-data file has some basic information for subiquity (Ubuntu Server’s setup program) to install the OS.

The dynamic provisioner block is interesting since it iterates over the ssh_authorized_keys list variable and runs the echo | tee command multiple times inside the new VM.

Some of the variables in the user-data file are modified by build.sh prior to packer being executed, which I’ll show a bit later.

The template uses variables for most user input so it can be used in other environments

To provide user variables, a file named variables.auto.pkrvars.hcl can be placed in the files/ directory. SSH public keys can be placed in the ssh_authorized_keys variable which will be injected into the VM in the build step. An example variables.auto.pkrvars.hcl file:

temp_dns = "192.168.2.254"
temp_gw = "192.168.2.254"
temp_ip = "192.168.2.90"
temp_mask = "255.255.255.0"
vcenter_cluster = "mycluster.domain.local"
vcenter_datacenter = "Home"
vcenter_datastore = "Datastore1"
vcenter_iso_path = "[Datastore1] ISO/ubuntu-22.04.1-live-server-amd64.iso"
vcenter_network = "VM network"
vcenter_server = "vcenter.domain.local"
vcenter_user = "administrator@vsphere.local"
ssh_authorized_keys = [
    "ssh-rsa AAAAB3NzaC1... user@box1",
    "ssh-rsa AAAAB3NzaC1... user@box2"
]

The temporary IP is because in my environment, the machine would get a different DHCP assigned address after the first reboot and packer would not reconnect to the new IP.

Running build.sh modifies some files in the user-data file that Ubuntu reads during setup. openssl generates a password hash for the user supplied password and there is a read command for the vCenter password so it’s not entered on the command line or echoed to the screen.

And finally, here’s the provision.sh script that runs inside the VM once it’s built. The provision script just does an apt update/upgrade, cleans up the cloud-init configuration from the installer, expires the user’s password and resets it’s sudo configuration.

Building the machine

Running build.sh
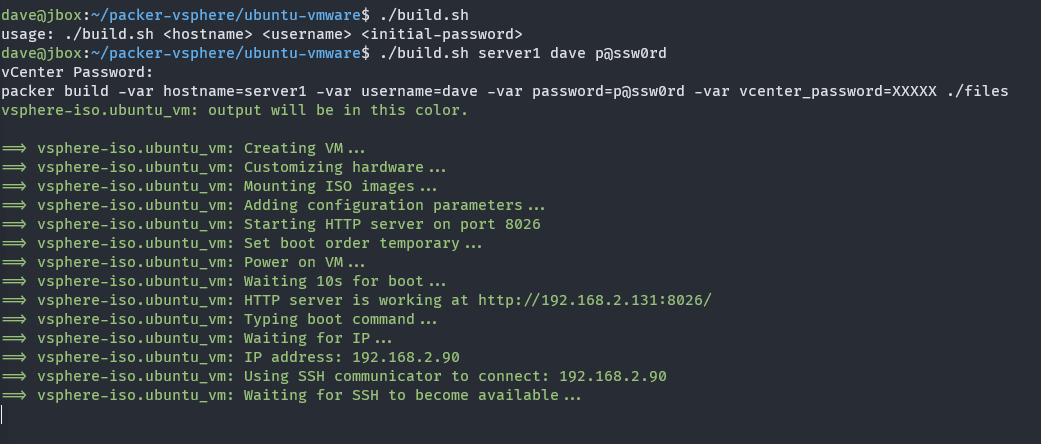
running build.sh

packer typing the boot command
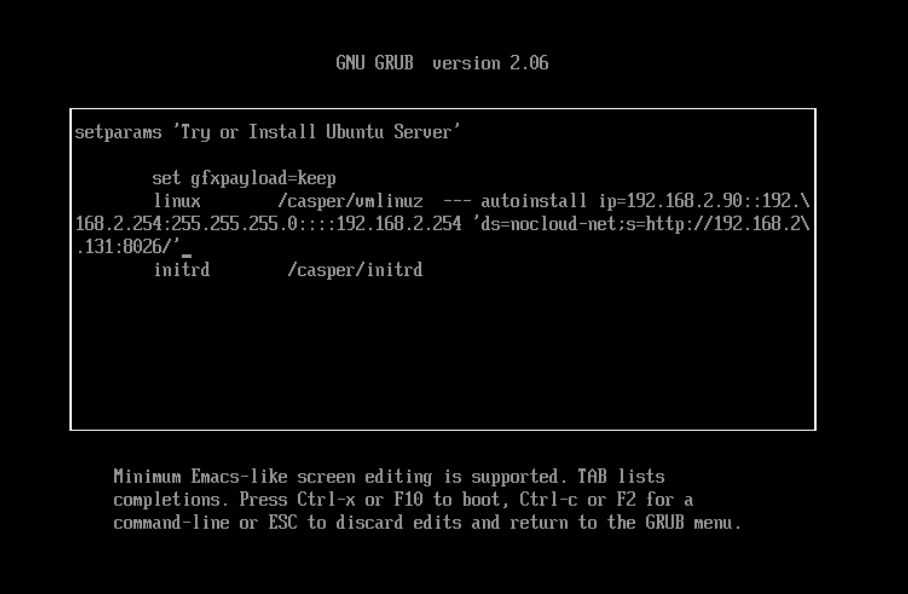
packer typing boot command

build section of the template running. Notice that the ssh-rsa public keys are echoed twice, this is because of the dynamic block in the build section of the template iterating over the list of keys provided in the variable.

packer running the build

Once the machine is built, login with my ssh key is possible. Since provision.sh expired the user password, we’re prompted to change from the initial password at first login.
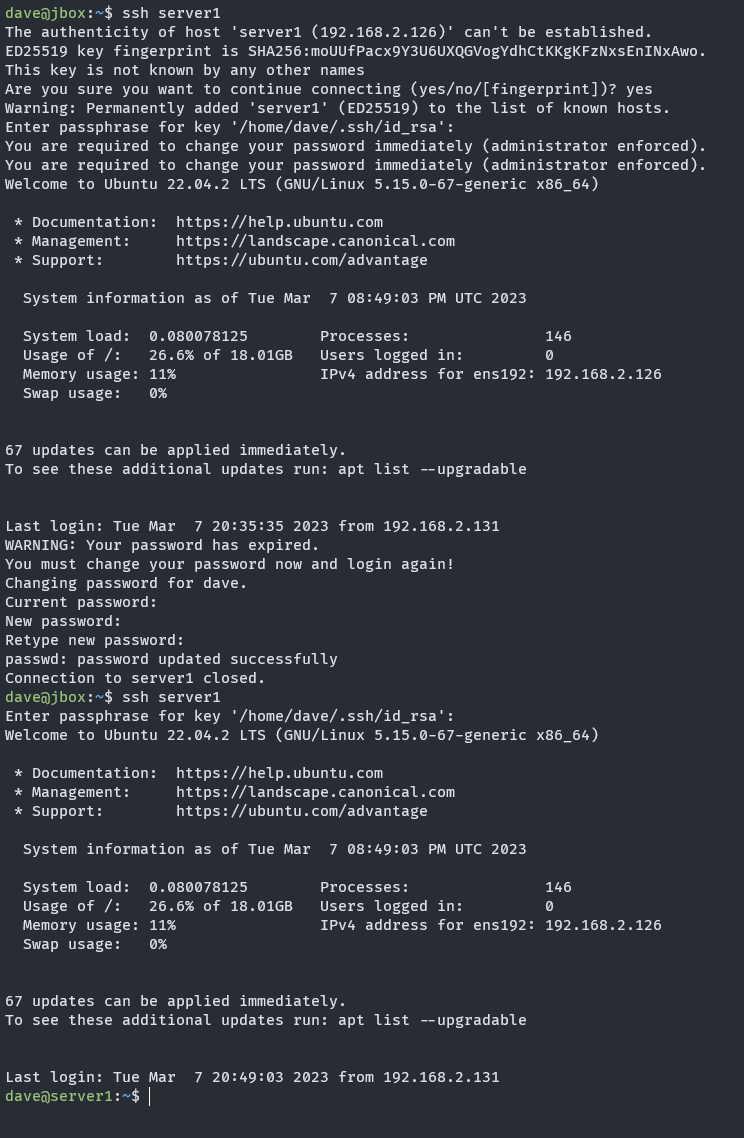
logging into the finished machine

I already have Ansible set up in my home lab, so I’ll try to integrate that into this build in the future.

Written with StackEdit.

Friday, 13 November 2020

Packer for Nutanix AHV Windows Templates

Packer for Nutanix AHV

Packer for Nutanix AHV

Packer automates the creation of virtual machine images. It’s quite a bit simpler than SCCM to set up if you just want basic, up to date images that you can deploy virtual machines from. Packer uses ‘builders’ to create virtual machine images for various hypervisors and cloud services. Unfortunately, there isn’t yet a builder for Nutanix AHV. AHV is based on KVM for virtualisation though, so it’s possible to generate images using a basic KVM hypervisor and then upload them to the image service ready to deploy.

Since it’s not possible to create the templates natively in the platform, a helper virtual machine is needed to run KVM and build the images. In this post, I’ll go through the set up for an Ubuntu virtual machine and give a Windows Server 2019 example ready to deploy.

I used Nutanix CE 5.18 in most of my testing, but it’s also possible to run the KVM builder on a physical machine or any VM that supports CPU passthrough such as VMware workstation, Hyper-V or ESXi. If you’re running an older version of Nutanix AOS/AHV then it may still be possible with caveats. Check the troubleshooting section for more information.

Create the builder virtual machine

Create the VM in AHV

  • Create VM, 2 vCPU, 4 GB, I’m using the name packer
  • Add disk, ~100 GB
  • Enable CPU passtrhough in the Nutanix CLI

SSH to a CVM as nutanix and run the following command

acli vm.update <VMNAME> cpu_passthrough=true

cpu passthrough

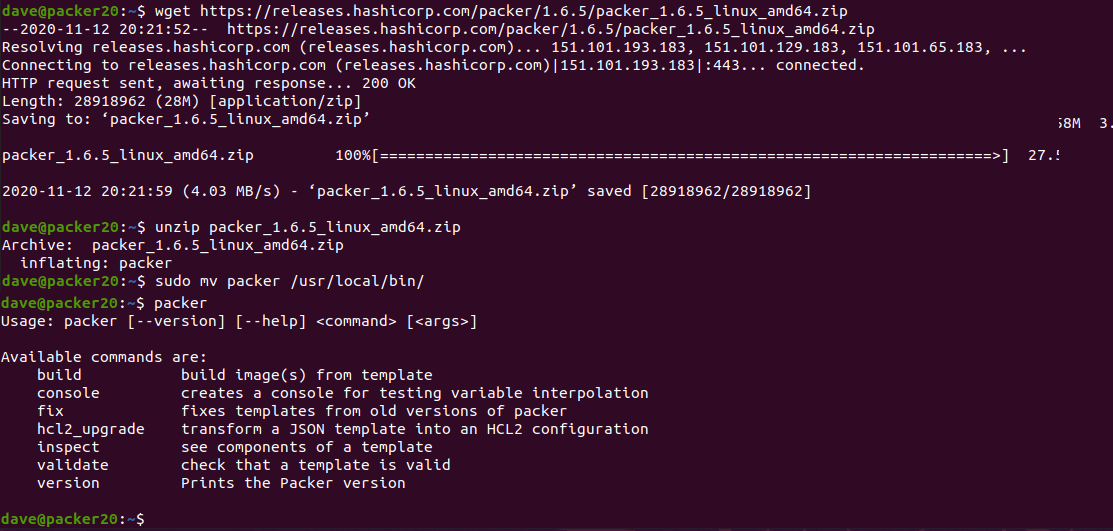
Install packer with the following commands. First party guide here. Make sure you update with the latest version, the URL here is just an example, but it is the version I used.

sudo apt update
sudo apt -y upgrade
wget https://releases.hashicorp.com/packer/1.6.5/packer_1.6.5_linux_amd64.zip
unzip packer_1.6.5_linux_amd64.zip
sudo mv packer /usr/local/bin/

Run the packer binary to make sure it’s in the path and executable

packer

packer run

Download the packer windows update provisioner and install per the instructions.

wget https://github.com/rgl/packer-provisioner-windows-update/releases/download/v0.10.1/packer-provisioner-windows-update_0.10.1_linux_amd64.tar.gz
tar -xvf packer-provisioner-windows-update_0.10.1_linux_amd64.tar.gz
chmod +x packer-provisioner-windows-update
sudo mv packer-provisioner-windows-update /usr/local/bin/

Install qemu, vnc viewer & git

sudo apt -y install qemu qemu-kvm tigervnc-viewer git

Check you have virtualisation enabled

kvm-ok

Add your local user to the kvm group and reboot

sudo usermod -aG kvm dave
sudo reboot

I have built an example windows build on github here

Clone the example files to your local system with the following command

git clone https://github.com/bobalob/packer-examples

you will need to download the Windows 2019 Server ISO from here, the Nutanix VirtIO Drivers from here and LAPS from here.

Place the Windows installation media in the iso folder and the 2 MSI files in the files folder. They must be named exactly as in the win2019.json file for this to work. Update the json file if you have differing MSI or ISO file names. Use this as a base to build from. You can upload additonal MSIs or add scripts. Experiment with the packer provisioners.

If you run with a different ISO you will either need to obtain the sha256 hash for the ISO or just run the packer build command and it will tell you what hash it wants. Be careful here, I trusted my ISO file so I just copied the hash that packer wanted into my json and ran the build again.

If you wish to change the password for the build, change the variable in the win2019.json file and the plain text password in the Autounattend.xml file.

My folder structure looks like this:

win2019 folders

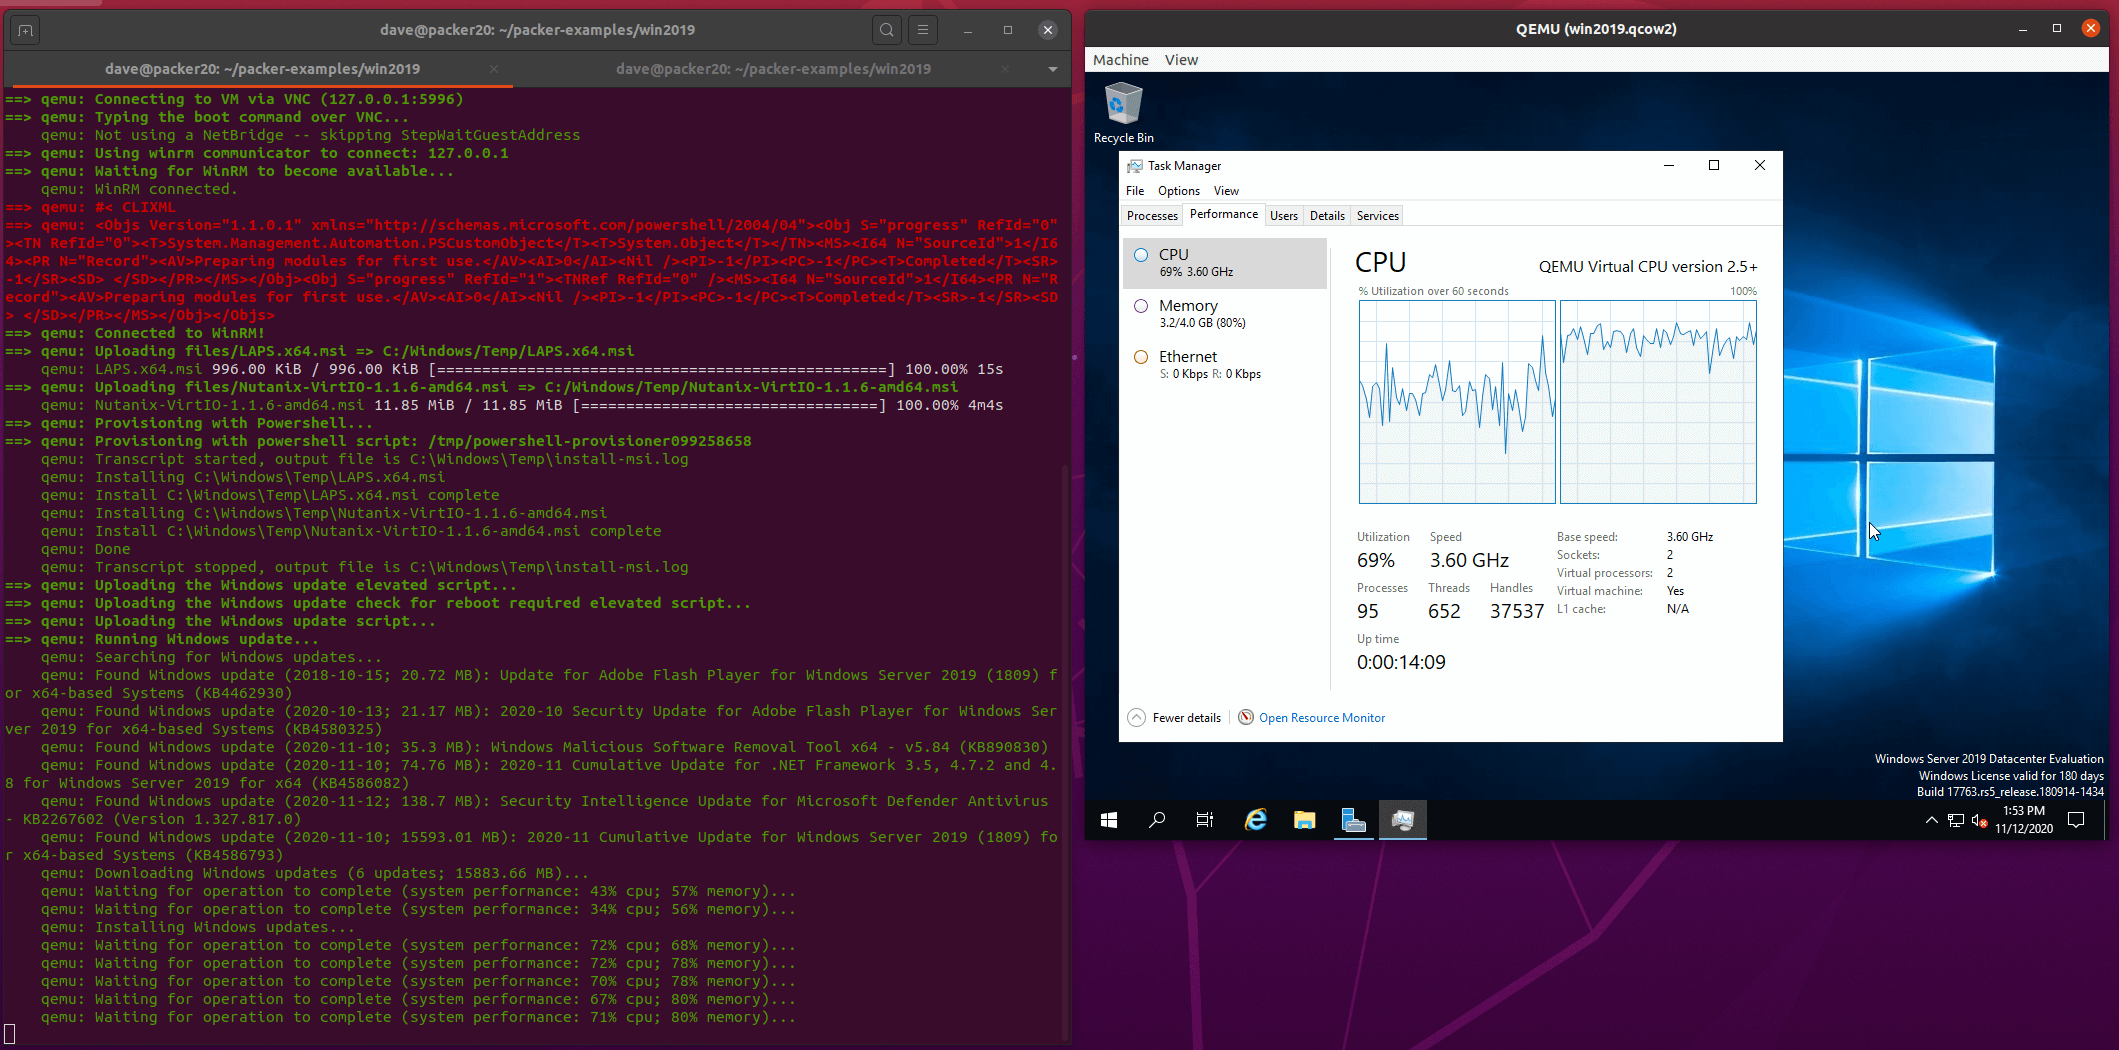
Run packer build

cd packer-examples/win2019/
packer build win2019.json

packer building

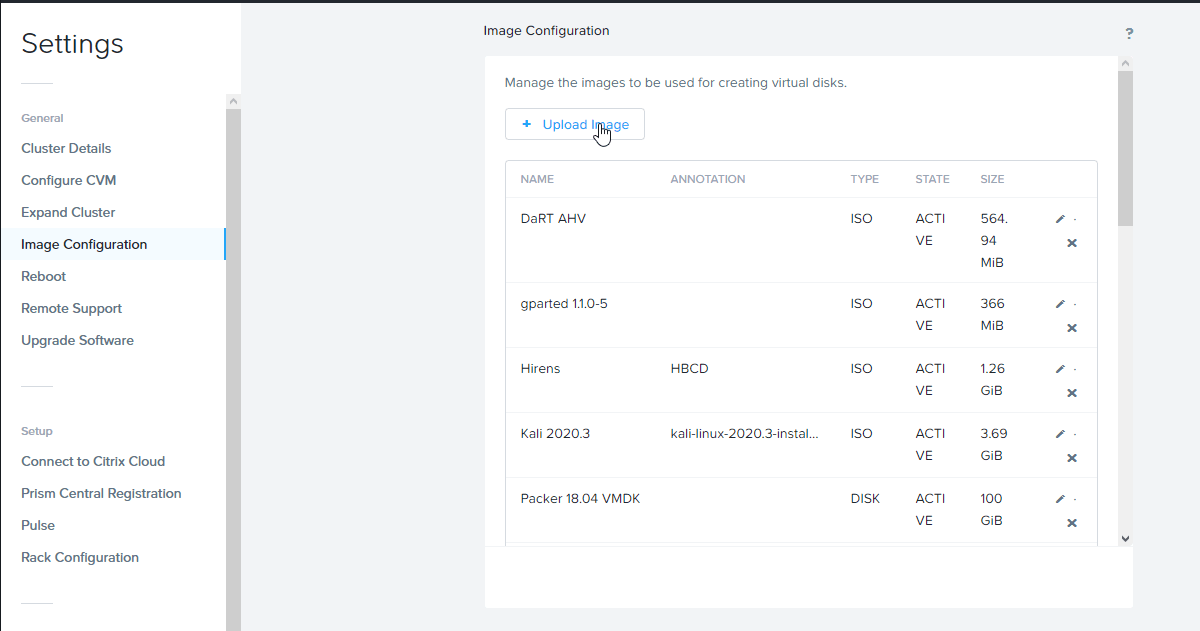
Once the machine is built, upload the artifact from vm/win2019-qemu/win2019 to the image service in Prism

upload the file

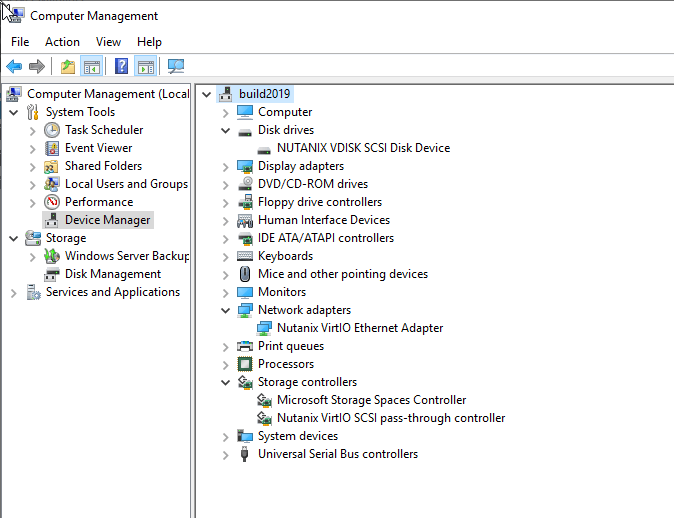
Once uploaded you can create a VM from the image. Hopefully it will have all the correct VirtIO drivers installed.

Finished VM

Troubleshooting

In all cases where a build fails it’s useful to set the PACKER_LOG environment variable as follows

PACKER_LOG=1 packer build win2019.json

==> qemu: Failed to send shutdown command: unknown error Post “http://127.0.0.1:3931/wsman”: dial tcp 127.0.0.1:3931: connect: connection refused

In my case this was because I had configured my sysprep command in a regular script. Since the sysprep runs and shuts the machine down, there is no longer a winrm endpoint for packer to connect to.

The issue with this is that packer attempts to cleanup once it has run the script and then run the shutdown_command. I removed my sysprep from the script and included it as my shutdown_command.

Build hangs when installing VirtIO MSI

I realised this is because the network driver installs and disconnects the network for a second causing packer to hang and not receive output from the script. Changing the build VM nic to e1000 in the json file means the NIC doesn’t get disconnected when installing VirtIO.

openjdk / java issue with ncli

System default is
but java 8 is required to run ncli

edit the ncli file in a text editor, replace

JAVA_VERSION=`java -version 2>&1 | grep -i "java version"

with

JAVA_VERSION=`java -version 2>&1 | grep -i "openjdk version"

MSR 0xe1 to 0x0 error on Ryzen system

Fix here

Essentially run the following and try again, if this fixes it, try the linked blog for the permenant fix.

echo 1 | sudo tee /sys/module/kvm/parameters/ignore_msrs

Windows build hangs the host VM or the guest

I think this is a problem in AHV 5.10, Tested working on AHV 5.18 CE. A workaround is changing the machine type to pc or pc-i440fx-4.2. Unfortunately this appears to be REALLY slow! Might be worth experimenting with different machine types. q35 is just as slow.

Update the Qemu args to include the machine type:

"qemuargs": [
    [
      "-m",
      "2048"
    ],
    [
      "-smp",
      "2"
    ],
    [
      "-machine",
      "pc"
    ]
  ]

Written with StackEdit.

Sunday, 6 November 2016

Creating Windows images on Azure Resource Manager with Packer

Building from the last post about creating infrastructure on Azure Resource Manager with Terraform, I wanted to try out packer on the platform for creating Windows Server images.

Getting this running requires the following:

  1. choco install -y packer - or manually download and install on windows machine
  2. Set up application and permissions in Azure
  3. Add the required environment variables
  4. Create json file for packer
  5. packer build windows-example.json

In much the same way as Terraform, you will need to create an application in Azure and assign permissions so that Packer can create resources to build your image.

Unfortunately the official packer script for auth setup doesn't work for me and the commands on the site are specific to Linux. I created a PowerShell script that will create the relevant objects in Azure for authorisation. If you want to manually create these objects you will need to follow the packer documentation here.

Once the API keys have been loaded into environment variables, I created the an example Windows build json file. An important thing to note is the winrm communicator section in the file, without it the build will fail. There is also an official packer example file here.


Packer requires a resource group and storage account to store your completed images. These can be created any way you choose but will need to be there for the build to complete successfully.


Once the file has been created, run the build with

    packer build .\windows-example.json

Packer should then build a keystore and VM in a temporary resource group, run any provisioners configured and then output build artifacts ready to use as a vm template. Once the template is created, you will be given a path to a vhd and an Azure json template for building VMs.

All scripts and files can be found on my GitHub.

Next step for this is to use Terraform to build a VM from the custom image.

Nutanix CE 2.0 on ESXi AOS Upgrade Hangs

AOS Upgrade on ESXi from 6.5.2 to 6.5.3.6 hangs. Issue I have tried to upgrade my Nutanix CE 2.0 based on ESXi to a newer AOS version for ...