Showing posts with label automation. Show all posts

Tuesday, 7 March 2023

Ubuntu with packer on vSphere

Building Ubuntu Server 22.04 on vSphere with Packer

While using my home lab, I regularly need a fresh Ubuntu Server to install test software. Rather than use the built in templating in vSphere, I wanted to use Packer to build an image so that I can include the regular software I use and have it always be up to date when I start using the server.

I initially built the template using JSON, but since HCL is now the preferred language, I converted the template to HCL and used some new features like dynamic blocks. I’ve parameterised all of the vSphere values and included some values to be injected into the VM such as username, initial user password and some ssh keys in authorized_keys for the user.

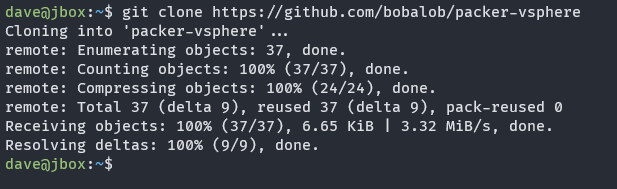
If you want to follow along, clone the git repo…

git clone https://github.com/bobalob/packer-vsphere

cloning the repo

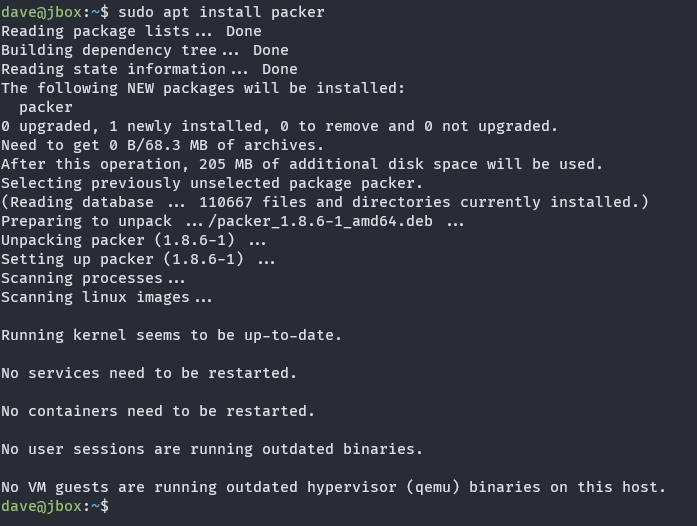
…and install packer. if this isn’t available on your distribution, download from hashicorp

sudo apt install packer

install packer

Here’s the main template. The source section defines the virtual machine ready to boot in vSphere and the build section defines what will happen after the OS has been installed.

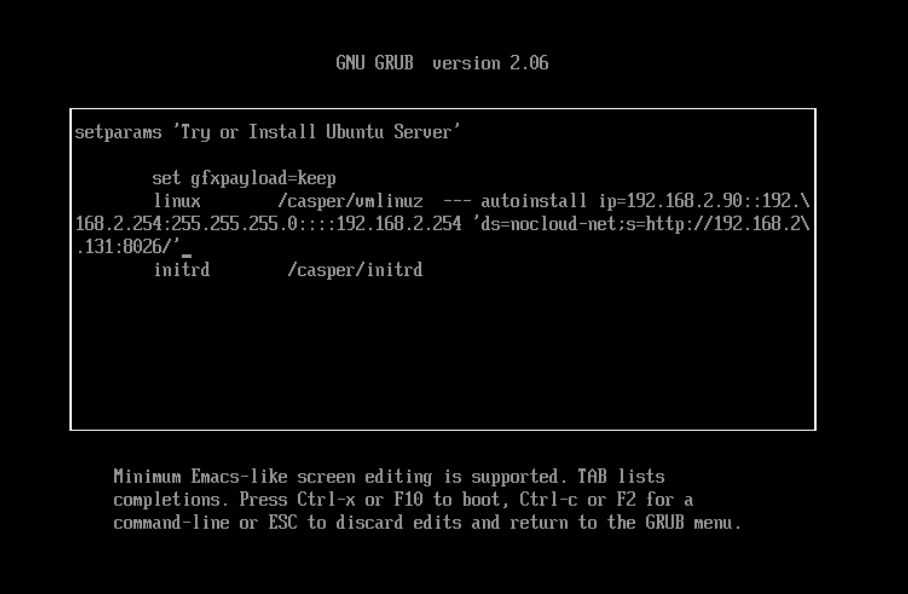
The boot_command sends keys to the VM via the remote console and essentially types a boot command into the grub boot menu. This instructs the machine to load the user-data file from packer’s in built dynamic HTTP server. The user-data file has some basic information for subiquity (Ubuntu Server’s setup program) to install the OS.

The dynamic provisioner block is interesting since it iterates over the ssh_authorized_keys list variable and runs the echo | tee command multiple times inside the new VM.

Some of the variables in the user-data file are modified by build.sh prior to packer being executed, which I’ll show a bit later.

The template uses variables for most user input so it can be used in other environments

To provide user variables, a file named variables.auto.pkrvars.hcl can be placed in the files/ directory. SSH public keys can be placed in the ssh_authorized_keys variable which will be injected into the VM in the build step. An example variables.auto.pkrvars.hcl file:

temp_dns = "192.168.2.254"
temp_gw = "192.168.2.254"
temp_ip = "192.168.2.90"
temp_mask = "255.255.255.0"
vcenter_cluster = "mycluster.domain.local"
vcenter_datacenter = "Home"
vcenter_datastore = "Datastore1"
vcenter_iso_path = "[Datastore1] ISO/ubuntu-22.04.1-live-server-amd64.iso"
vcenter_network = "VM network"
vcenter_server = "vcenter.domain.local"
vcenter_user = "administrator@vsphere.local"
ssh_authorized_keys = [
    "ssh-rsa AAAAB3NzaC1... user@box1",
    "ssh-rsa AAAAB3NzaC1... user@box2"
]

The temporary IP is because in my environment, the machine would get a different DHCP assigned address after the first reboot and packer would not reconnect to the new IP.

Running build.sh modifies some files in the user-data file that Ubuntu reads during setup. openssl generates a password hash for the user supplied password and there is a read command for the vCenter password so it’s not entered on the command line or echoed to the screen.

And finally, here’s the provision.sh script that runs inside the VM once it’s built. The provision script just does an apt update/upgrade, cleans up the cloud-init configuration from the installer, expires the user’s password and resets it’s sudo configuration.

Building the machine
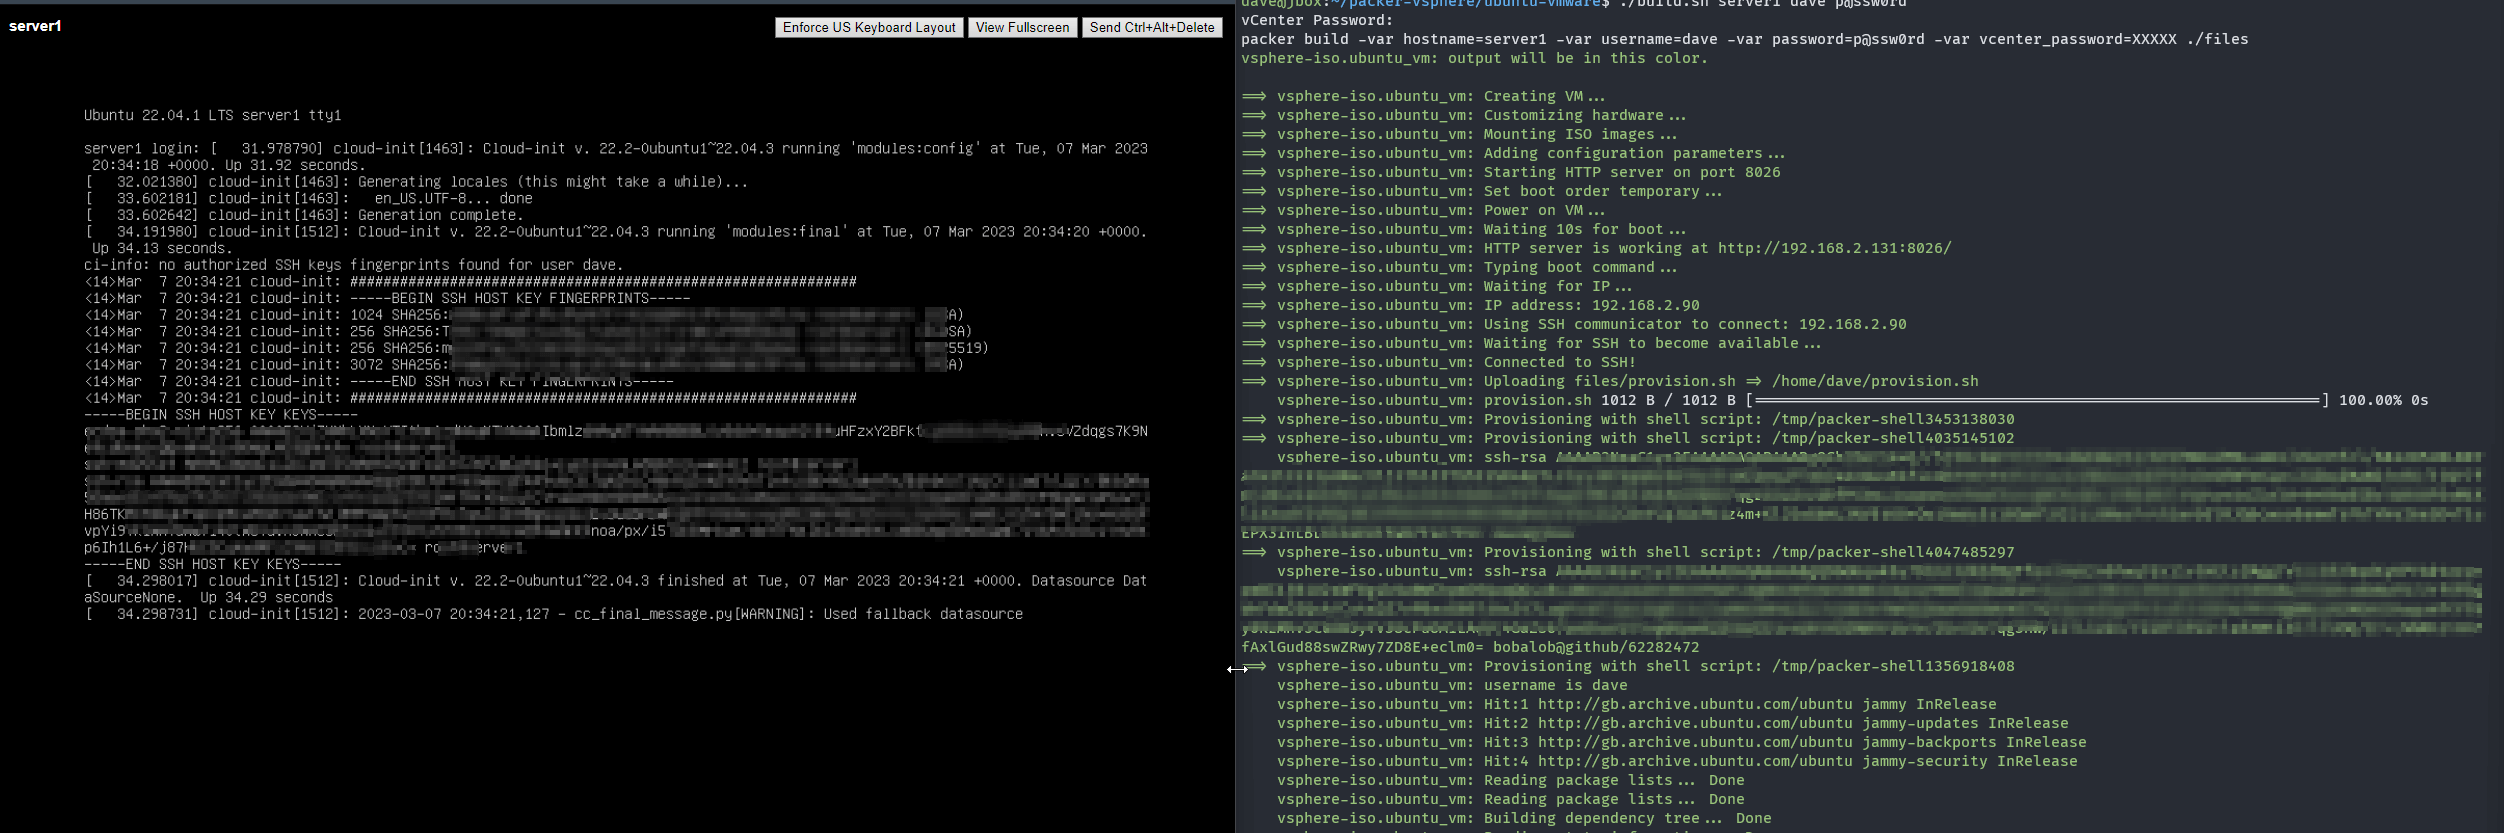
Running build.sh

running build.sh

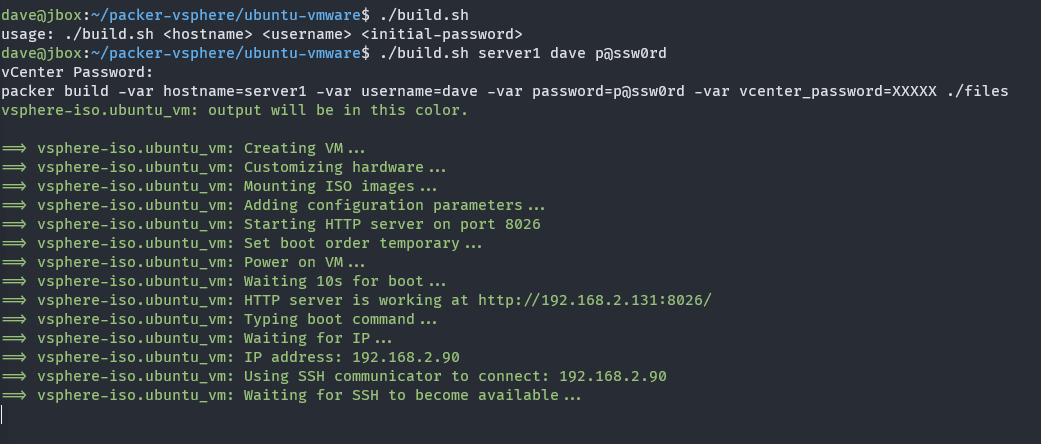
packer typing the boot command

packer typing boot command

build section of the template running. Notice that the ssh-rsa public keys are echoed twice, this is because of the dynamic block in the build section of the template iterating over the list of keys provided in the variable.

packer running the build

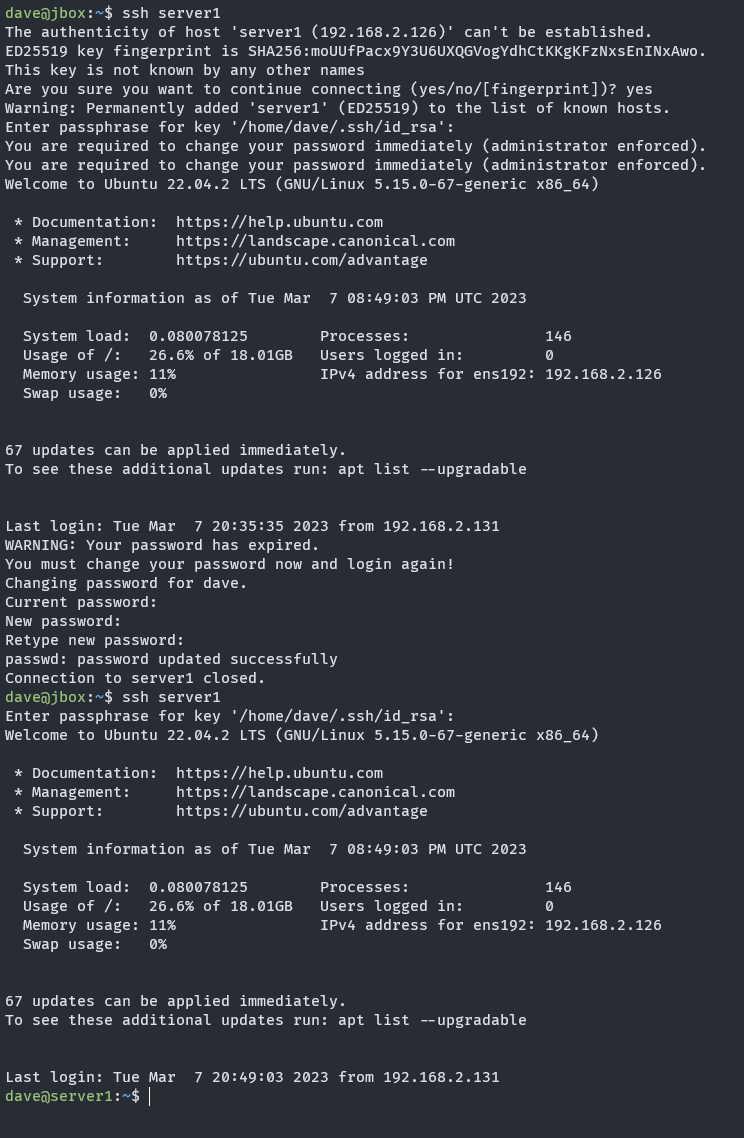
Once the machine is built, login with my ssh key is possible. Since provision.sh expired the user password, we’re prompted to change from the initial password at first login.

logging into the finished machine

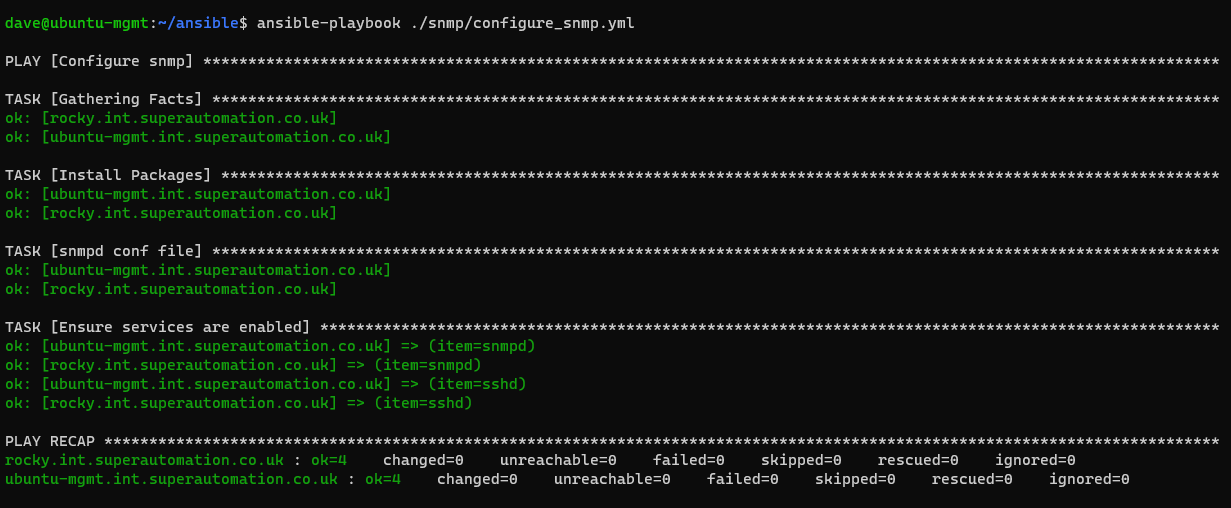
I already have Ansible set up in my home lab, so I’ll try to integrate that into this build in the future.

Written with StackEdit.

Sunday, 19 June 2022

Ansible as fast as possible

Super quick start guide for Ansible. This is a getting started guide only and should be sufficient to get you started writing playbooks for your lab environment. Before moving to production, security should be considered for the user account and roles should be reviewed for anything unexpected.

With that said:

sudo apt install ansible
cd ~
mkdir ansible
cd ansible

The inventory

The inventory is a list of machines which ansible will run on. Machines can be grouped and groups can be nested. The inventory file can be generated dynamically or statically as an ini or yaml formatted file. Here is a basic ini formatted inventory file with a few hosts in the production and test groups.

I have assigned the ‘syslocation’ variable to the machines which can be used later. Click here for more information on inventory files, and here for more information on variables.

inventory.ini

[production]
server1.example.com syslocation="London, England"
server2.example.com syslocation="London, England"
[test]
server3.example.com
server4.example.com

SSH Access to machines

Before you can start pushing configuration to your inventory, you’ll need a user account that can access the machines, generally with root level privileges. For the lab setup we will create an ansible user which has passwordless sudo using an SSH key for access.

Create an ssh key on your control node, save the keys somewhere and update the bootstrap-ansible.yml below with the public key location

ssh-keygen

bootsrap-ansible.yml

- name: Ansible user account bootstrapping
  hosts: all
  become: yes
  vars:
    user_name: ansible

  tasks:
  
  - name: Make sure we have a 'wheel' group
    group:
      name: wheel
      state: present
      
  - name: Add the {{ user_name }} user
    user:
      name: "{{ user_name }}"
      shell: /bin/bash
      home: "/home/{{ user_name }}"
      groups: wheel
      append: yes
      createhome: yes
      state: present
      
  - name: Allow 'wheel' group to have passwordless sudo
    lineinfile:
      dest: /etc/sudoers
      state: present
      regexp: '^%wheel'
      line: '%wheel ALL=(ALL) NOPASSWD: ALL'
      validate: 'visudo -cf %s'
      
  - name: Set up authorized keys for the ansible user
    authorized_key:
      user: "{{ user_name }}"
      key: "{{ item }}"
    with_file:
      - /home/dave/ansible/id_rsa.pub 
      # Public key location goes above

The above file combines several Ansible modules into a playbook. The modules will create the user, allow passwordless sudo and assign our control node’s public key for SSH access.

Once you’ve created the bootstrap playbook and inventory, run the bootstrap playbook with -i inventory.ini -k -K -u username using a known sudo account in order to push the ansible user to each machine. Rerun the command as many times as needed with different credentials. If you’re connecting directly as root, omit the -K flag.

ansible-playbook -i ./inventory.ini ./bootstrap-ansible.yml -k -K -u <remote_sudo_user>

You can limit the above command to a single host by appending -l hostname.exmaple.com, (note trailing comma)

The command will fail for all machines that don’t have the user/password you are using each time you run the command but once you’ve covered each machine at least once, you’ll have a new user that can be used.

Now that all your machines in the inventory have an ansible user with passwordless sudo capability, copy /etc/ansible/ansible.cfg to your working ansible directory and update the following values.

inventory = /home/<you>/ansible/inventory.ini
remote_user = ansible
private_key_file = /home/<you>/ansible/id_rsa

Run ansible --version to make sure you are using the new config file

Run the ping module command for all inventory to confirm connectivity (my screenshot is limited to a smaller group of machines called test_group)

ansible all -m ping

Now we can create a simple config yaml to install snmpd and copy a jinja2 file template to configure the snmpd service.

Create 2 files - configure_snmp.yml and snmpd.conf.j2

snmpd.conf.j2

agentAddress udp:161
rocommunity superSecretCommunity  192.168.55.55
rocommunity superSecretCommunity  127.0.0.1
sysLocation    {{ syslocation }}
sysContact     Dave <no@thanks.com>

Note the syslocation variable from earlier in the inventory file. Varibles can be assigned in many places such as the inventory, playbooks, for specific groups etc.

configure_snmp.yml

- name: Configure snmp
  hosts: test_group
  become: yes
  vars:
    # Dynamic list based on OS type
    _packages:
      Debian:
        - snmpd
      RedHat:
        - net-snmp
    packages: "{{ _packages[ansible_os_family] }}"

    # Standard list
    services:
        - snmpd
        - sshd

  tasks:

  # Package module to install list of packages apt / yum
  - name: Install Packages
    package:
      name: "{{ packages }}"
      state: present

  # Use the jinja2 template to create a new snmpd.conf
  - name: snmpd conf file
    template:
      src: "/home/dave/ansible/snmpd/snmpd.conf.j2"
      dest: "/etc/snmp/snmpd.conf"
      backup: yes
      owner: root
      group: root
      mode: 0600
    notify:
      - restart snmpd

  # Loop over services list and make sure they are started and enabled
  - name: Ensure services are enabled
    ansible.builtin.service:
      name: "{{ item }}"
      state: started
      enabled: yes
    loop: "{{ services }}"

  handlers:

  # Handler called if the snmpd conf file is changed from template module above
  - name: restart snmpd
    ansible.builtin.service:
      name: snmpd
      state: restarted

Run a dry-run on the playbook to see what happens

ansible-playbook -C ./snmp/configure-snmp.yml

Because this is a dry run it will fail to start the snmpd service as it’s not yet installed. Run the playbook without a dry run to actually configure the services

ansible-playbook ./snmp/configure-snmp.yml

If we run it a second time, all should be in order and no changes will be required

ansible-playbook ./snmp/configure-snmp.yml

You can check out Ansible Galaxy for pre-written Ansible Roles to save time writing playbooks that the community has already written. For example there are roles on Ansible Galaxy for unattended-upgrades for Debian based machines, dnf-automatic for updates on red hat based machines and many other configurations.

For more information check out the Ansible Docs

If you’re interested and have the time, I recommend this Pluralsight course. You can get 1 month of free access to Pluralsight with Visual Studio Dev Essentials.

Written with StackEdit.

Nutanix CE 2.0 on ESXi AOS Upgrade Hangs

AOS Upgrade on ESXi from 6.5.2 to 6.5.3.6 hangs. Issue I have tried to upgrade my Nutanix CE 2.0 based on ESXi to a newer AOS version for ...