Super quick start guide for Ansible. This is a getting started guide only and should be sufficient to get you started writing playbooks for your lab environment. Before moving to production, security should be considered for the user account and roles should be reviewed for anything unexpected.
With that said:
sudo apt install ansible
cd ~
mkdir ansible
cd ansible
The inventory
The inventory is a list of machines which ansible will run on. Machines can be grouped and groups can be nested. The inventory file can be generated dynamically or statically as an ini or yaml formatted file. Here is a basic ini formatted inventory file with a few hosts in the production and test groups.
I have assigned the ‘syslocation’ variable to the machines which can be used later. Click here for more information on inventory files, and here for more information on variables.
inventory.ini
[production]
server1.example.com syslocation="London, England"
server2.example.com syslocation="London, England"
[test]
server3.example.com
server4.example.com
SSH Access to machines
Before you can start pushing configuration to your inventory, you’ll need a user account that can access the machines, generally with root level privileges. For the lab setup we will create an ansible user which has passwordless sudo using an SSH key for access.
Create an ssh key on your control node, save the keys somewhere and update the bootstrap-ansible.yml below with the public key location
ssh-keygen
bootsrap-ansible.yml
- name: Ansible user account bootstrapping
  hosts: all
  become: yes
  vars:
    user_name: ansible

  tasks:

  - name: Make sure we have a 'wheel' group
    group:
      name: wheel
      state: present

  - name: Add the {{ user_name }} user
    user:
      name: "{{ user_name }}"
      shell: /bin/bash
      home: "/home/{{ user_name }}"
      groups: wheel
      append: yes
      createhome: yes
      state: present

  - name: Allow 'wheel' group to have passwordless sudo
    lineinfile:
      dest: /etc/sudoers
      state: present
      regexp: '^%wheel'
      line: '%wheel ALL=(ALL) NOPASSWD: ALL'
      validate: 'visudo -cf %s'

  - name: Set up authorized keys for the ansible user
    authorized_key:
      user: "{{ user_name }}"
      key: "{{ item }}"
    with_file:
      - /home/dave/ansible/id_rsa.pub
      # Public key location goes above
The above file combines several Ansible modules into a playbook. The modules will create the user, allow passwordless sudo and assign our control node’s public key for SSH access.
Once you’ve created the bootstrap playbook and inventory, run the bootstrap playbook with -i inventory.ini -k -K -u username using a known sudo account in order to push the ansible user to each machine. Rerun the command as many times as needed with different credentials. If you’re connecting directly as root, omit the -K flag.
ansible-playbook -i ./inventory.ini ./bootstrap-ansible.yml -k -K -u <remote_sudo_user>
You can limit the above command to a single host by appending -l hostname.exmaple.com, (note trailing comma)
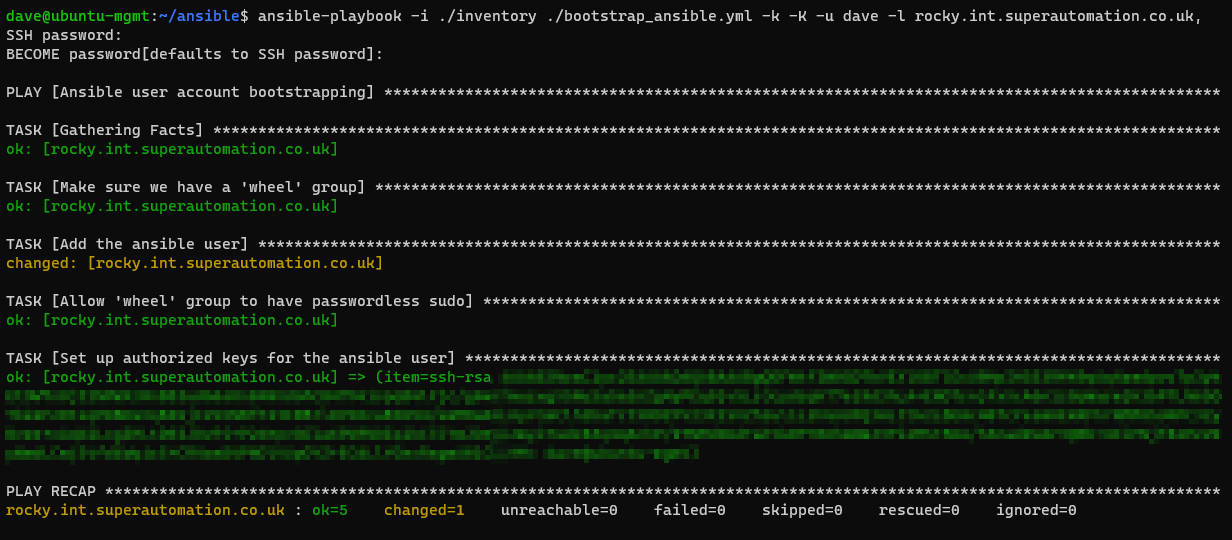
The command will fail for all machines that don’t have the user/password you are using each time you run the command but once you’ve covered each machine at least once, you’ll have a new user that can be used.
Now that all your machines in the inventory have an ansible user with passwordless sudo capability, copy /etc/ansible/ansible.cfg to your working ansible directory and update the following values.
inventory = /home/<you>/ansible/inventory.ini
remote_user = ansible
private_key_file = /home/<you>/ansible/id_rsa
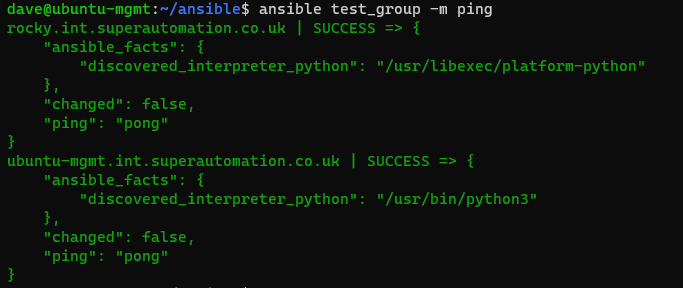
Run ansible --version to make sure you are using the new config file

Run the ping module command for all inventory to confirm connectivity (my screenshot is limited to a smaller group of machines called test_group)
ansible all -m ping
Now we can create a simple config yaml to install snmpd and copy a jinja2 file template to configure the snmpd service.
Create 2 files - configure_snmp.yml and snmpd.conf.j2
snmpd.conf.j2
agentAddress udp:161
rocommunity superSecretCommunity  192.168.55.55
rocommunity superSecretCommunity  127.0.0.1
sysLocation    {{ syslocation }}
sysContact     Dave <no@thanks.com>
Note the syslocation variable from earlier in the inventory file. Varibles can be assigned in many places such as the inventory, playbooks, for specific groups etc.
configure_snmp.yml
- name: Configure snmp
  hosts: test_group
  become: yes
  vars:
    # Dynamic list based on OS type
    _packages:
      Debian:
        - snmpd
      RedHat:
        - net-snmp
    packages: "{{ _packages[ansible_os_family] }}"

    # Standard list
    services:
        - snmpd
        - sshd

  tasks:

  # Package module to install list of packages apt / yum
  - name: Install Packages
    package:
      name: "{{ packages }}"
      state: present

  # Use the jinja2 template to create a new snmpd.conf
  - name: snmpd conf file
    template:
      src: "/home/dave/ansible/snmpd/snmpd.conf.j2"
      dest: "/etc/snmp/snmpd.conf"
      backup: yes
      owner: root
      group: root
      mode: 0600
    notify:
      - restart snmpd

  # Loop over services list and make sure they are started and enabled
  - name: Ensure services are enabled
    ansible.builtin.service:
      name: "{{ item }}"
      state: started
      enabled: yes
    loop: "{{ services }}"

  handlers:

  # Handler called if the snmpd conf file is changed from template module above
  - name: restart snmpd
    ansible.builtin.service:
      name: snmpd
      state: restarted
Run a dry-run on the playbook to see what happens
ansible-playbook -C ./snmp/configure-snmp.yml
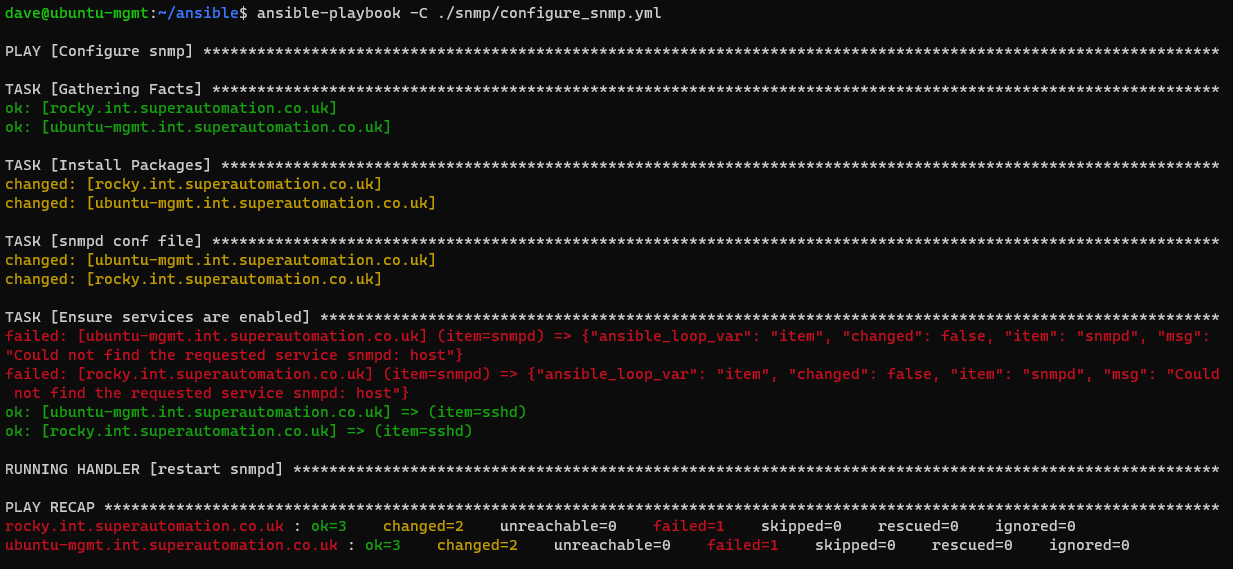
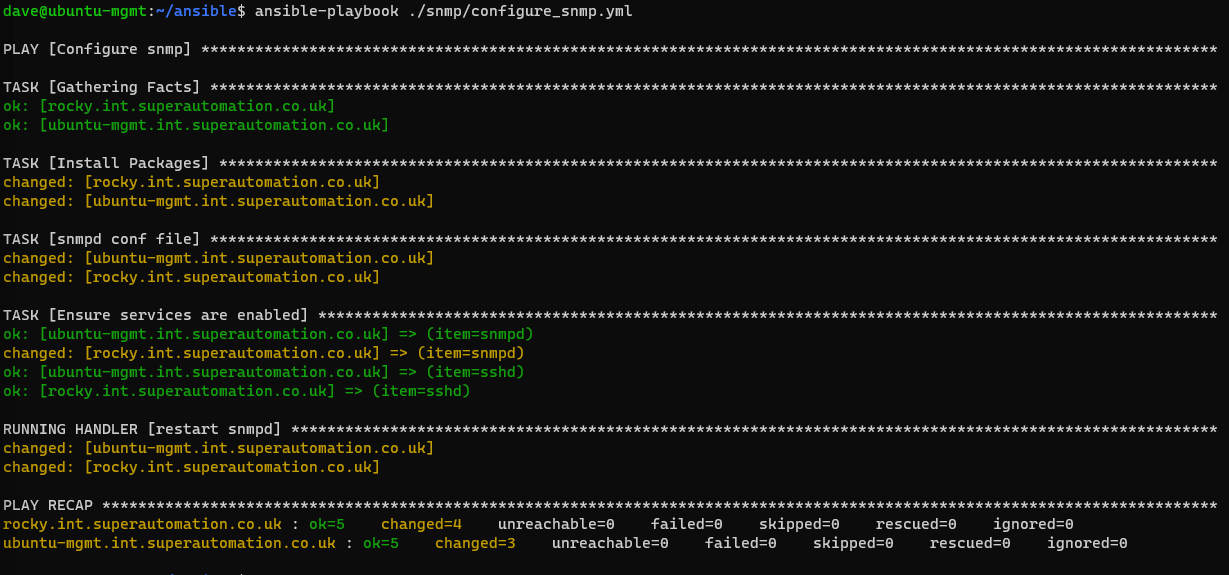
Because this is a dry run it will fail to start the snmpd service as it’s not yet installed. Run the playbook without a dry run to actually configure the services
ansible-playbook ./snmp/configure-snmp.yml
If we run it a second time, all should be in order and no changes will be required
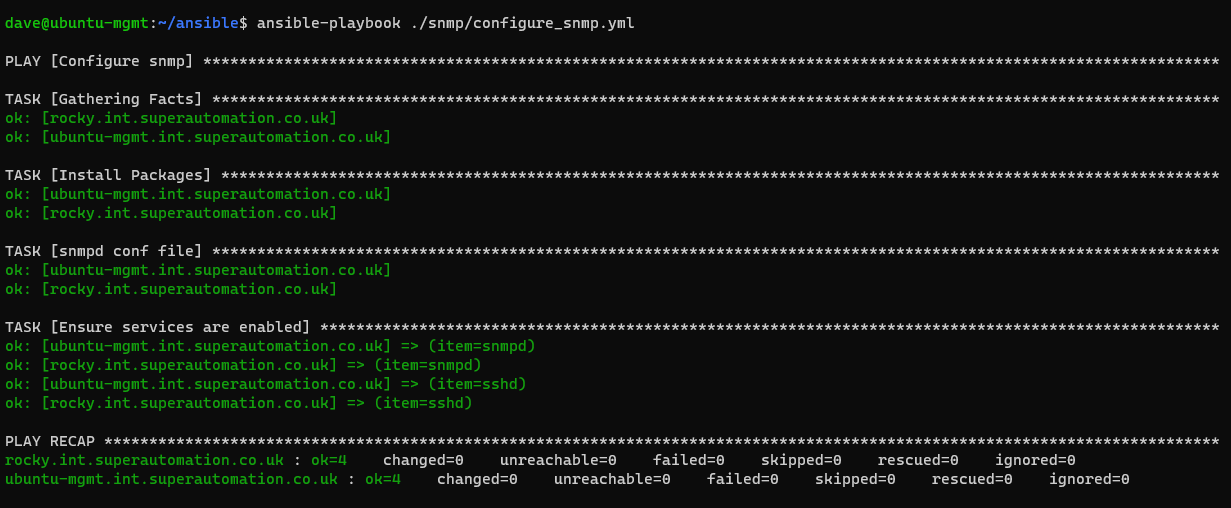
ansible-playbook ./snmp/configure-snmp.yml
You can check out Ansible Galaxy for pre-written Ansible Roles to save time writing playbooks that the community has already written. For example there are roles on Ansible Galaxy for unattended-upgrades for Debian based machines, dnf-automatic for updates on red hat based machines and many other configurations.
For more information check out the Ansible Docs
If you’re interested and have the time, I recommend this Pluralsight course. You can get 1 month of free access to Pluralsight with Visual Studio Dev Essentials.
Written with StackEdit.

No comments:
Post a Comment
Please be nice! :)