Adding a new disk to Single Node Nutanix CE
There wasn’t much detailed information for adding an additional disk to a Nutanix CE node, so I’ve compiled the steps and written a guide here. This guide is for a single node CE cluster and therefore I have to stop the cluster to perform most of these actions. If you have a multi node cluster, most of the steps can be done by shutting down a single CVM but these are the steps I took and verified.
At a high level, the drive should be added to the physical host then added to the CVM config. Once the CVM is booted back up, there are some scripts to run to partition, format, mount and set the tier for the drive.
I have read that there is a script named ce_add_disk but running this on my system didn’t work.
This was tested on AOS 5.18 / 2020.09.16.
On the CVM
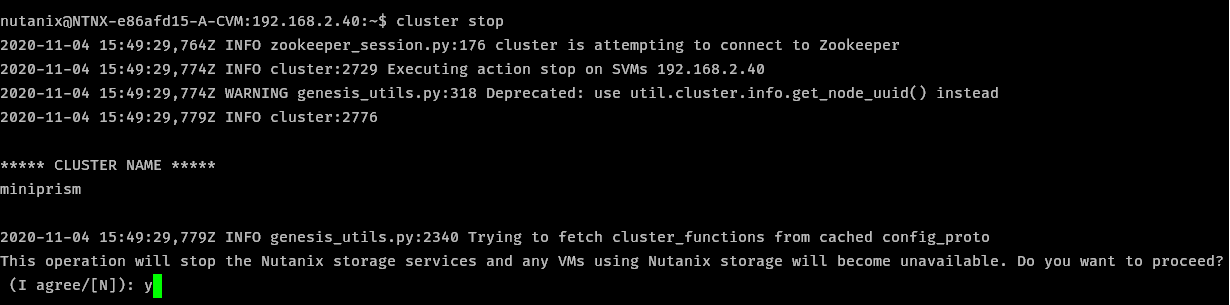
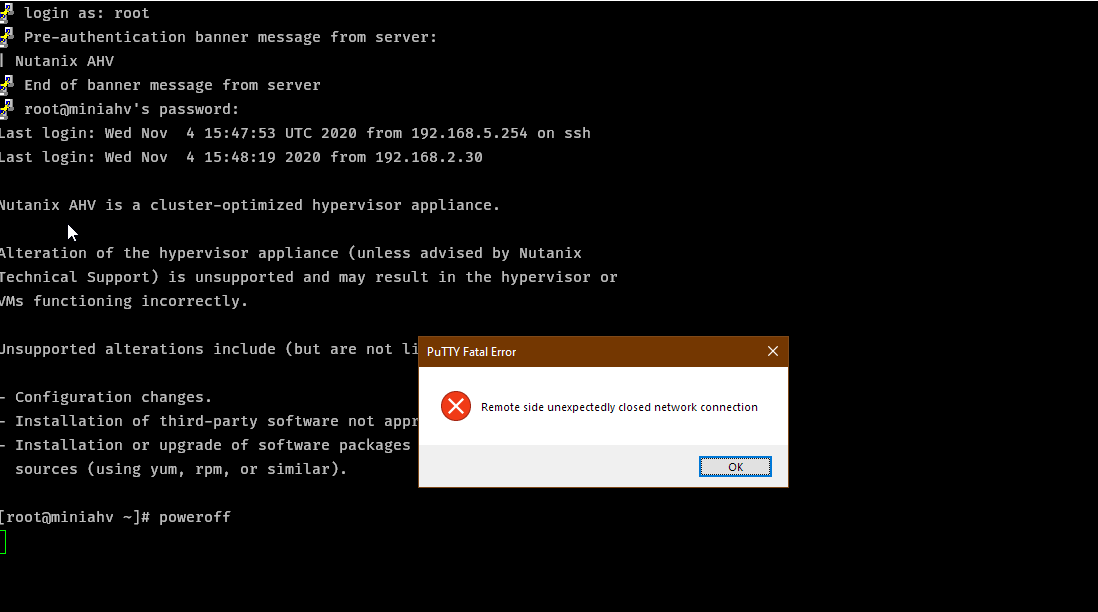
SSH to the CVM and Stop the cluster
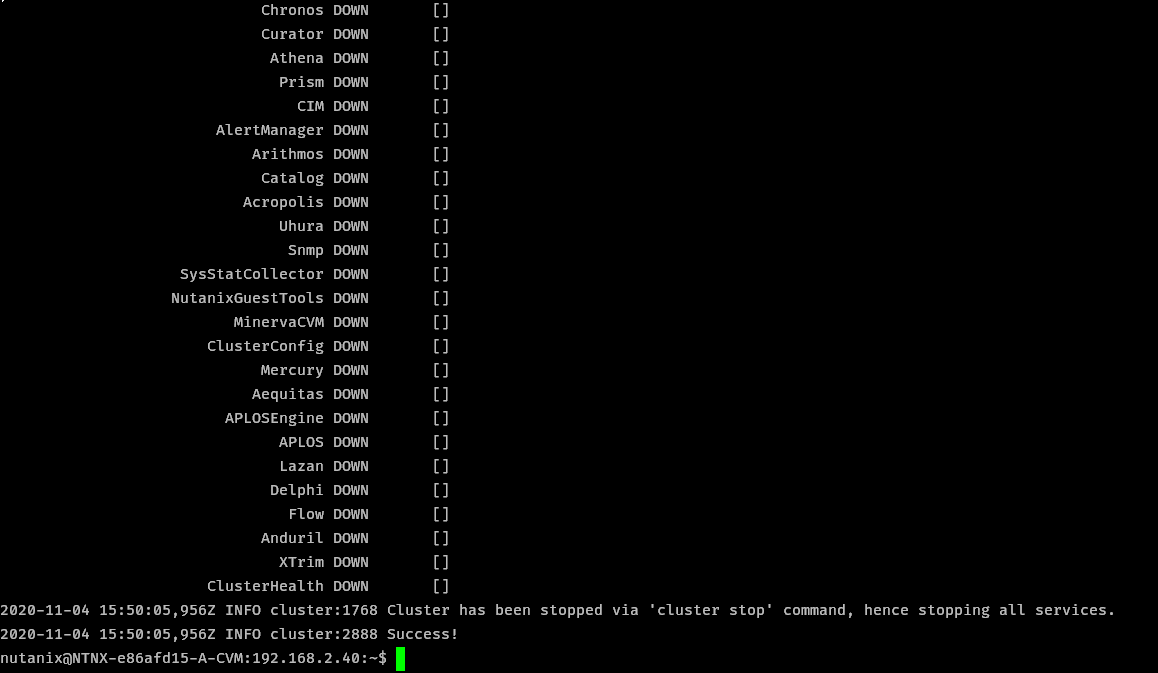
cluster stop
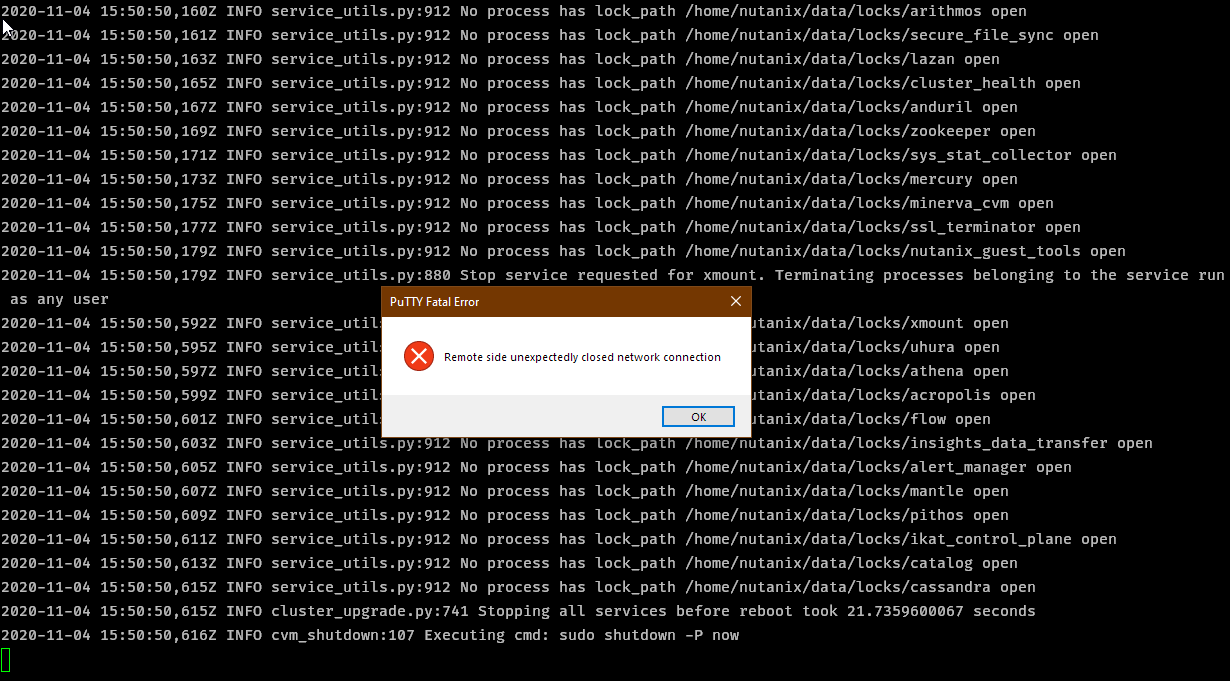
Shut down the CVM
cvm_shutdown -P now
On the AHV Host
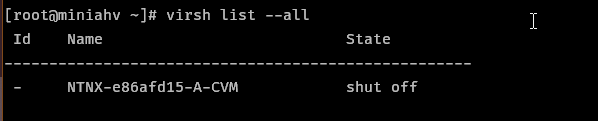
SSH to the AHV Host and Shut down. Check that the CVM is not running first.
virsh list --all

poweroff
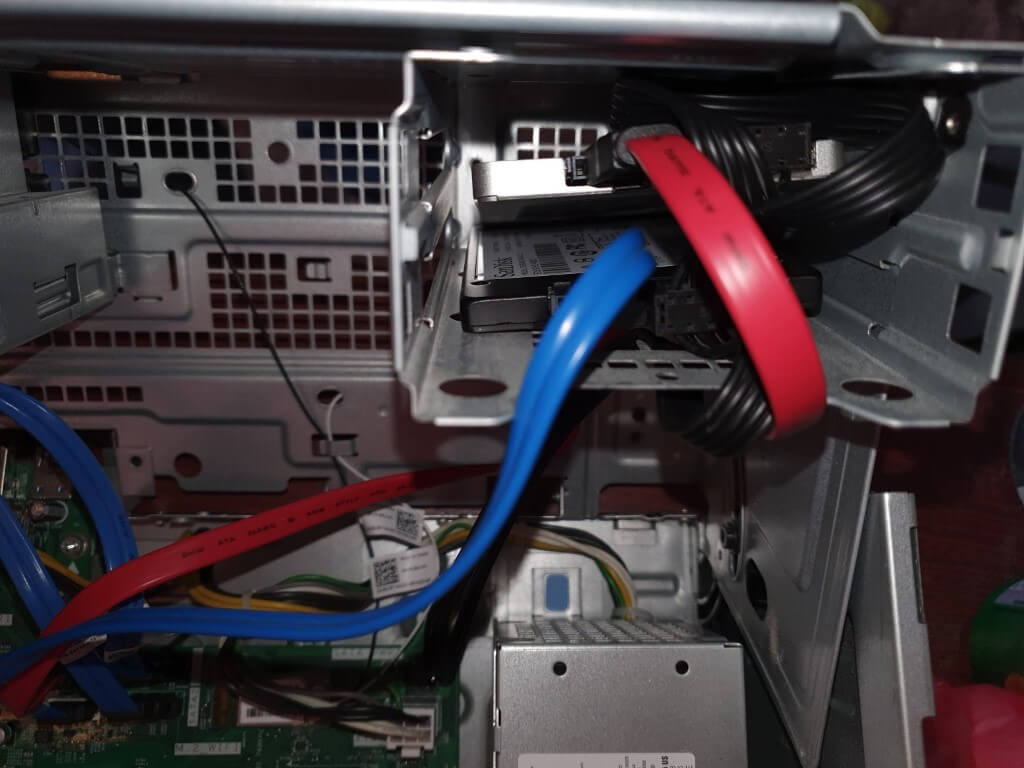
Open up your “server” and add your disk. Bonus points for professional cable management and mounting 😉
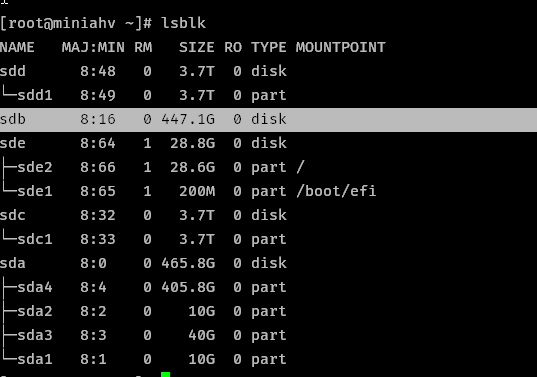
Power up your host and wait for it to come back up. Once you can SSH back in, run lsblk to identify the new disk. My disk has been cleaned using DISKPART and therefore it’s the one listed with no partitions. Note the sdX identifer for the new drive. In this case my drive is sdb.
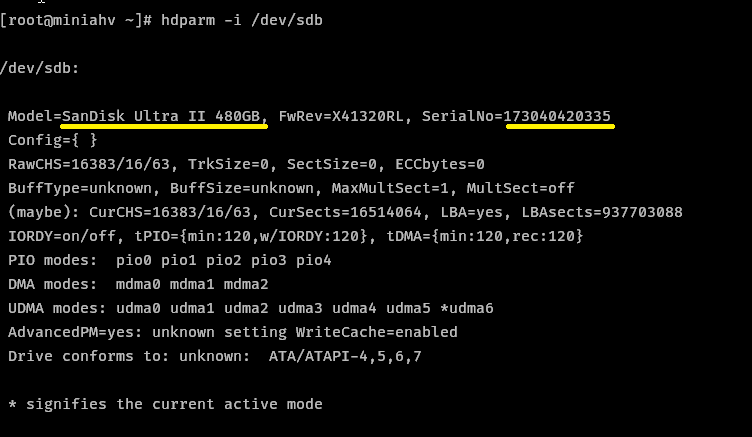
Run hdparm /dev/sdX and note the Model and SerialNo of the device
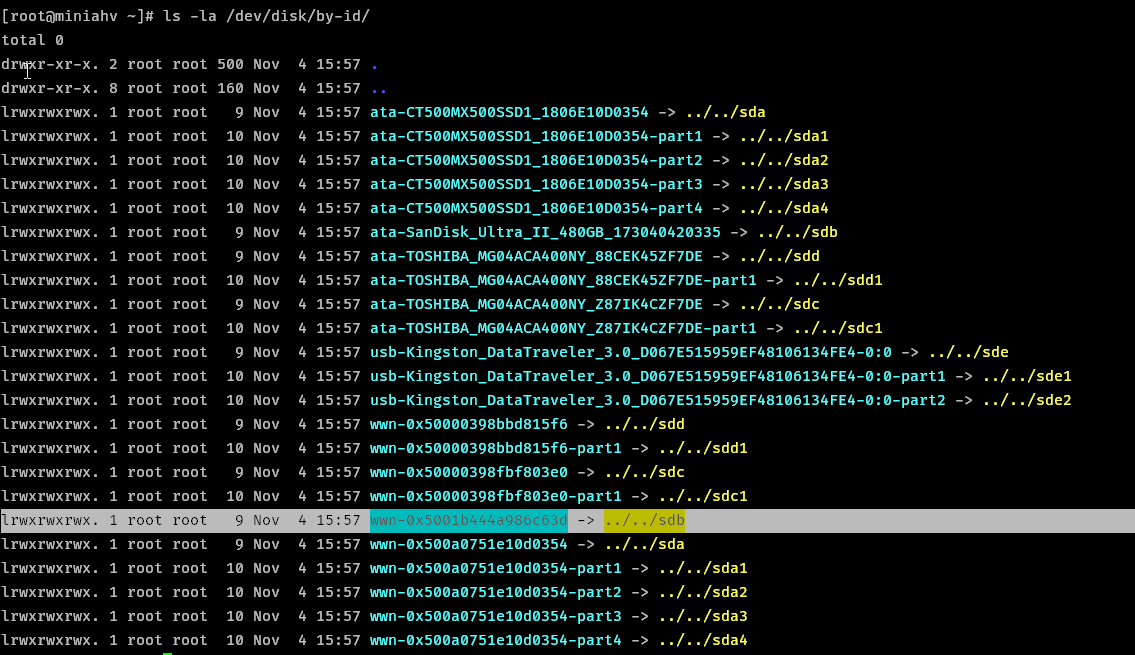
Run ls -la /dev/disk/by-id and note the filename that points to your /dev/sdX
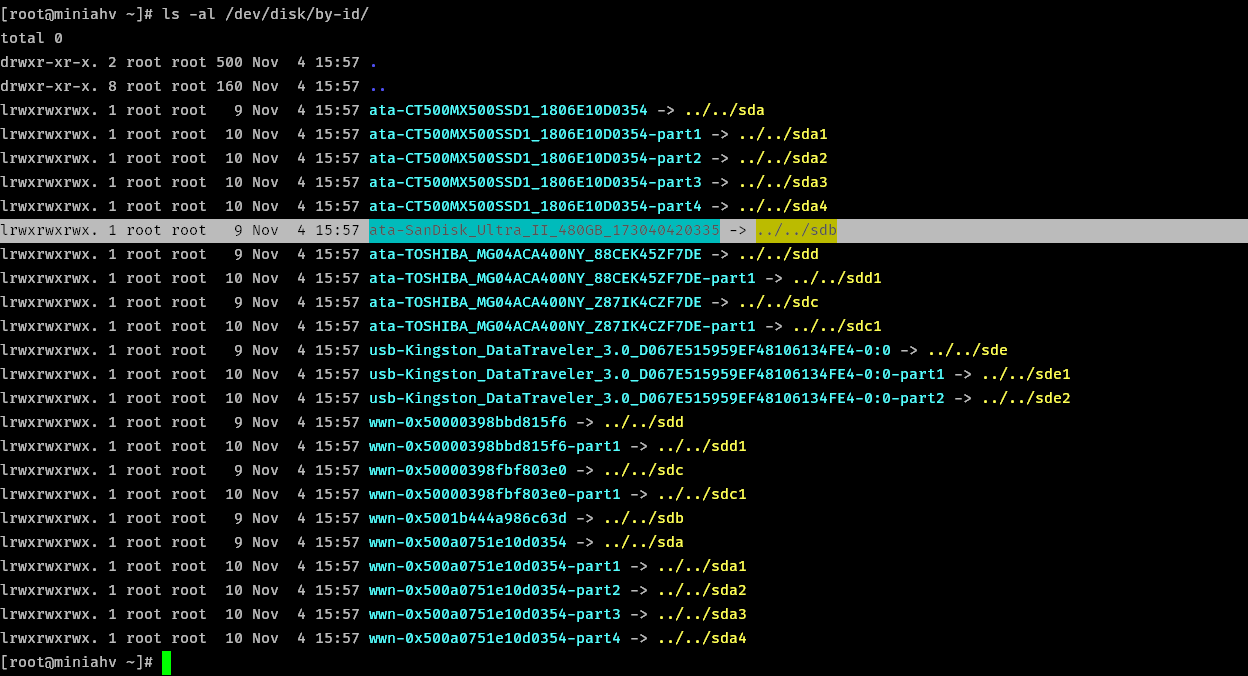
Also note the wwn-0x5XXXXXXXX number that points to your /dev/sdX
Now you have all the information required to add the disk to the CVM config. Edit the CVM config by running virsh list --all to get the CVM name, then run virsh edit CVMNAME. You may need to shut down the CVM with virsh shutdown CVMNAME first if it’s not already off.

Add a new disk block to the XML config. I coped and pasted an existing block. Make sure to update the entries in the following list. The editor is vi so press i to enter INSERT mode.
source devis theata-DeviceNamepath from thels -lacommandtarget devis a unique device ID for the CVM, I went withsddas it was the next one available from all device blocks currently in this fileserialis theSerialNoof the device fromhdparmcommandwwnis the id afterwwn-0xin thels -lacommandproductis theModelfrom thehdparmcommand, however this disk model name caused the update of the CVM config to fail. It appears you need exactly 2 words, alphanumeric characters only so I modifed the model number appropriately.addressis a unique SCSI LUN for the CVM, I just incremented the unit by 1 from the previous disk block

Once you’ve made your edits, hit esc then wq, enter to save.

Back on the CVM
Start your CVM (virsh start CVMNAME) and SSH to it. If you had previously stopped the cluster then it should still be stopped. You can check with cluster status. Since this is a single node guide, I won’t restart the cluster just yet.
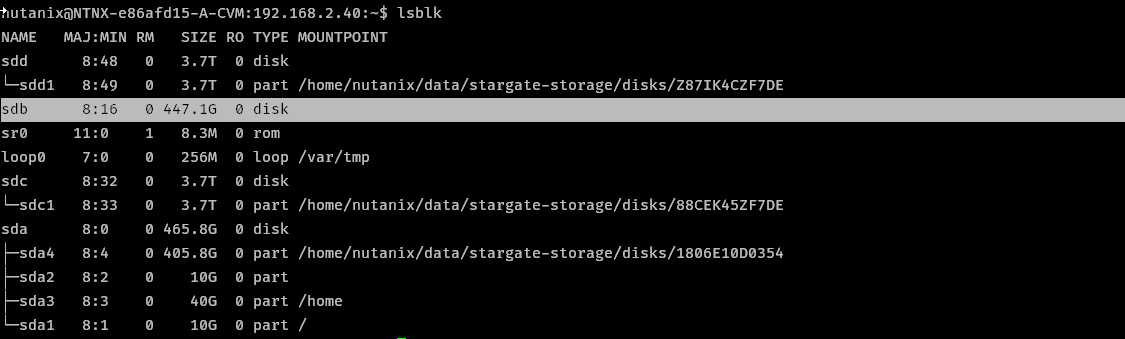
Run lsblk to see what sdX designation the new drive has been given inside the CVM. In my case the drive has no partitions and is not mounted.
To create a new partition on the drive run sudo cluster/bin/repartition_disks -d /dev/sdX

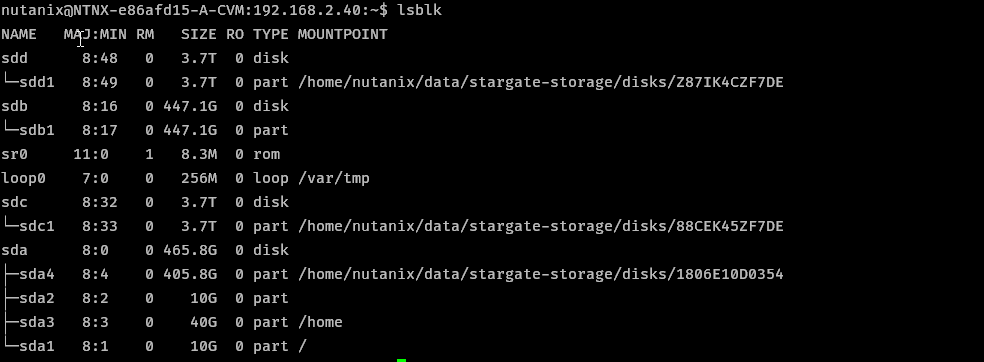
The disk now shows with a single partition
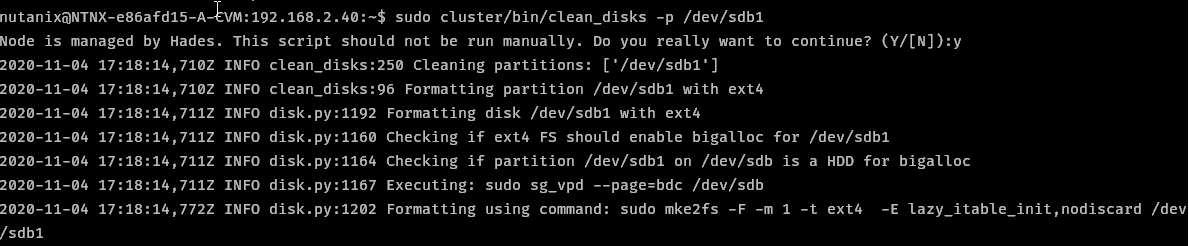
Format the disk with sudo cluster/bin/clean_disks -p /dev/sdX1 (get partition id from above command, mine is sdb1)
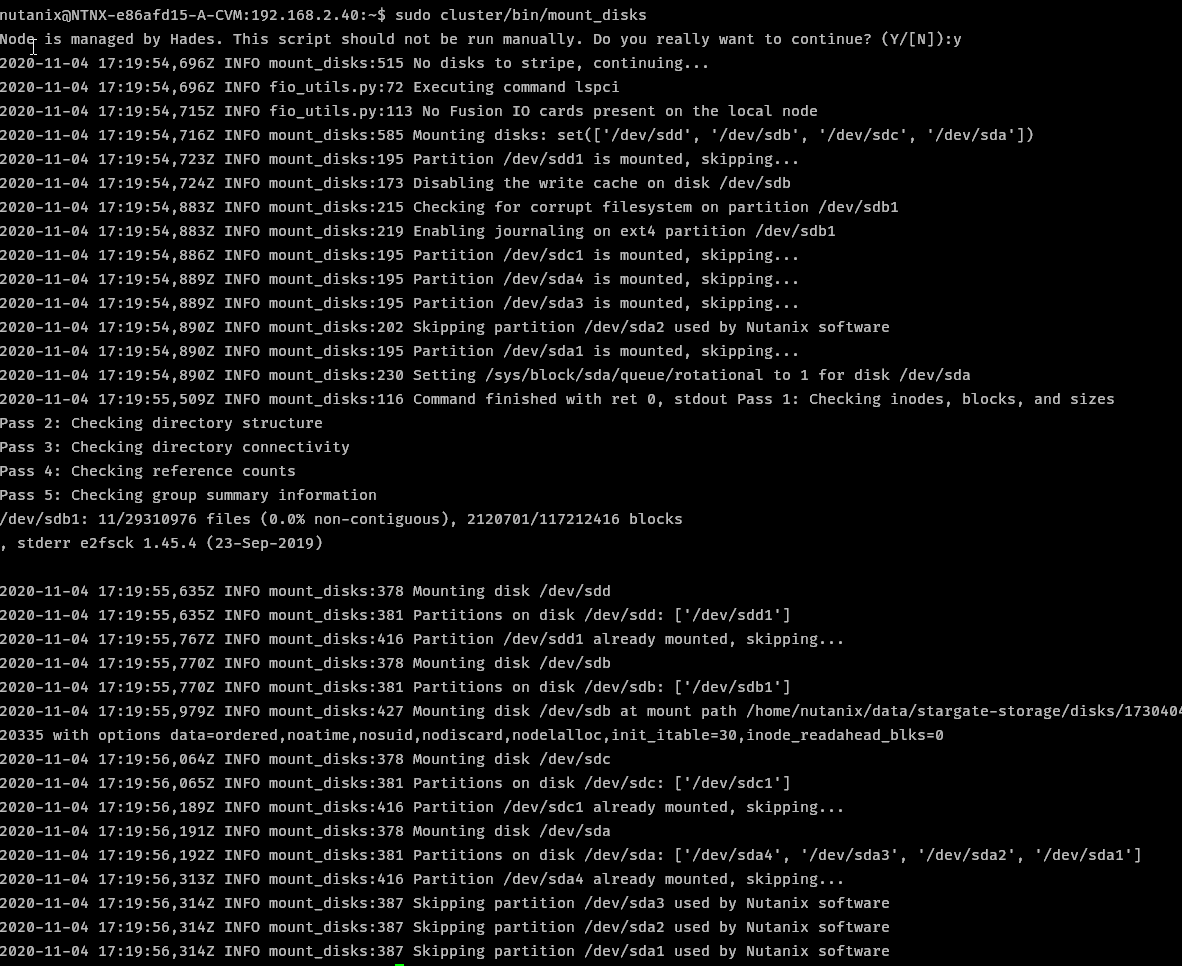
Mount the new partition with sudo cluster/bin/mount_disks
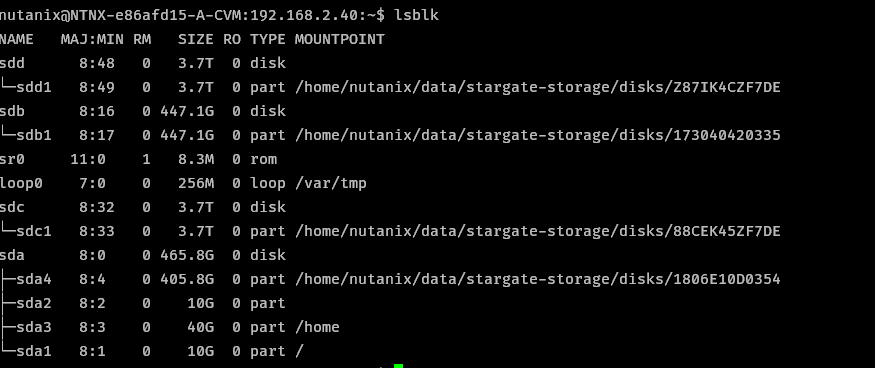
Verify the partition is mounted with lsblk
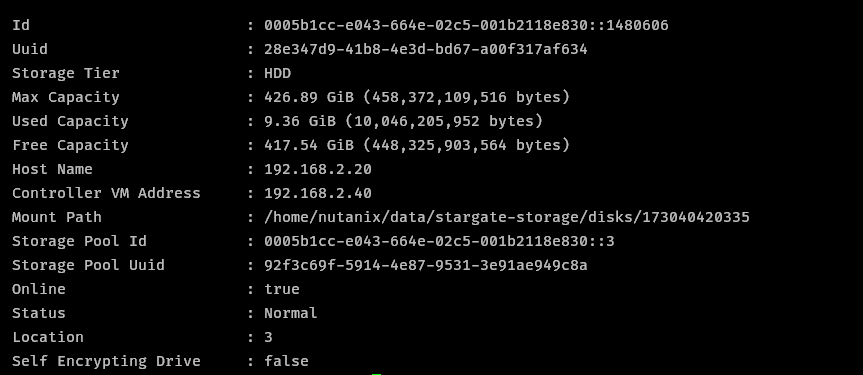
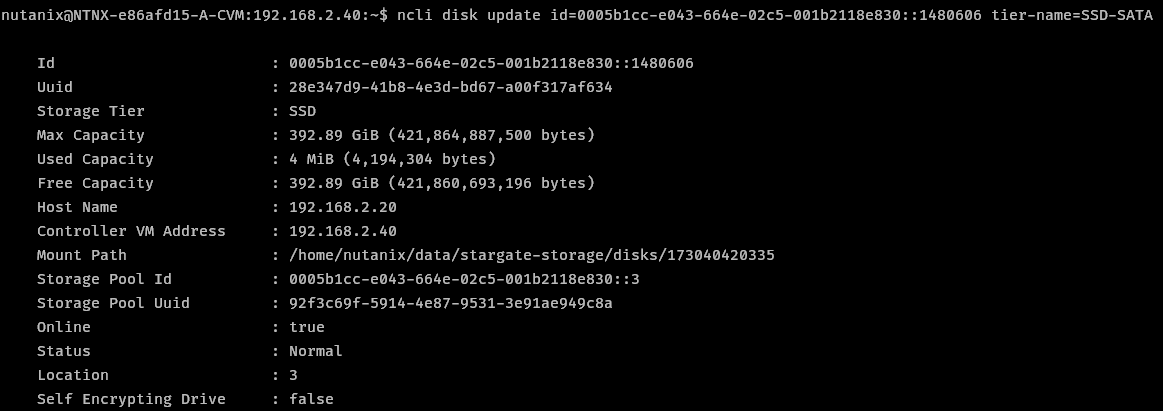
Restart the cluster with cluster start. Once the cluster is up, verify the disk is visible using ncli disk ls. If the disk is an SSD, then note the disk id number. In my example it is 0005b1cc-e043-664e-02c5-001b2118e830::1480606.
If the disk is not showing in ncli disk ls then you many need to stop and restart the cluster again. In my case, I waited around 10 minutes with no disk showing up. But after a cluster stop / start the disk was immediately visible.*
* It’s possible I ran the mount command while the cluster was running which is what actually brought the disk online in ncli and PE. If I get chance I’ll test this more thoroughly.
If this is a hard disk then skip this step. If you added an SSD you need to update the disk type with the following ncli command
ncli disk update id=0005b1cc-e043-664e-02c5-001b2118e830::1480606 tier-name=SSD-SATA
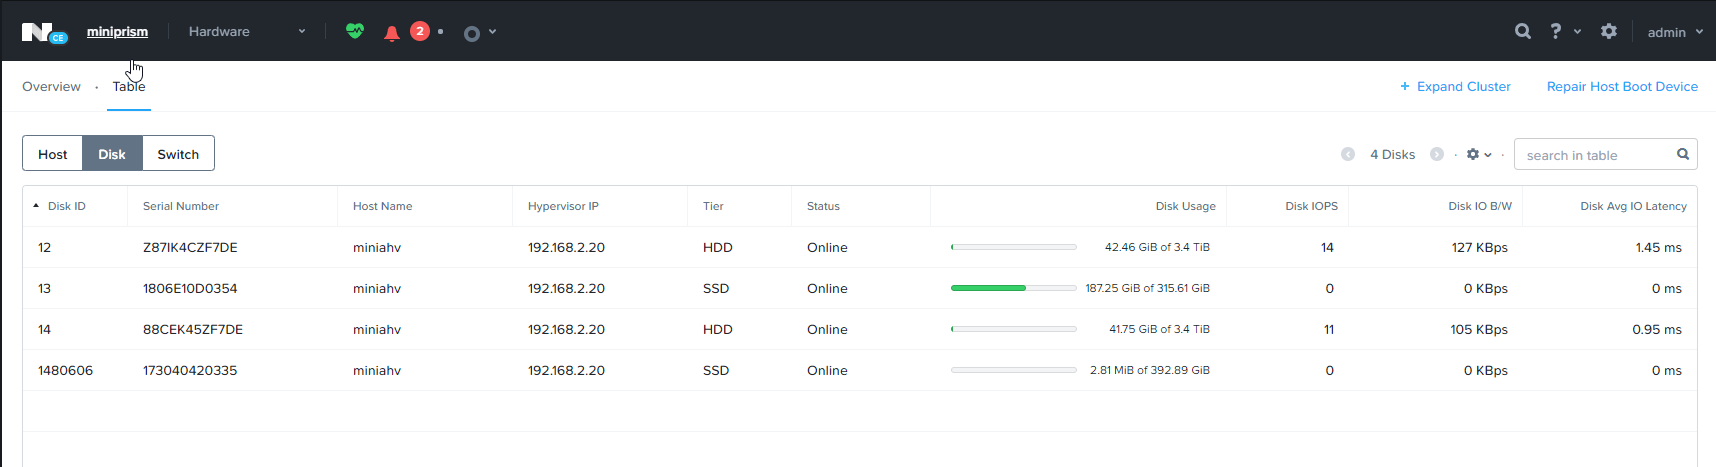
Once the disk is showing and in the correct tier, you should shortly be able to see the disk in Prism Elements. Check in Hardware > Table > Disk section
Sources
Written with StackEdit.
So I ran through your guide using it with a 3 node cluster.
ReplyDeleteFirst, thank you for the documentation lmao you saved my life.
Secondly,
when adding the disks there is no need to actually stop the cluster.
I ran "genesis restart" and waited then was able to see the disk after waiting about 6mins or so.
After that I ran the disk update command with the correct values and boom disk in my cluster with no stop or start of the cluster needed.
I hope this helps anyone doing this guide as well. Been using nutanix for over a year already and love it.
Thanks,
Austin
Hey, that's great and thanks for the tip!
DeleteThe current version of CE is wanting "hdparm -I" (capital I) as the new syntax. This was super-helpful. Thanks.
ReplyDeleteIf you are getting an XML error as "error: XML document failed to validate against schema: Unable to validate doc against..." , check the size of the Product string. It can't be bigger than 16 chars. I found it on my WD 2TB SDD as it has been identified as "Model Number: WDC WDS200T2B0A-00SM50" by hdparm.
ReplyDelete