Removing Certificate warnings for RDP
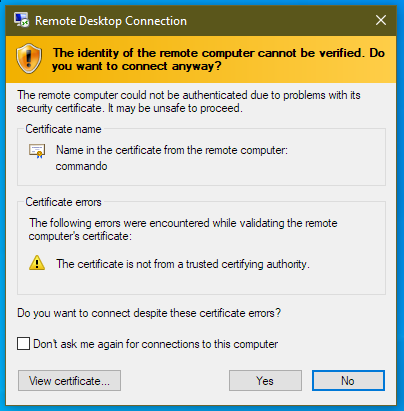
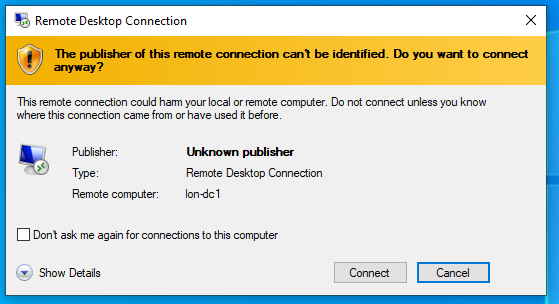
Certificate warnings on connection to an RDS server are not uncommon and are in fact normal when connecting to a non domain joined PC. They can be annoying, look unprofessional and can cause concern when users are required to connect.
Defaults & Self signed certificates
By default a non-domain joined PC will present a self-signed certificate when connecting. Since this isn’t trusted by the connecting client then a warning will be displayed.
When connected via RDP to a machine with a non trusted certificate, no security icon is shown in the connection bar.

While it’s possible to generate another self signed certificate with the DNS names you require, the certificate needs to be trusted by all client machines that connect otherwise the warning is displayed. Managing client’s trusted certificates is complex and not possible if you do not control the clients. In fact, it’s probably easier to just tick the ‘Don’t ask me again for connections to this computer’ box than it is to deploy a certificate to each client.
Ticking this box caches the certificate’s thumbprint in the REG_BINARY registry value, CertHash. The location in the registry is as follows:
HKEY_CURRENT_USER\SOFTWARE\Microsoft\Terminal Server Client\Servers\COMPUTERNAME
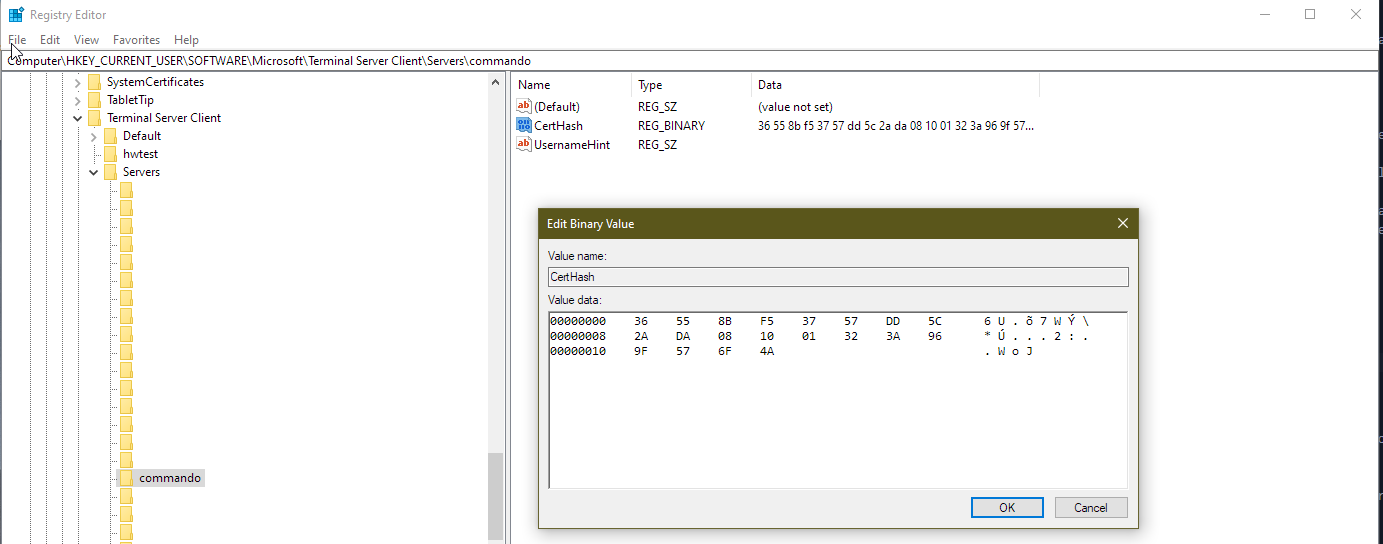
This is a per user setting so could be included in a login script for example. Here is some example PowerShell to set the value in the registry:
$thumbprint = "36558bf53757dd5c2ada081001323a969f576f4a"
$ComputerName = "commando"

$regPath = "HKCU:\SOFTWARE\Microsoft\Terminal Server Client\Servers\$($ComputerName)"
$thumbprintBinary = [byte[]] -split ($thumbprint -replace '..', '0x$& ')
New-ItemProperty -Path $regPath -Name CertHash -PropertyType Binary -Value $thumbprintBinary
Unfortunately, both methods of using self-signed certificates are cumbersome to manage.
Kerberos & Service Principal Names (SPNs)
By default you won’t get a certificate warning from a domain joined machine if connecting to it using it’s host name or fully qualified domain name (FQDN) since it will have an SPN registered for TERMSVC/hostname and TERMSVC/fqdn.
If you have a domain joined machine that you want to RDP to using an alternative name, you can use an SPN to allow Kerberos authentication to work. This only works for a single RDP endpoint since SPNs must be unique in the forest.
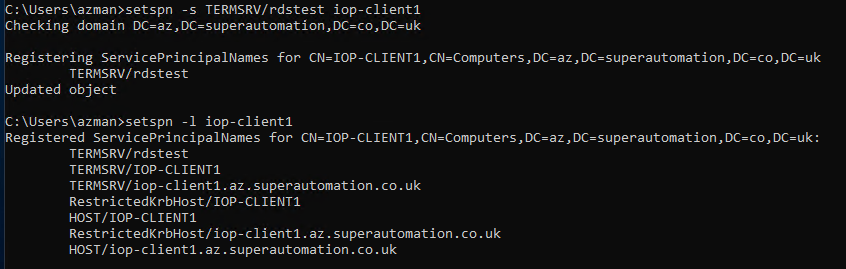
To create a new SPN, use the setspn utility
Show current SPNs
setspn -l computername

Set a new SPN
setspn -s TERMSRV/aliasname computername
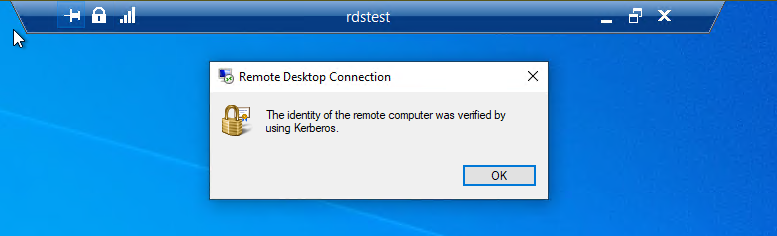
Once a new SPN is added, connecting to the machine with the aliasname will show the connection is verified with Kerberos.
Public Certificate Authority (CA) Signed certificate
It’s possible to use a wildcard, public CA signed certificate to secure an RDP connection. If you have a CA cert that provides the DNS name you need for connection then it’s possible to use this on all of the RDS servers behind a simple load balancer. To do this you must import the certificate in Windows. In my example I’m using a let’s encrypt wildcard certificate, the only requirement I can see is that it must have a greater than 2048 bit private key and include the “Server Authentication” Enhanced Key Usage.
Create a pfx bundle of your certificate on a machine with openssl installed. The following command includes the CA chain in the pfx.
openssl pkcs12 -export -out certificate.pfx -inkey privkey.pem -in cert.pem -certfile chain.pem
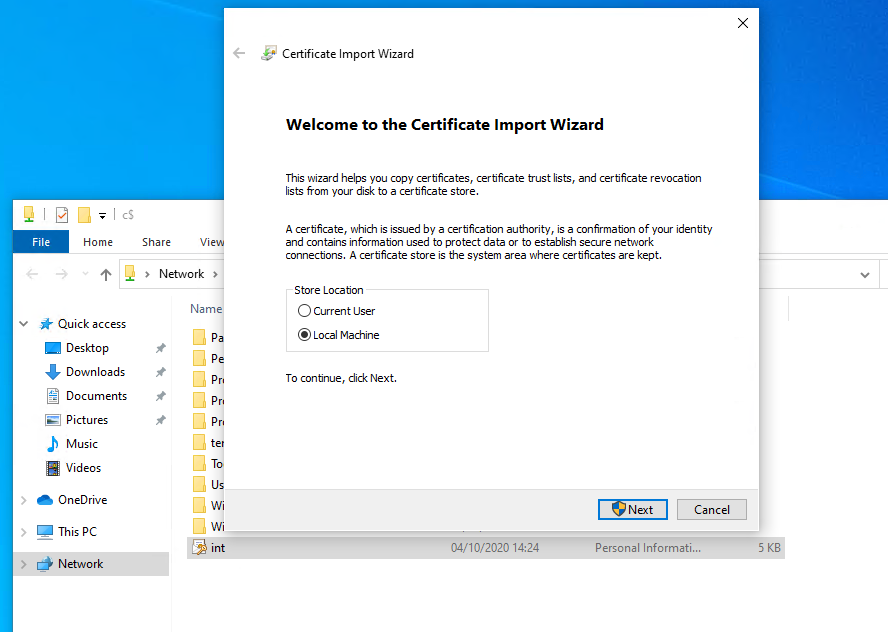
Once you have a pfx file you can import it in Windows. I imported to the default location, which is the local computer’s “personal” store. Right click on the pfx file and click import.
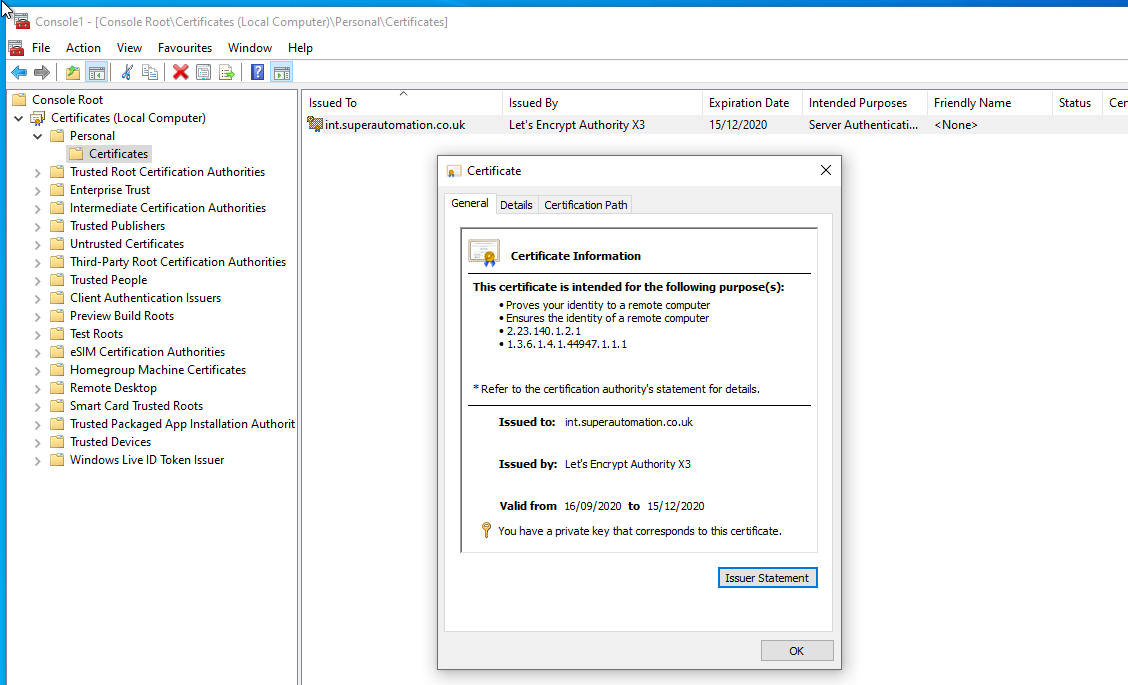
Note that there is a private key available for the imported certificate
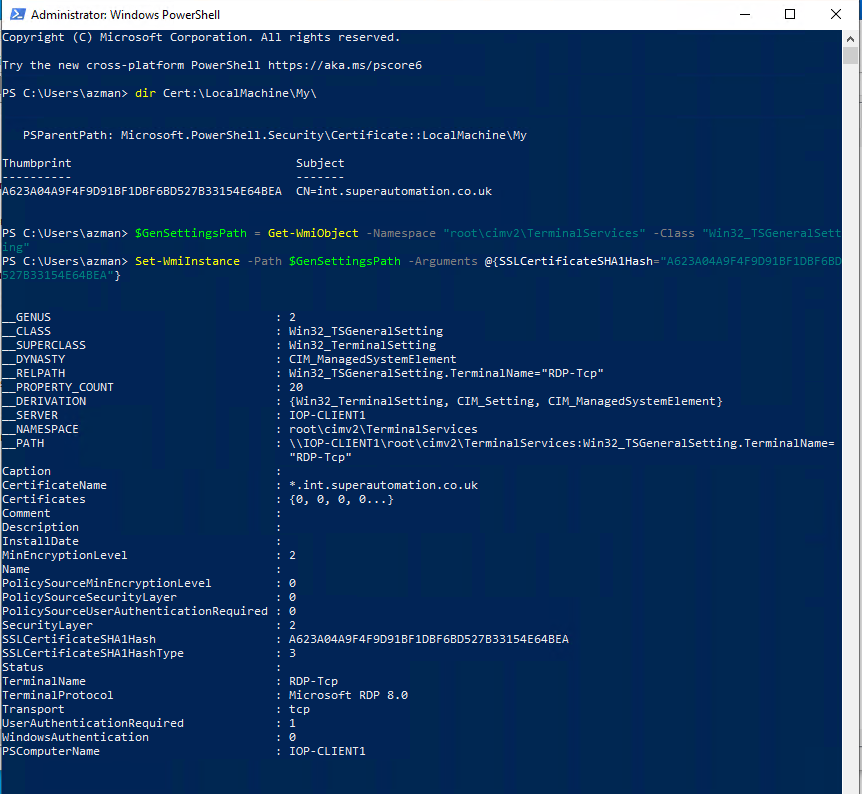
Once imported, set the RDS certificate using PowerShell and WMI. WARNING: It’s worth mentioning that restarting the TermService service will kill current RDP connections so make sure to do this from the console of the machine. If the TermService service doesn’t find a valid certificate you could be locked out if you only have RDP access to the machine.
$GenSettingsPath = Get-WmiObject -Namespace "root\cimv2\TerminalServices" -Class "Win32_TSGeneralSetting"
Set-WmiInstance -Path $GenSettingsPath -Arguments @{SSLCertificateSHA1Hash="THUMBPRINT"}

Restart-Service TermService -Force
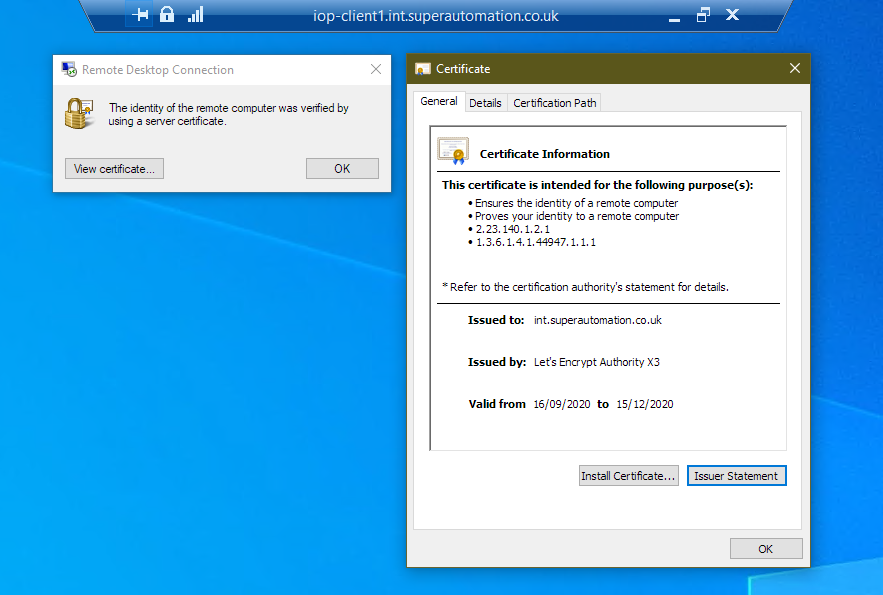
Once connected, the connection is shown to be verified by a server certificate
Certificate from an Enterprise Active Directory (AD) CA
You can also secure an RDP connection to a single or group of machines using a digital certificate from your Enterprise, AD Certificate Authority. This is beneficial if you have a group of RDS servers behind a simple load balancer.
SECURITY WARNING: To generate a certificate from the Enterprise CA, we need to create a certificate template and publish in AD. Since we need arbitrary subject alternative names enabled in the template this is a dangerous template to create and leave enabled. For this example, I will create the template, publish it, request a certificate and then disable the template so it cannot be used automatically. This template could allow any domain computer to create a certificate for any name and therefore compromise the entire security of the CA. It would be best to secure the template so it requires CA manager approval before the certificate is issued. The following code snippets would need to be modified to handle a pending request.
Template creation steps
- On your enterprise CA, open the Certification Authority application
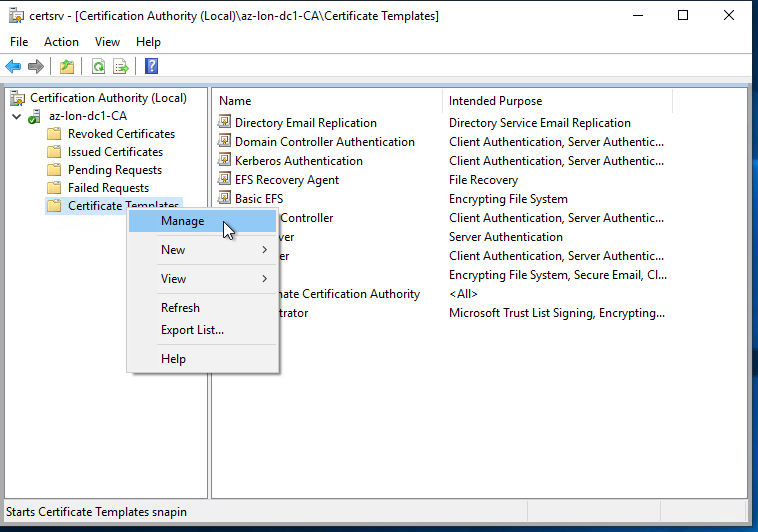
- Right click on Certificate Templates and click Manage
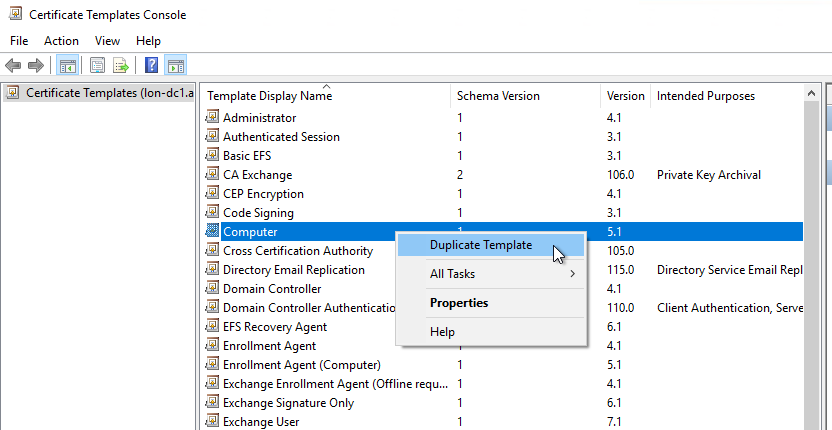
- The Certificate Templates Console opens, right click Computer and click Duplicate Template
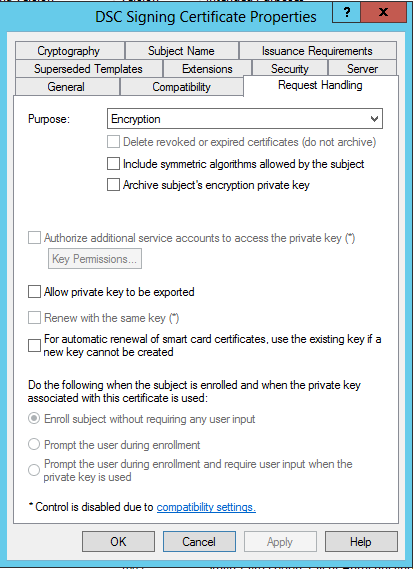
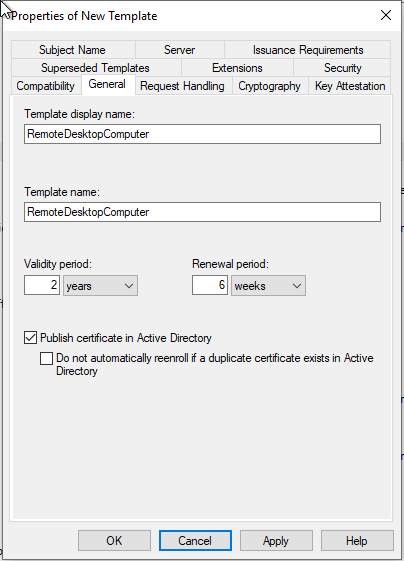
- On the General tab, give the template an appropriate name, in this example I am using “RemoteDesktopComputer”
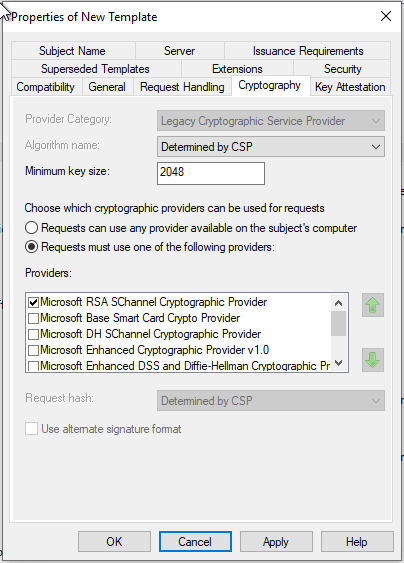
- Check the minimum key size is 2048-bits on the Cryptography tab
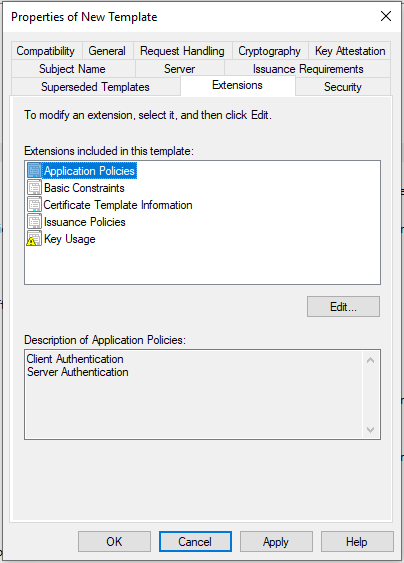
- Check that Server Authentication is enabled in the Application Polices section of the Extensions tab
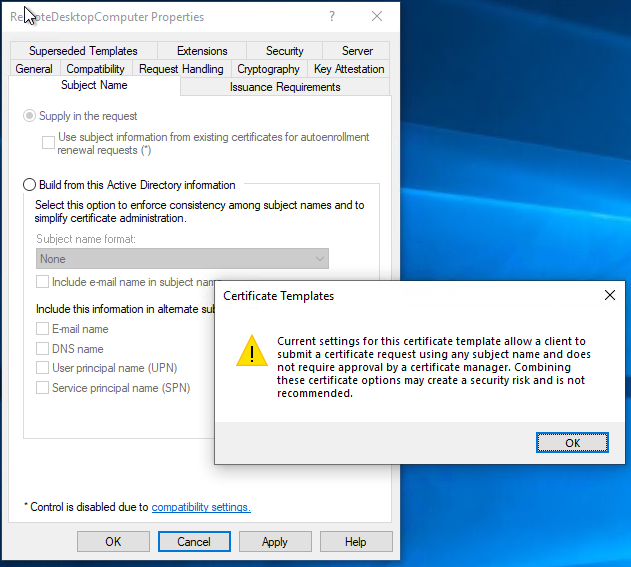
- On the Subject Name tab, choose supply in the request. Note the security warning In a production environment, the “CA Certificate manager approval” option should be selected to ensure that certificates from this template are validated before issuance.
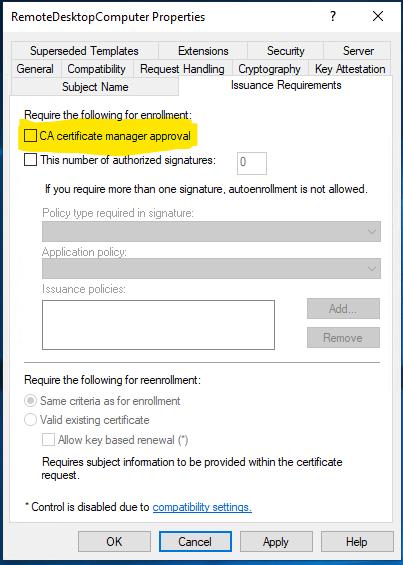
- Review the Issuance Requirements tab, for this example the “CA Certificate manager approval” is unchecked, Do not do this in a production environment
- Click OK to save the template, close the Certificate Templates Console window
- In the Certification Authority window, Right click on Certificate Templates and click “Certificate Template to issue”
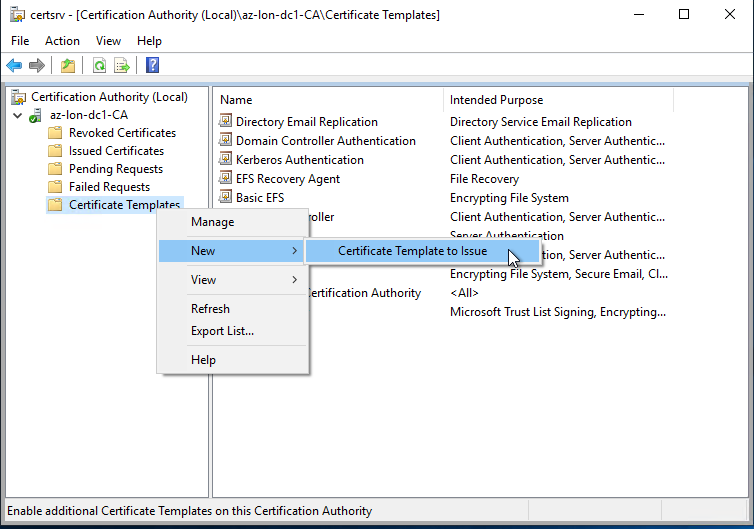
- Select the new template
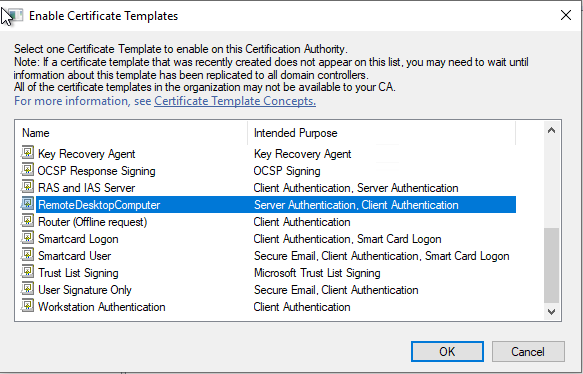
Once you have a template created and published, the following PowerShell will request and issue a new certificate on the RDP server.
$CN = "CN=COMPUTER"
$dnsNames = @("COMPUTER", "computer.example.com", "loadbalancer.example.com")

$Cert = Get-Certificate -Template "RemoteDesktopComputer" `
	-SubjectName $CN -DnsName $dnsNames `
	-CertStoreLocation "cert:\LocalMachine\My" -Url ldap:

$Cert
At this point, check that the certificate in the computer certificates mmc is as expected and contains the correct DNS subject alternative names.
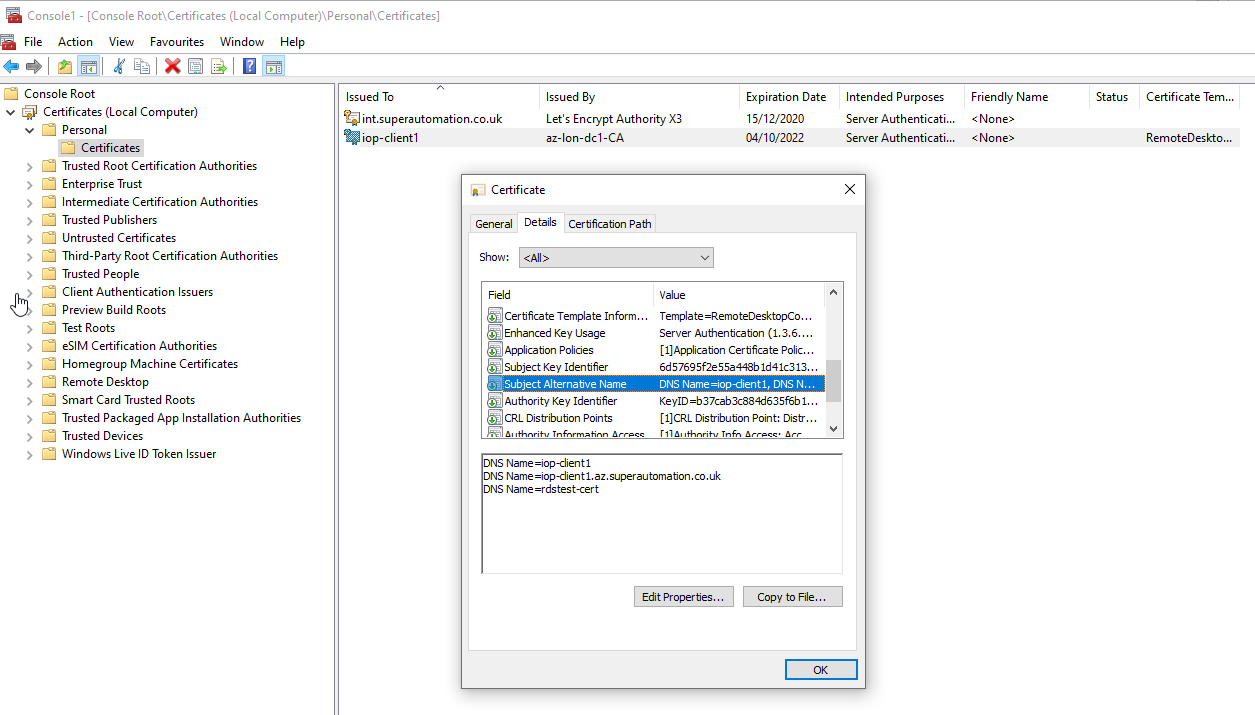
Once done, run the following in the same PowerShell session to apply the certificate. WARNING: It’s worth mentioning that restarting the TermService service will kill current RDP connections so make sure to do this from the console of the machine in case the certificate is invalid. If the TermService service doesn’t find a valid certificate you could be locked out if you only have RDP access to the machine.
if ($cert) {
	$GenSettingsPath = Get-WmiObject -Namespace "root\cimv2\TerminalServices" -Class "Win32_TSGeneralSetting"
	Set-WmiInstance -Path $GenSettingsPath -Arguments @{SSLCertificateSHA1Hash="$($Cert.Certificate.Thumbprint)"}

	Restart-Service TermService -Force
} else {
	Write-Host "Error generating certificate"
}
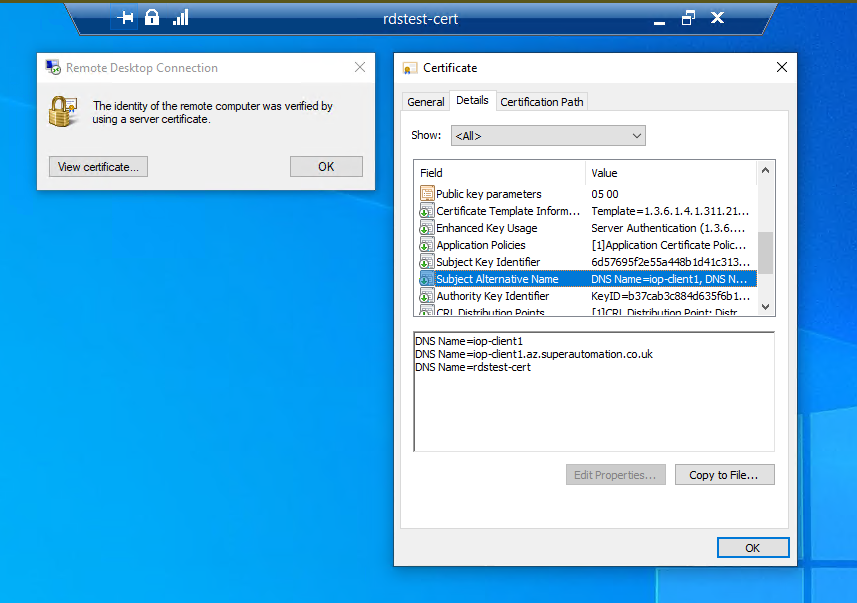
Once connected, the connection is shown to be verified by a server certificate
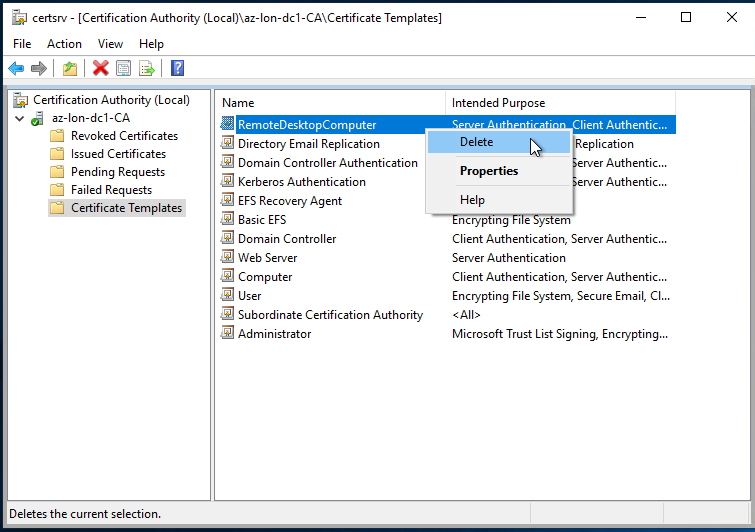
IMPORTANT At this point, delete the published certificate template or secure it in another way
Written with StackEdit.