Sunday, 25 October 2020

Convert UEFI to BIOS

UEFI to BIOS.md

Convert UEFI VM to BIOS MBR (Windows, Nutanix AHV)

What happens if you have a disk image configured for a UEFI machine, but you need to boot from BIOS? UEFI boot uses GPT disks, BIOS uses MBR. Microsoft’s guide to convert GPT to MBR requires the disk is empty, that doesn’t help if you need to boot the UEFI image on a BIOS machine…

In my case, my Nutanix home lab isn’t able to boot UEFI reliably and therefore I was unable to use all of my older VMware machines in this system. Nutanix does support UEFI booting, but in my case I believe my hardware is unable to support this.

There may be other reasons, such as migrating a newer machine to an older virtualisation platform, or even converting a physical disk from a newer machine to boot on an older machine.

There are several changes required to allow an image configured for UEFI boot to be able to boot from BIOS. BIOS requires MBR partitioned disks, while UEFI utilises GPT partitioning. UEFI accesses boot files in a dedicated boot partition, while BIOS uses a partition marked as “active” with the required boot files on this partition. BIOS also requires a “Master Boot Record” on the disk which is configured as the boot device.

The steps to switch from UEFI to BIOS are essentially:

  • Install a blank, new disk in the system
  • Initialise the new disk as MBR
  • Create a new, active partition
  • Clone the contents of the original GPT system partition to the new MBR disk partition
  • Write an MBR to the new disk
  • Add the required boot files
  • Update the windows BCD (Boot Configuration Data)

For more information on the Windows boot process, check this Wikipedia article.

The steps in this guide are all performed on a Nutanix AHV CE system, but most of the steps should work on other virtualisation platforms or on a physical machine with appropriate disks and a DVD-ROM or USB to boot the required tools.

IMPORTANT before attempting any of these steps make sure you have a known good backup of your original image in case of problems. The steps here could be destructive.


I’m starting here with a single GPT disk image that contains the boot partition for the machine. I have created a virtual machine in Nutanix, with a basic 2 CPU and 4 GB RAM configuration, but 1 CPU and 1 GB should be enough for the boot tools that are needed. Once the image is able to boot, then other data disks can be added as required.

If this is another hypervisor or a physical machine and the machine doesn’t boot or doesn’t detect the disk in Hiren’s Boot CD, investigate connecting the disks using an IDE adapter or changing the “IDE / AHCI” mode to IDE in the physical machine BIOS.

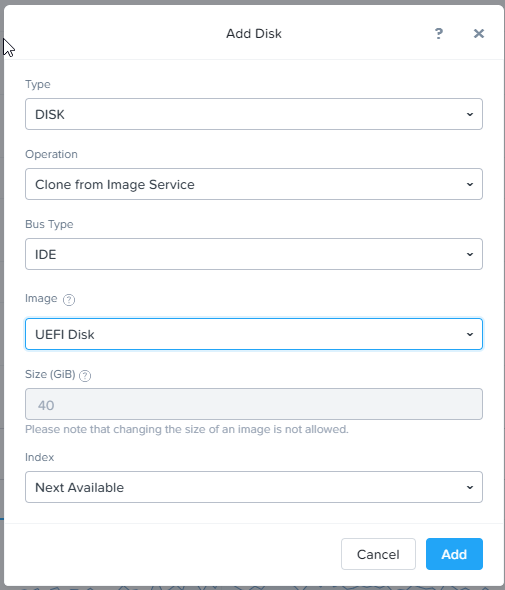
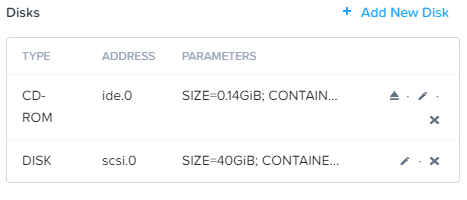
Start by adding the original disk to the machine on an IDE bus. I’m using IDE so that Hiren’s boot CD is able to see the disk without injecting drivers. Also because the original disk image does not have the virtual SCSI drivers installed. I will convert to SCSI later.

Adding the original disk

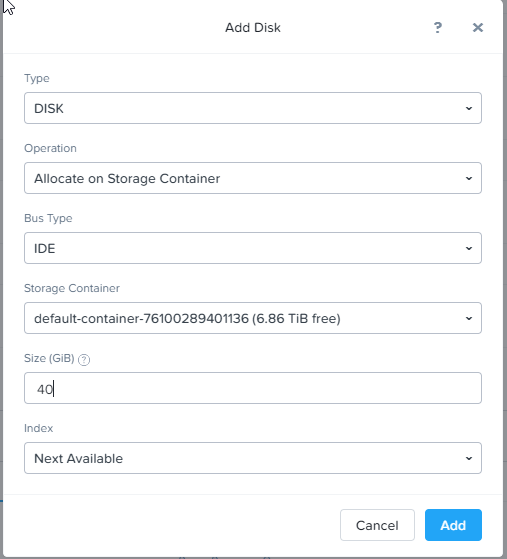
Add another fresh disk of the same size or greater than your primary boot partition as IDE

Adding the new disk

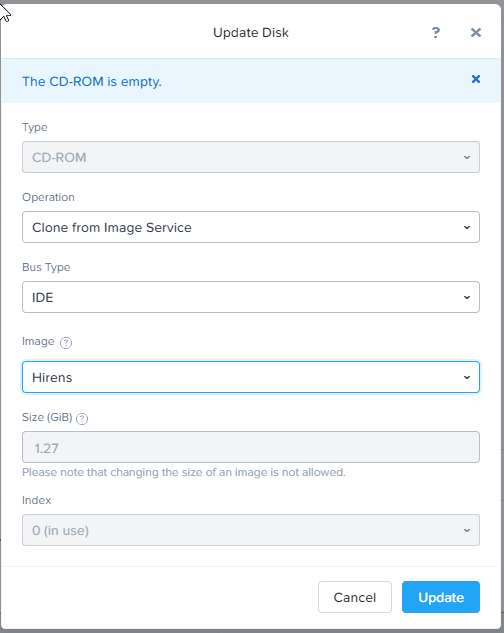
Add Hiren’s boot CD and boot the machine. If you are using a physical machine you could use Rufus to create a bootable USB.

Add Hiren's Boot CD

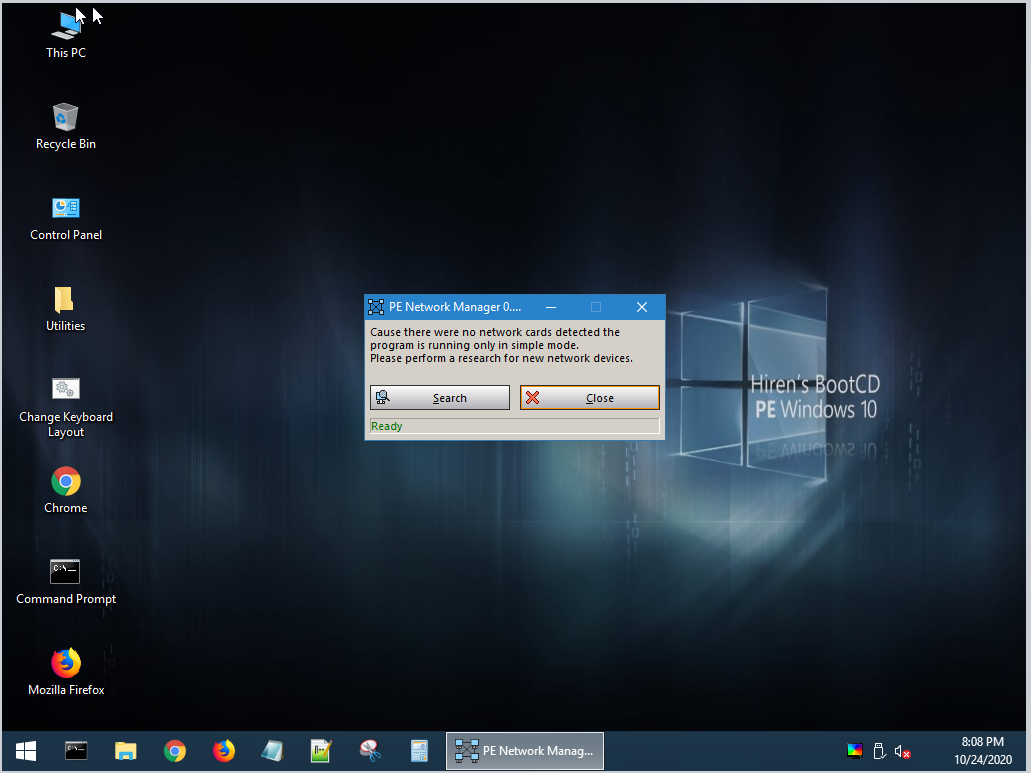
Hiren’s Boot CD desktop should appear

Hiren's booted

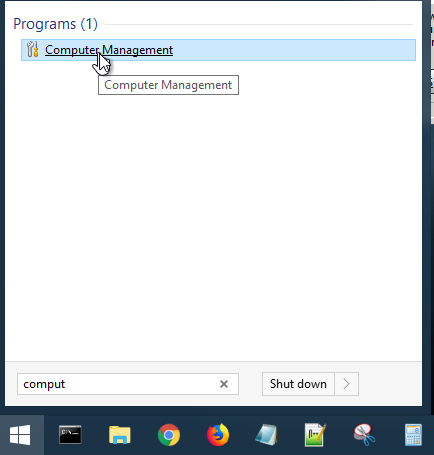
Launch Computer Management and click Disk Management

Start compmgmt.msc

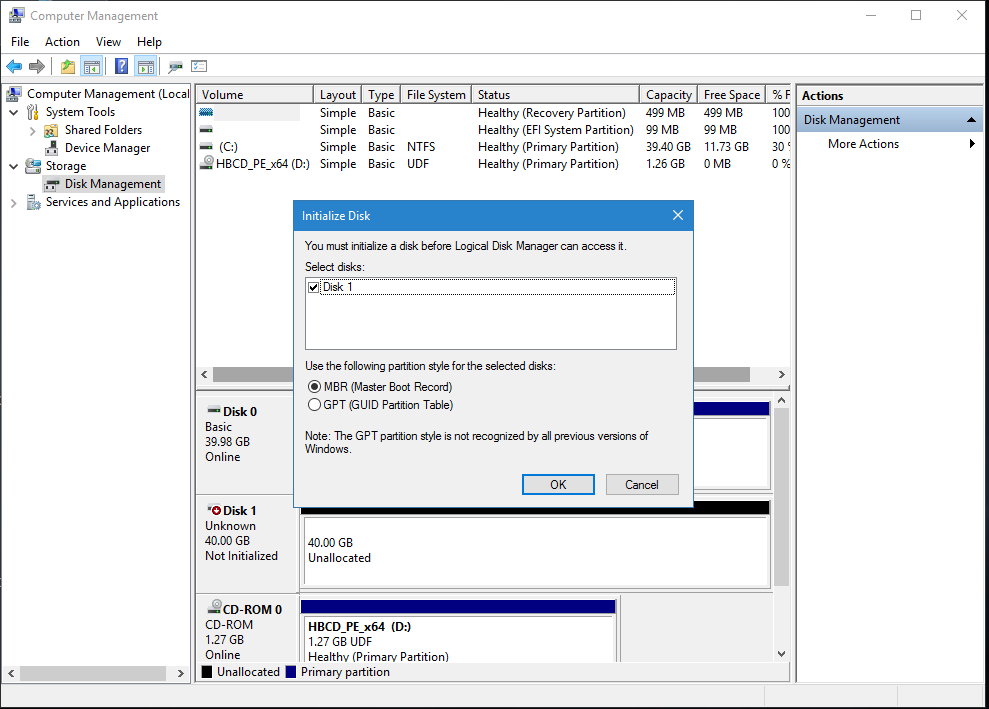
Initialise the new disk as MBR when asked

Initialise the disk

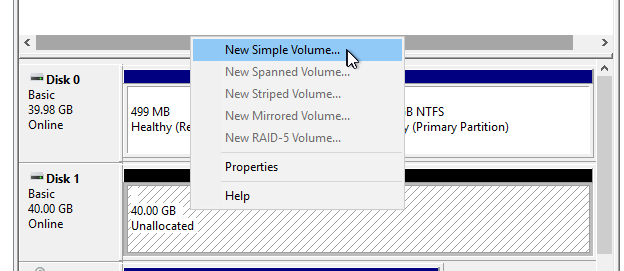
Create a new partition on the disk

Create partition

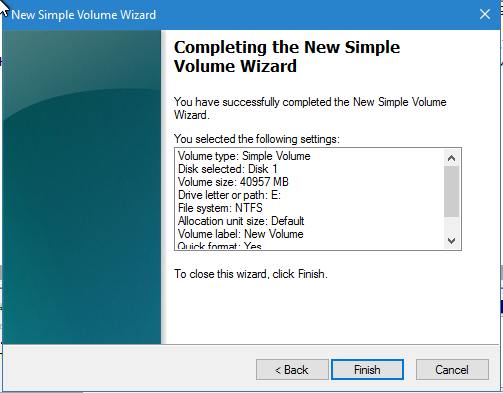
Accept all the defaults in the wizard and click Finish. Minimise the Computer Management console.

Create partition

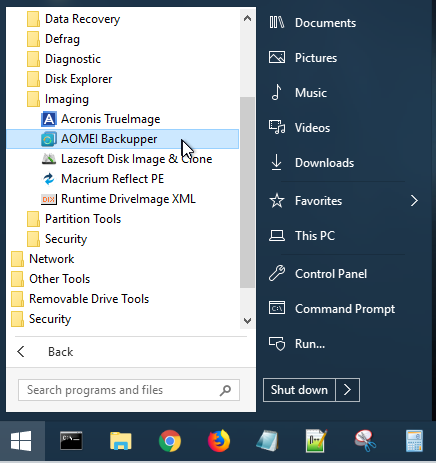
Launch AOMEI Backupper

Launch AOMEI Backupper

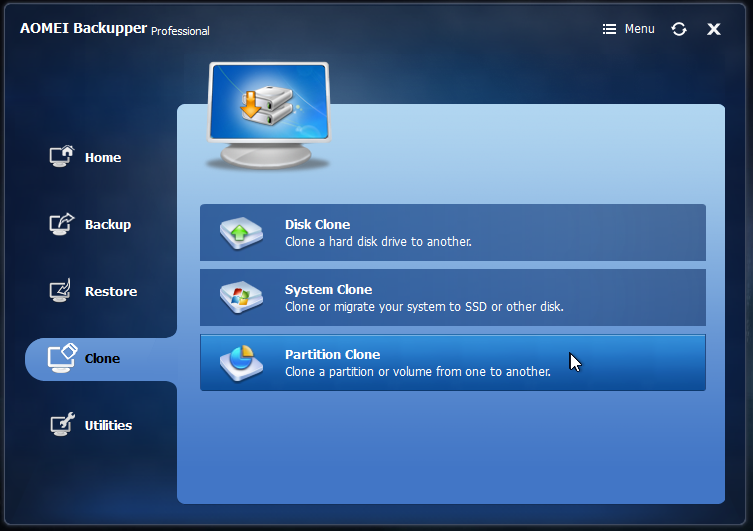
Select Clone, Partition Clone

Select Partition Clone Option

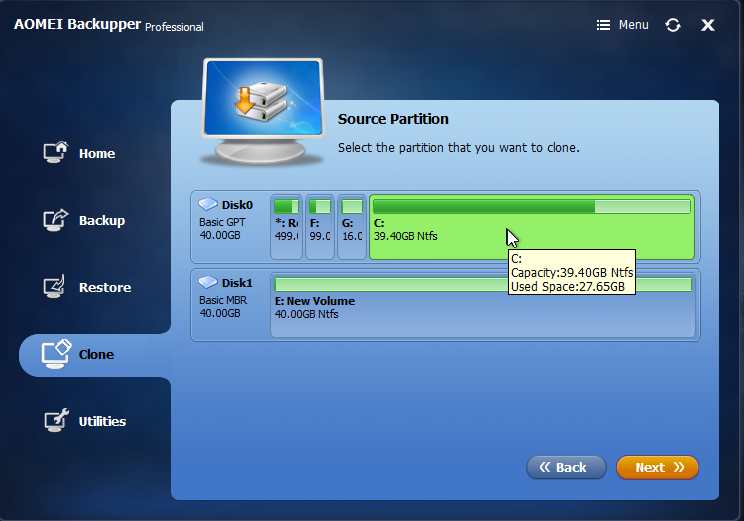
Select the your source partition from the GPT disk

Select Source

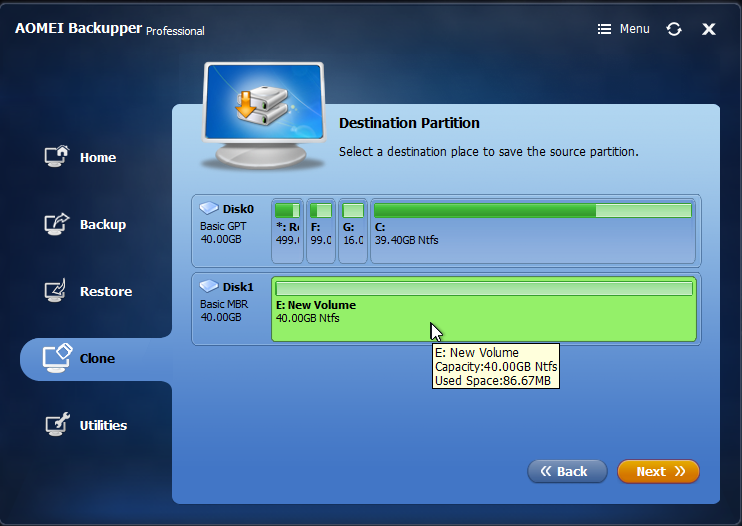
Select the new destination partition created earlier. It should be called “New Volume” if you accepted the defaults when creating. Click Next.

Select Destination

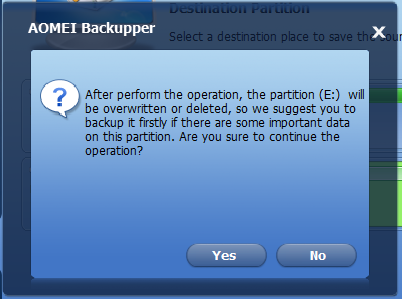
Accept the warning only if you’re sure you selected the correct source and destination partitions and only if you have a known good backup of the original image.

Accept Warning

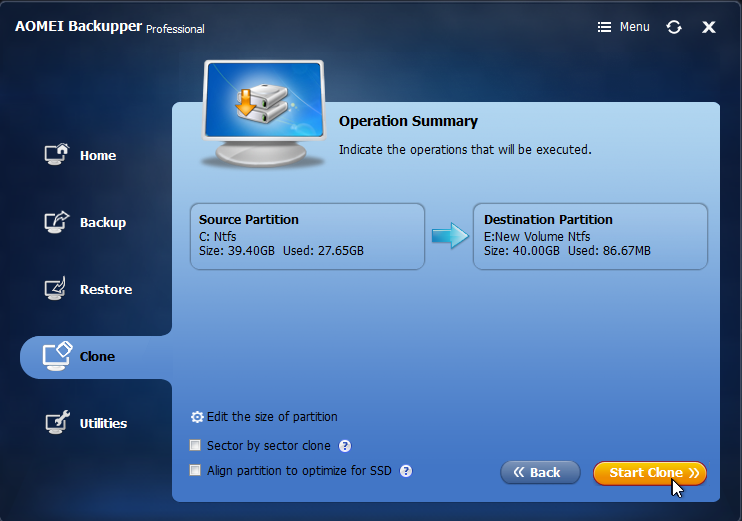
Click Start Clone.

Start Clone

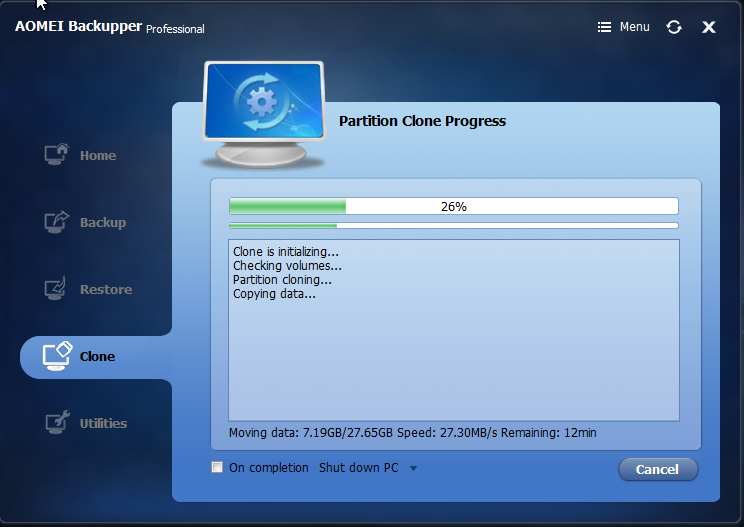
Allow the clone to complete

Clone Progress

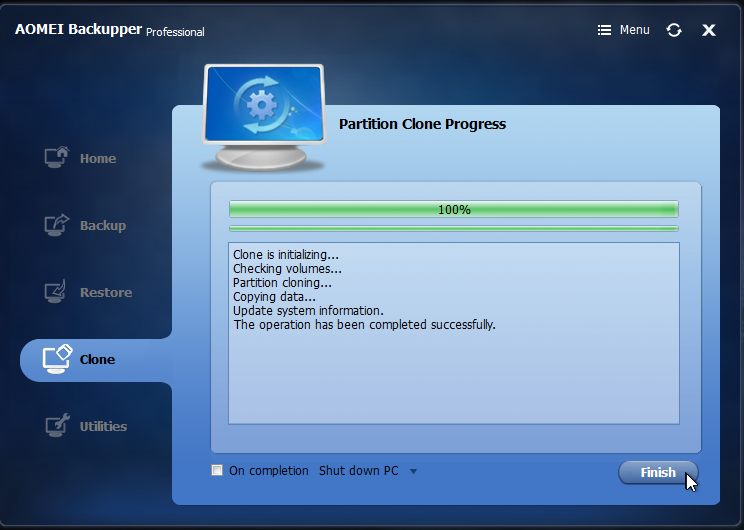
Once the clone is complete, Click Finish and close the Backupper application.

Clone Finished

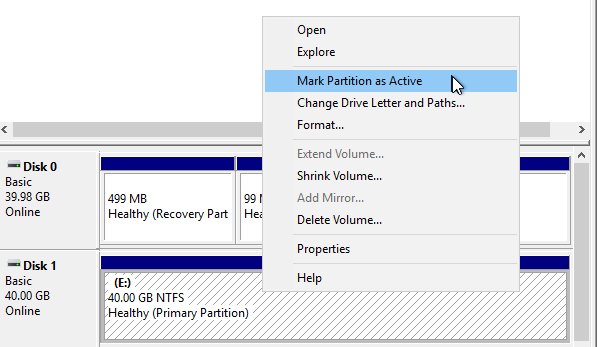
Re-open the Computer Management console and go to disk management. You may need to right click and click refresh to update the view. Right click on the new partition and click “Mark Partition as Active.”

Mark Partition Active

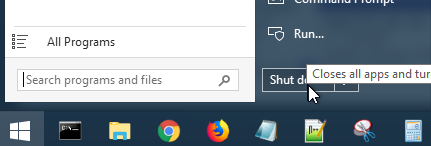
Power down the machine

Shutdown Menu

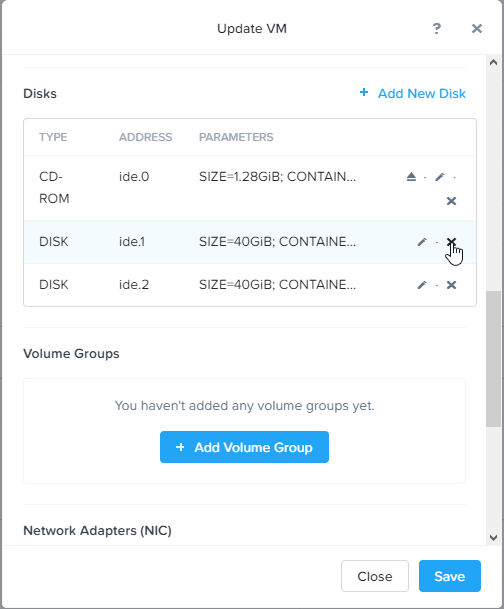
Remove the original disk, leaving only the MBR disk

Remove Original Disk

Remove Original Disk

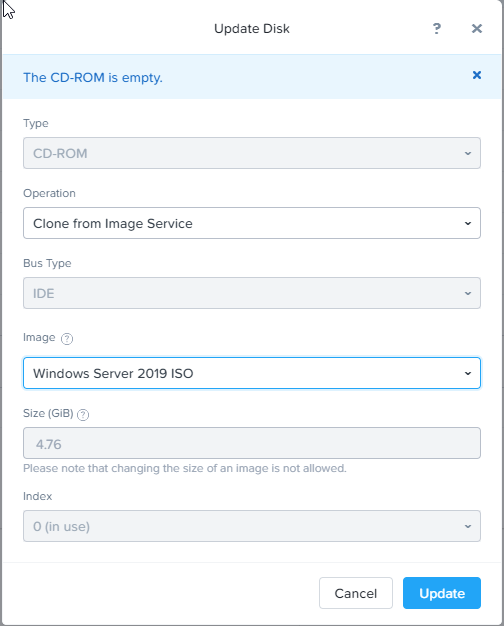
Add a Windows 10 / Server 2016 / Server 2019 boot ISO to the virtual CD drive

Add Windows ISO

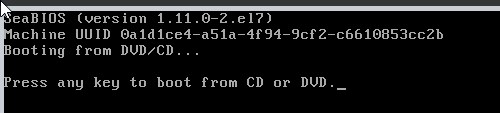
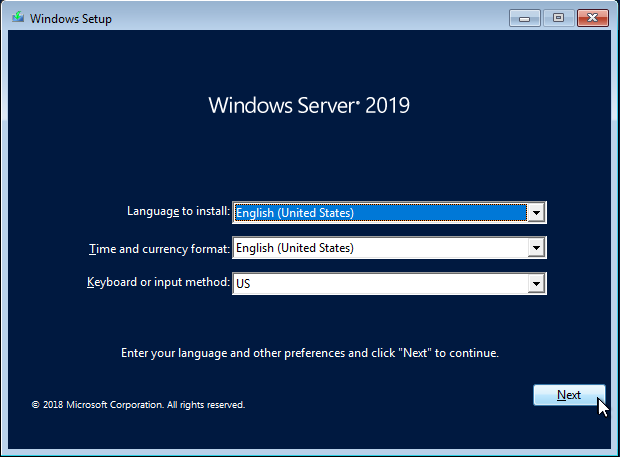
Boot the VM to windows setup

Press key to start from CD

Click Next

Windows Setup 1

Click Repair your computer

Windows Setup 2

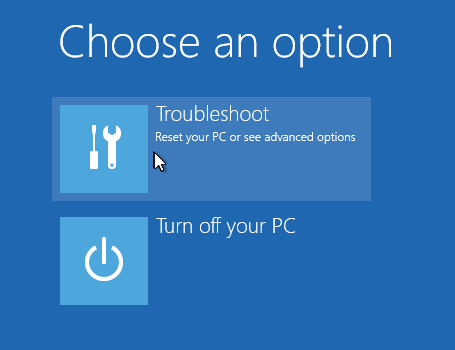
Select Troubleshoot

Windows Setup 3

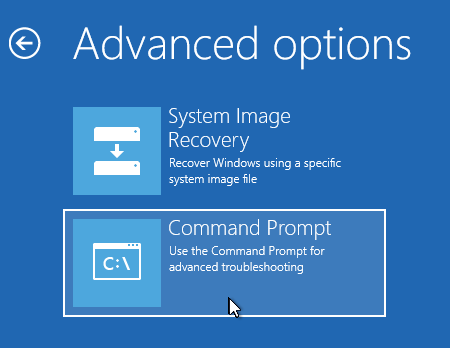
Select Command Prompt

Windows Setup 4

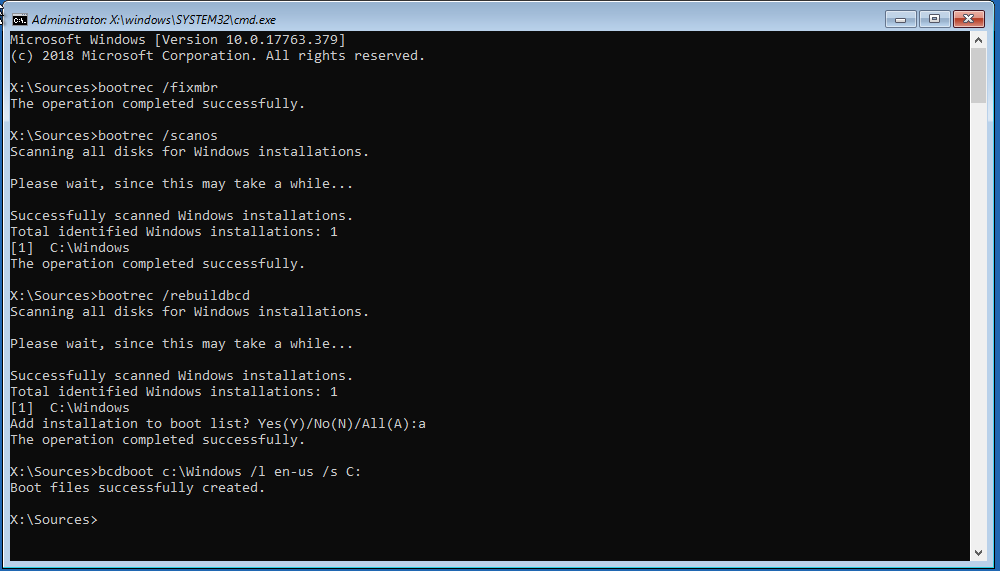
Run the following commands, The first one writes a new MBR to the disk. Second and third are to update the windows BCD (Boot Configuration Data) and the third copies in the files needed to boot the machine. It’s possible that the “C:” drive may need to be changed to a different drive letter depending on your configuration. More information can be found here

bootrec /fixmbr
bootrec /scanos
bootrec /rebuildbcd
bcdboot c:\Windows /l en-us /s C:

Windows Boot Commands

Reboot the VM, hopefully it boots into Windows. If you don’t need to install drivers, you’re done.

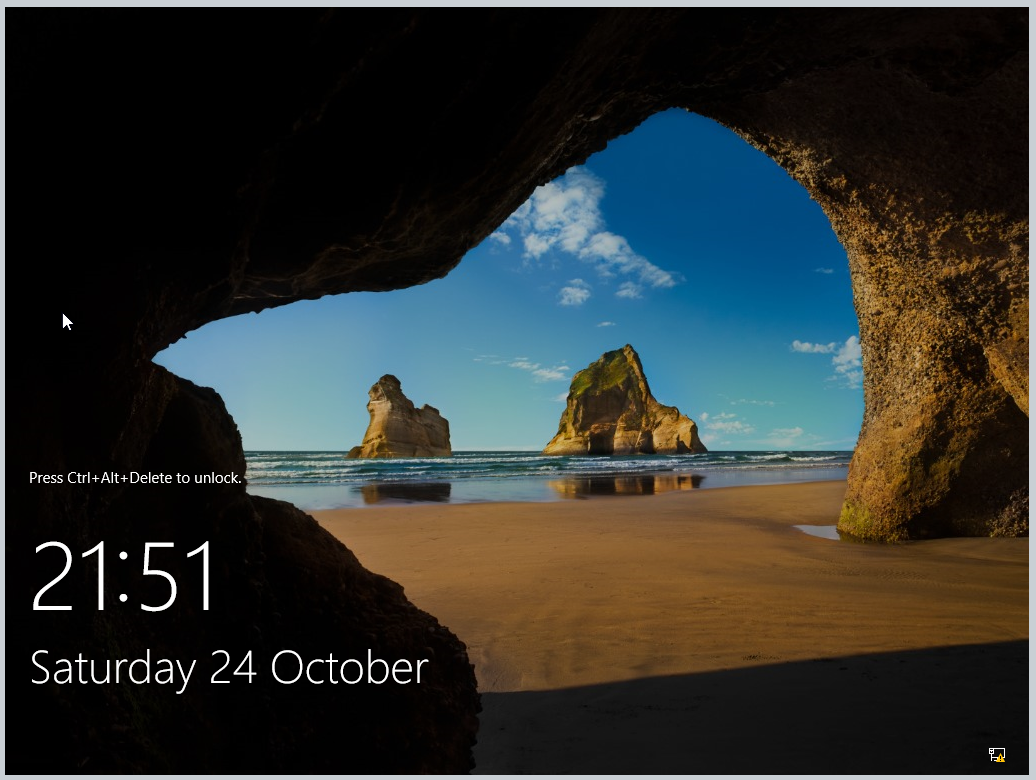
Windows Login

Install Virtual machine tools / drivers

Since I’m working on Nutanix AHV, I will install the VirtIO drivers. If you’re running VMware you may need to install VMware tools. Hyper-V Generation 1 machines (BIOS Type) can only boot from IDE so the following is not required. If you are working on a physical machine and it booted, then the following is not required.

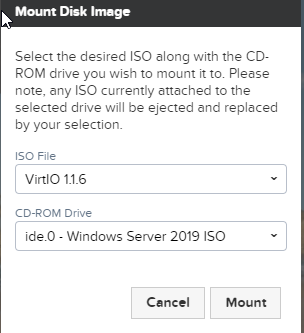
Mount the VirtIO ISO

Mount VirtIO ISO

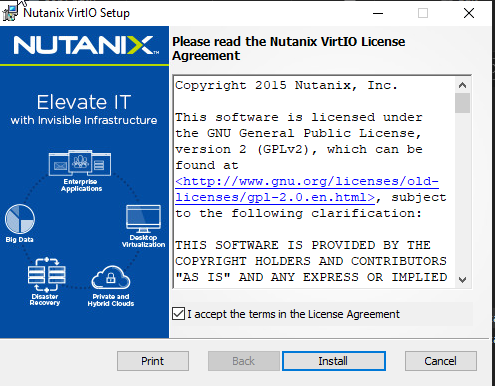
Install the Drivers and shut down the VM

Install the drivers

Copy the boot disk to SCSI, log into a CVM with SSH to run the following command. Check the current virtual machine for the ide.X disk ID. In VMware this procedure will be very different.

acli vm.disk_create <VM NAME> bus=scsi clone_from_vmdisk=vm:<VM NAME>:ide.2

acli SCSI conversion

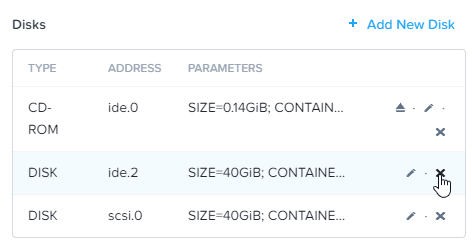
Remove the IDE disk

Remove the disk

Disk Removed

Disk Removed

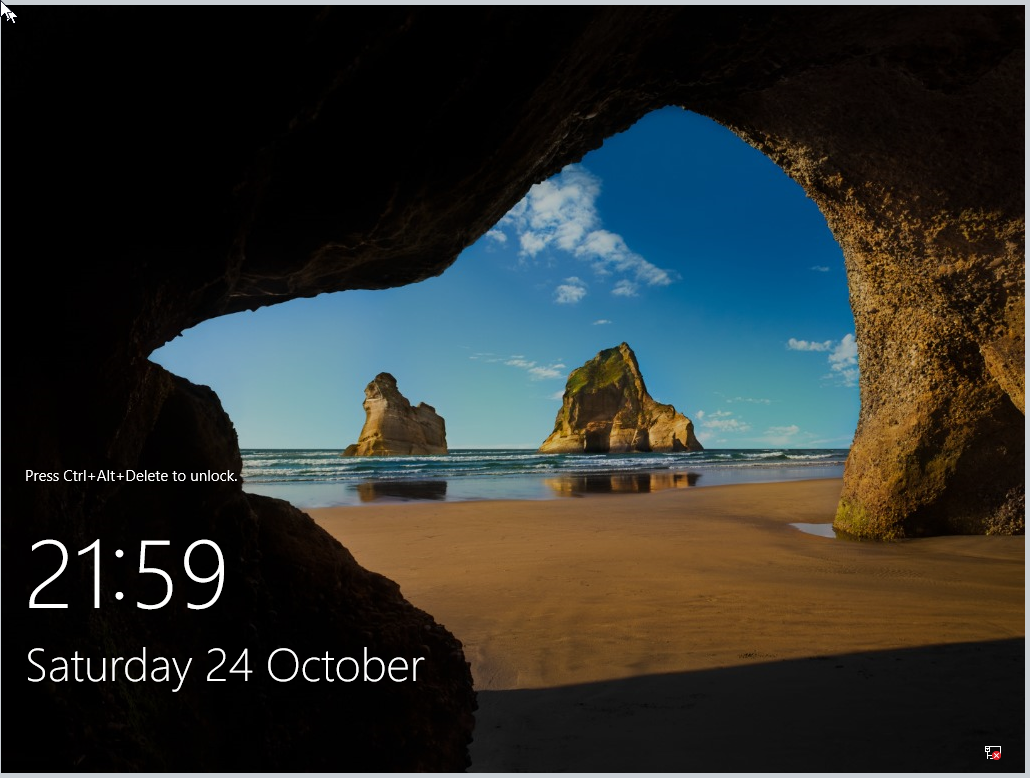
Hopefully the VM will now boot from SCSI using BIOS

Widnows Login Screen

Written with StackEdit.

Wednesday, 21 October 2020

OLOy 64GB RAM Kit Review

Oloy RAM Kit.md

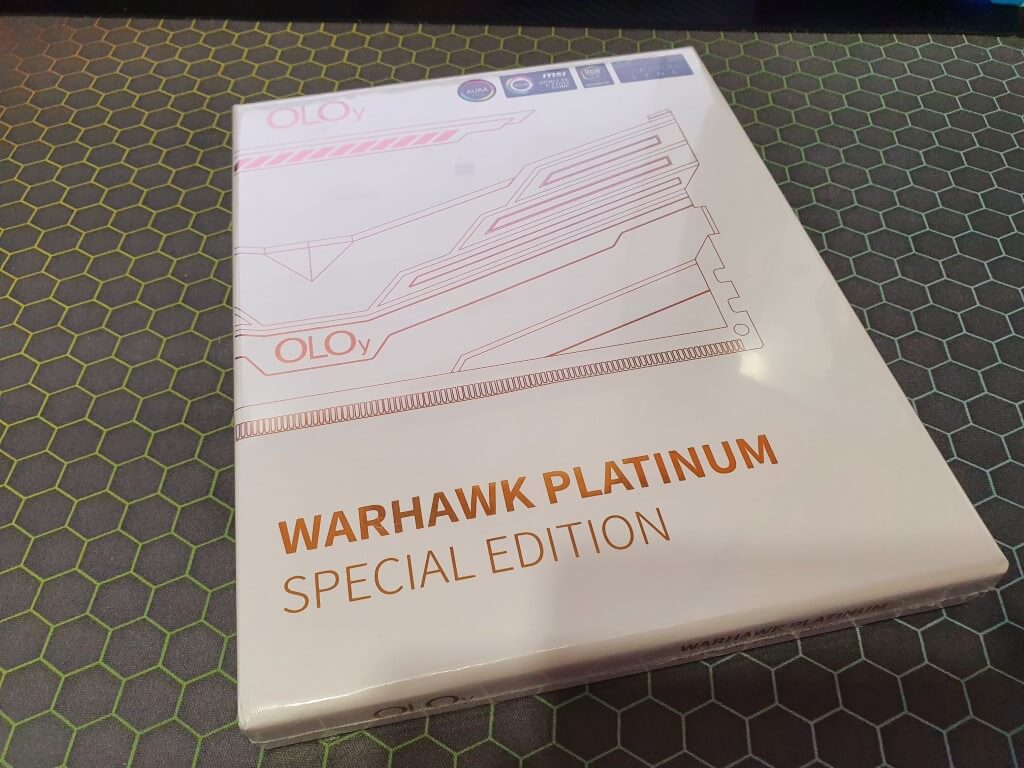
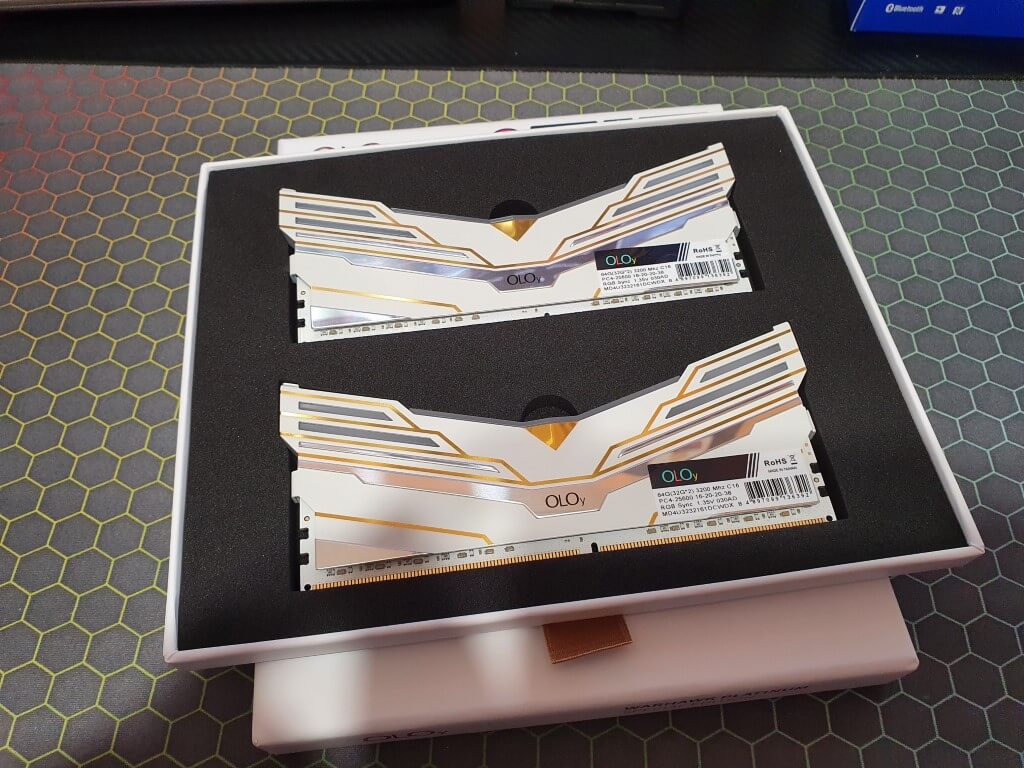
OLOy 64 GB WarHawk “Platinum Special Edition” 3200 Mhz Memory Kit

Product Image 4

Who TF is OLOy

A newcomer to the memory market, OLOy is apparently a trademark of “CHIPSET TECHNOLOGY HOLDING LIMITED.” Established in 2018, they appear to currently only offer a small range of DDR4 memory. Their basic and empty looking website claims they will offer SSD and IC products, but no mention of what they are or will be.

It seems they have started selling their memory modules on newegg and Amazon. I purchased my kit from Amazon UK for £199 GBP, a comparable kit from Corsair was £245 at the time of purchase so this was a substantialy lower price for the same speed kit. Since I wanted the cheapest kit I could find for a home lab “server” PC, this fit the bill pretty well.

Manufacturer Specifications

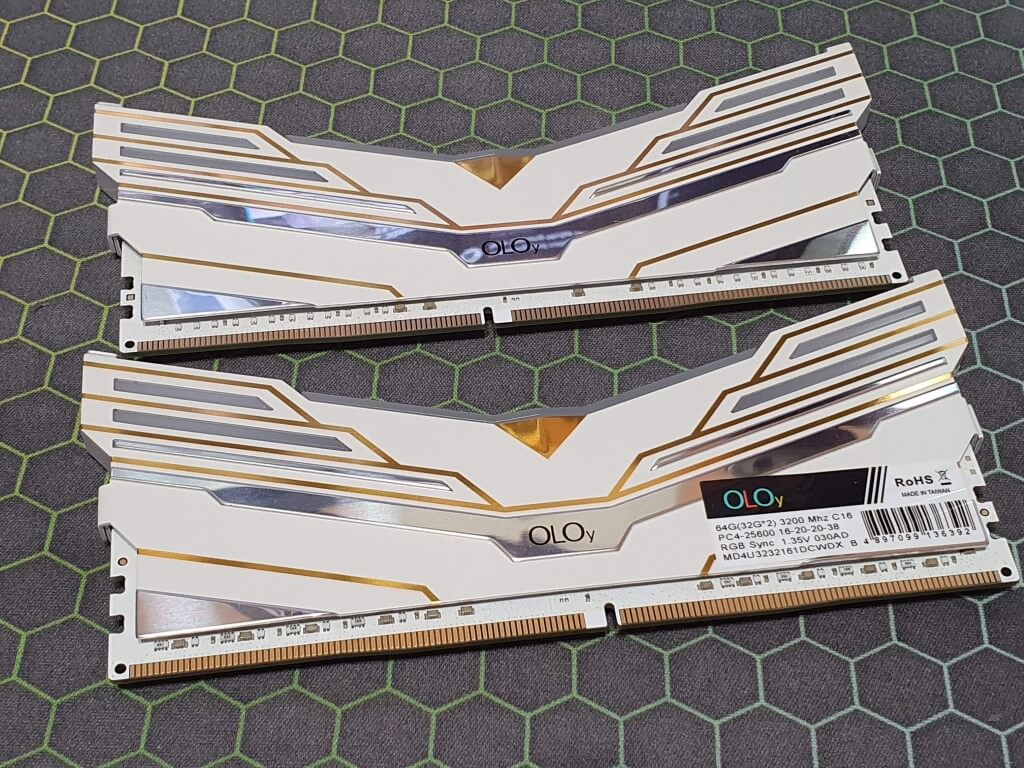
The kit is sold as a 64 GB (32 GB x 2) 3200 MHz kit at 16-20-20-38 with XMP and “limited lifetime warranty.” Since the brand is so new, I’m not holding out on that lifetime warranty. I purchased from Amazon UK so if there is a problem, as the retailer in the UK they are obligated to repair, replace or refund if the product is faulty (6 months from purchase.)

Out of the box

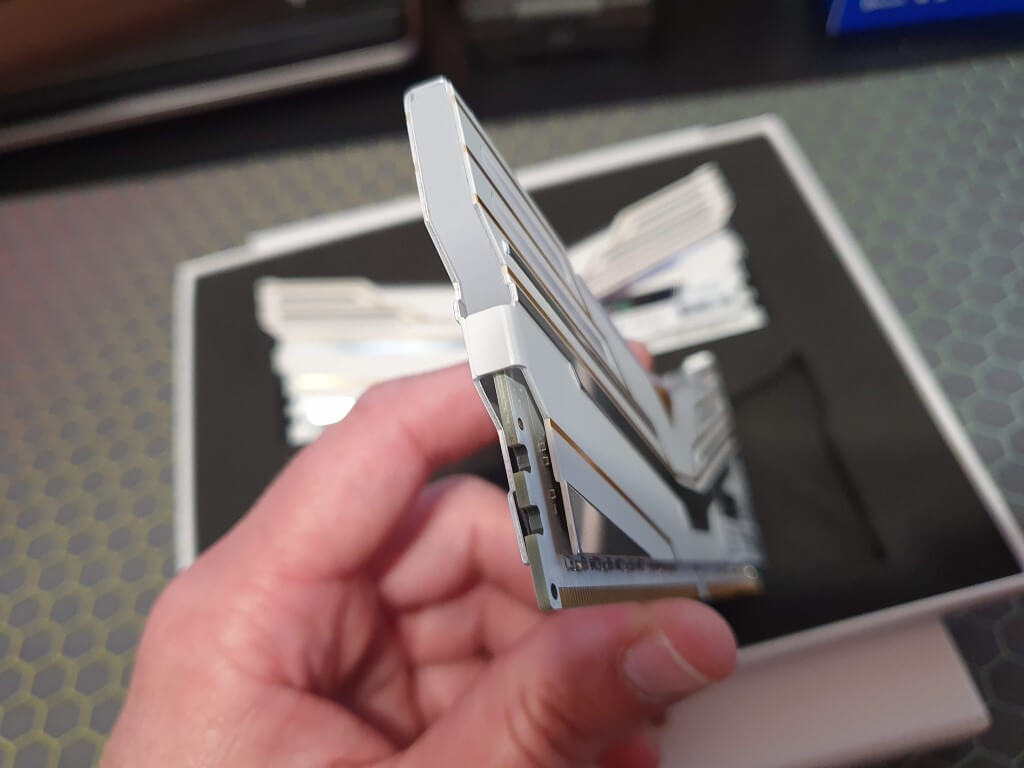
From the images on Amazon, this RAM looks pretty awful, I’d probably rather a simple rectangular design, but they were cheap so I don’t care too much about looks. In person they are actually not as bad as I thought. The look is pretty gamer but it’s not too bad.

The heatsink is painted metal with some plastic parts, the LED window / light spreader is a frosted white plastic.

Product Image 1
Product Image 2
Product Image 3

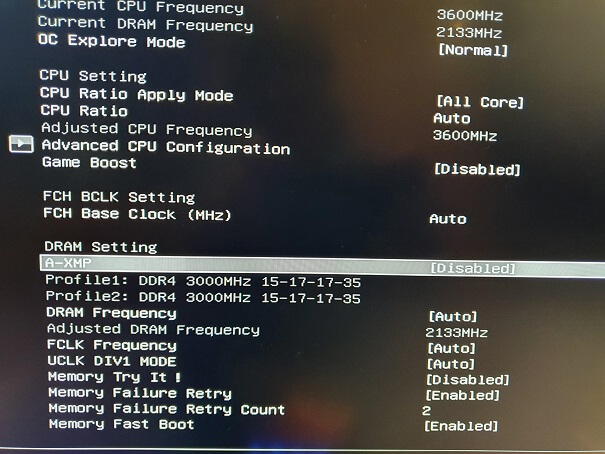
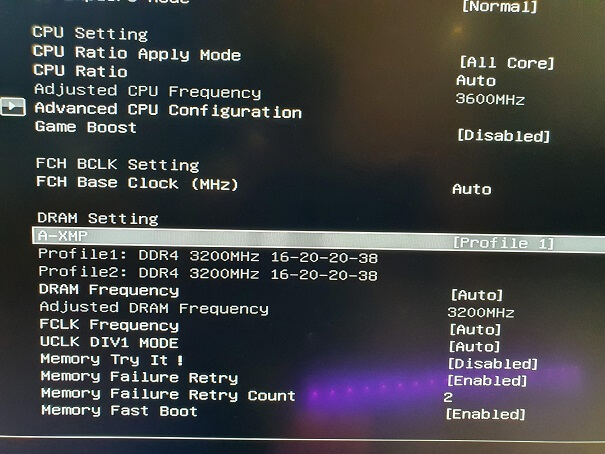
I switched from my existing DDR4-3000 Corsair Vengeance RGB Pro kit (at 3200 MHz) without adjusting settings and the system failed to boot. Switching back and then resetting RAM XMP to default and speed to Auto allowed the system to boot with the new modules. Once booted, I enabled XMP Profile 1 which automatically set the frequency to 3200 MHz with the manufacturer’s timings.

BIOS 1 BIOS 2

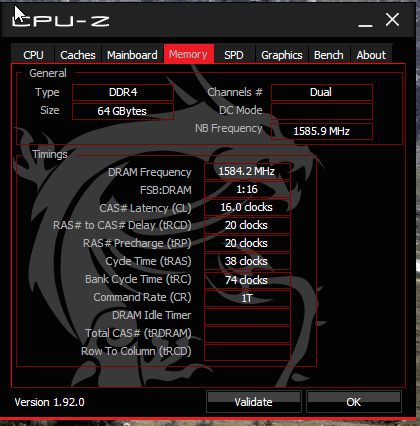
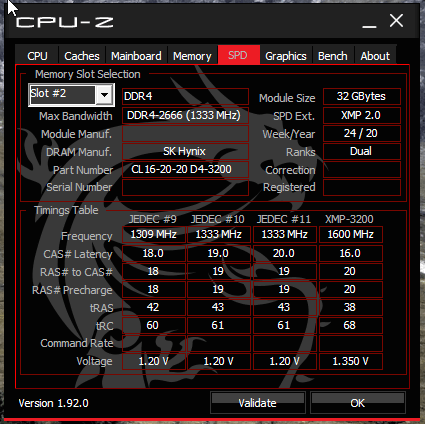
CPU-Z indicates the kit is running at 3200 MHz (DRAM Frequency 1600 MHz x 2) with 16-20-20-38 timings as advertised. SK Hynix DRAM is detected. Interestingly with 32 GB per module it is still a Dual rank module.

CPUZ Screenshot CPUZ Screenshot 2

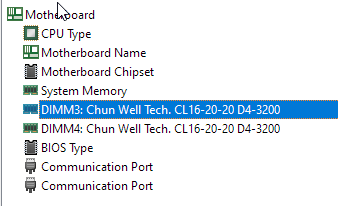
AIDA64 shows the memory modules as “Chun Well Tech.” branded.

AIDA Modules

Performance

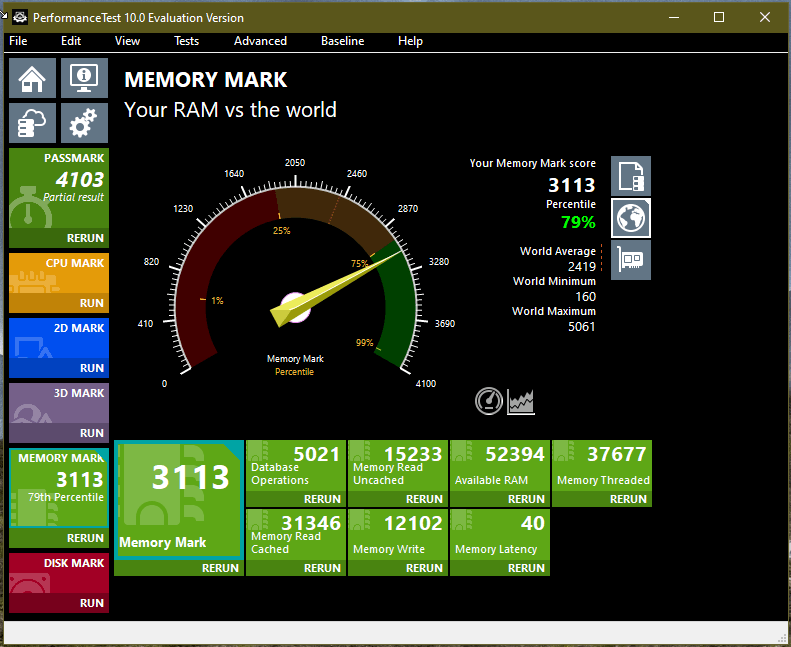
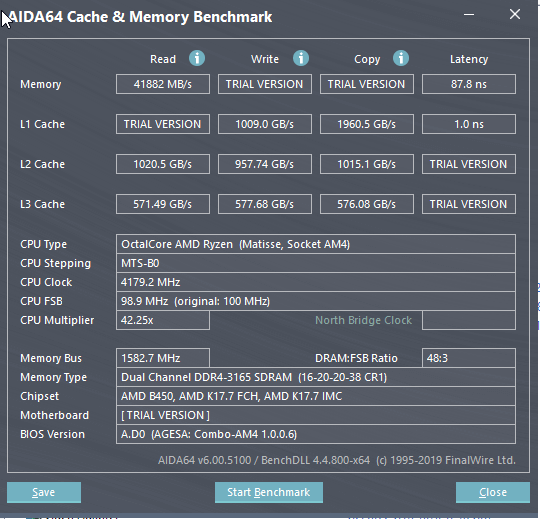
A couple of quick performance tests

Passmark Screenshot

AIDA Screenshot

Basic overclocking tests

A very quick attempt at overclocking failed miserably. Upping the DRAM frequency to DDR4-3400 in the BIOS resulted in a failed POST. I had to revert to my original Corsair RAM to get the system to boot so I could reset the RAM frequency. I didn’t change the timings or increase voltage, so loosening timings or increasing voltage may help. If you get a failed POST with this RAM you may need to reset your BIOS or switch to a known good memory kit to reset the XMP / RAM frequency.

Reliability

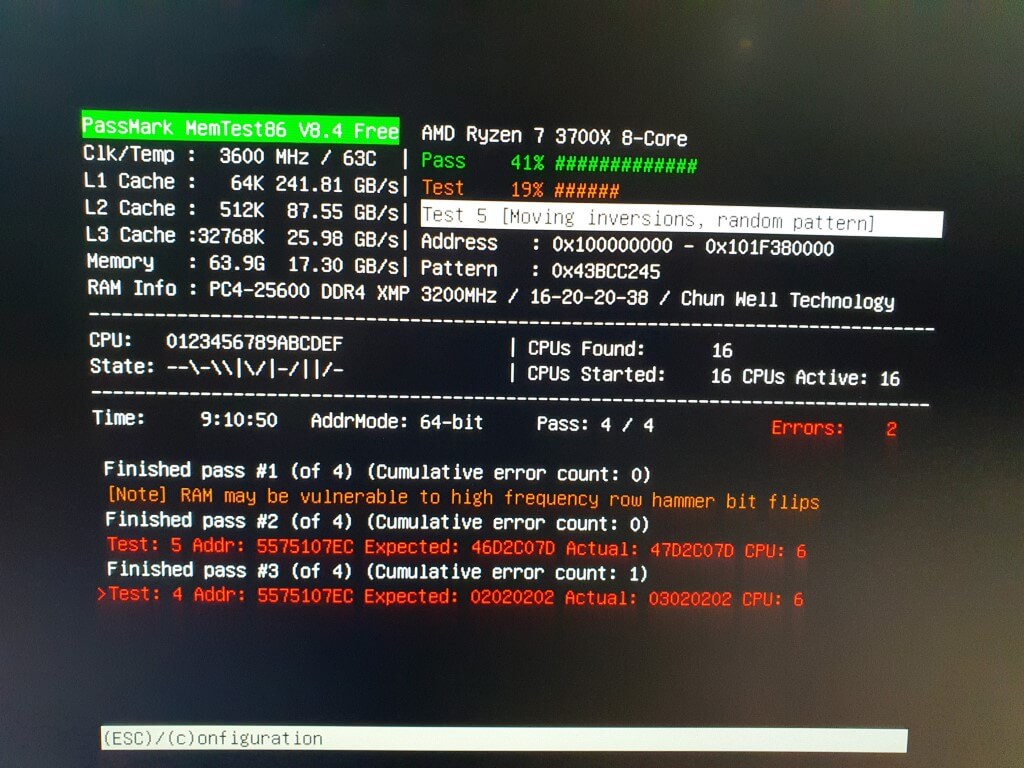
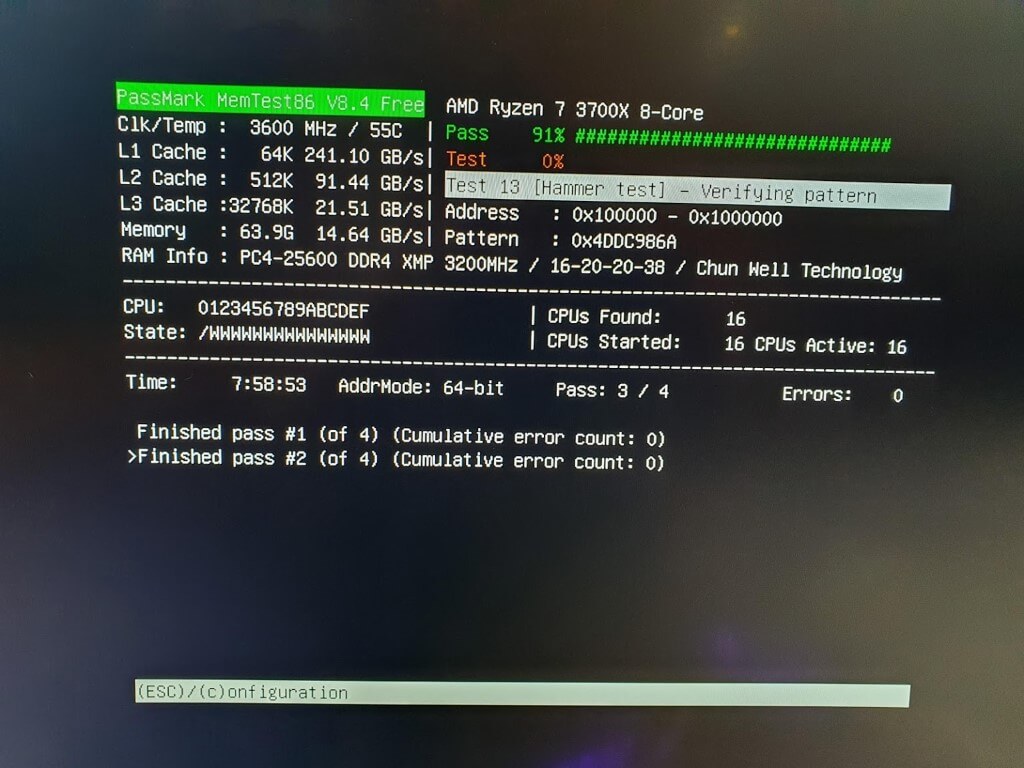
I performed a burn in using memtest86 overnight and… oh, oh dear!

The kit passed one full test but on the second and third tests a single error occurred. This might be a sign of a bad chip, or that the memory is getting too hot. The airflow in my case is pretty good and there are fans blowing air over both modules. It could be a sign that the memory is running really close to the wire. It’s not likely that these errors would occur in normal use, but still a worrying sign.

Memtest86 Results
Memtest86 Oloy Kit on Ryzen 3700x at 3200 MHz


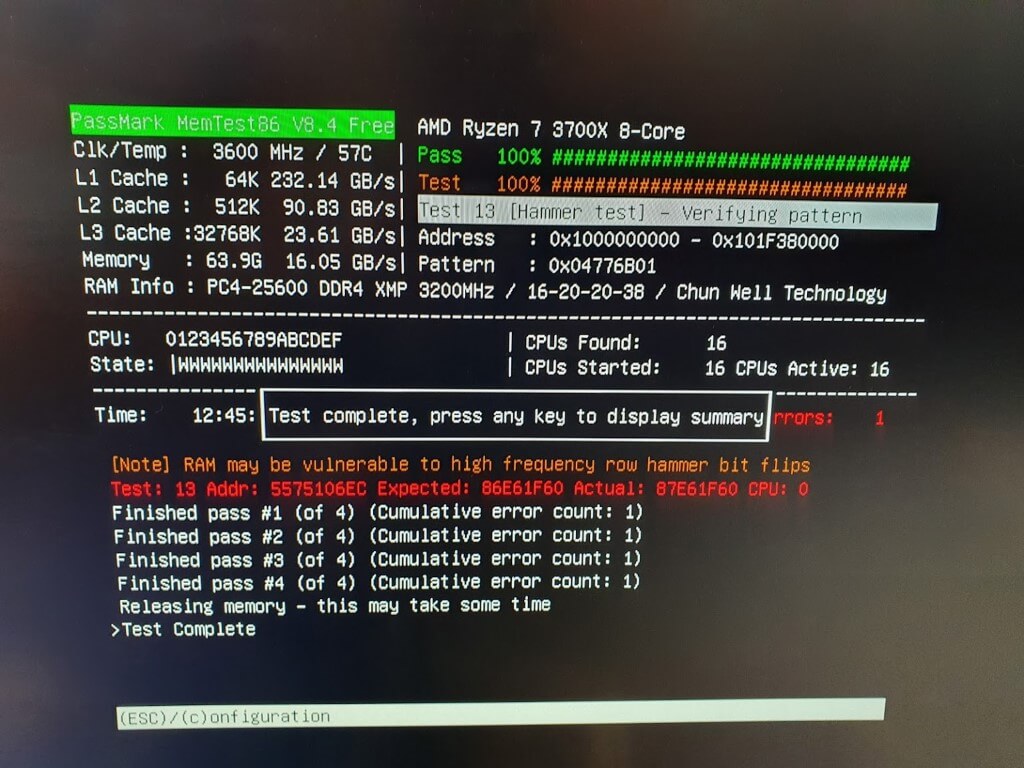
Here’s another run at 3000 MHz to see if the memory is just rated too high. Unfortunately this also failed with the at the same address.

Memtest86 3000 Mhz Results
Memtest86 Oloy Kit on Ryzen 3700x at 3000 MHz


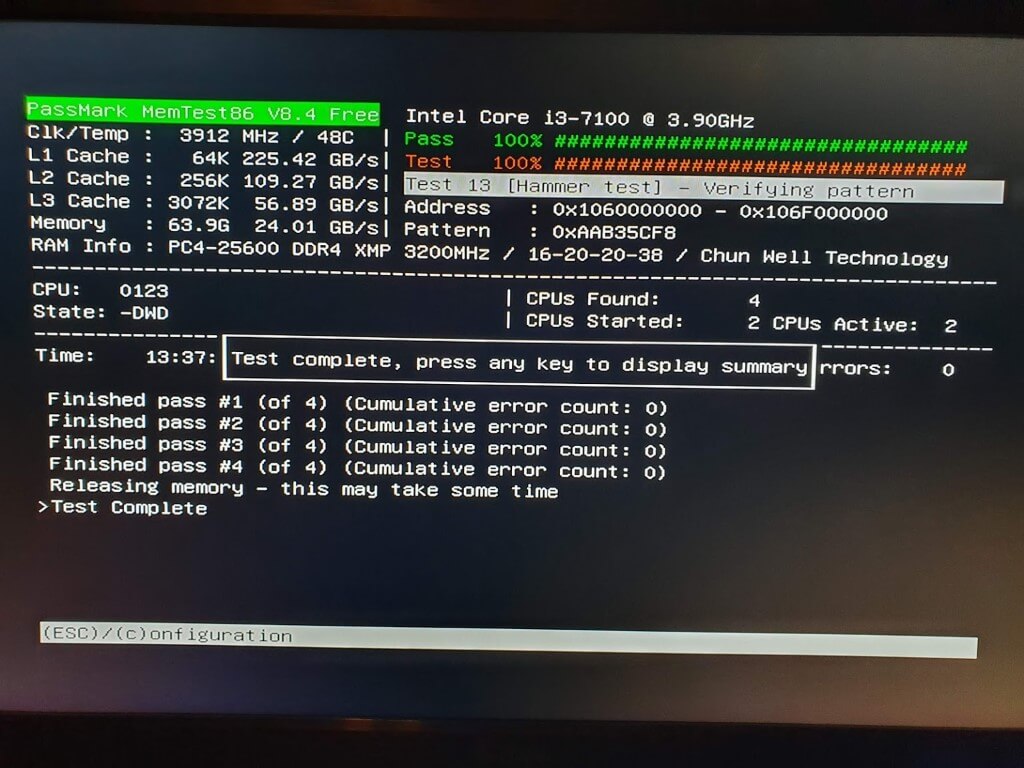
I tested on my “server” PC (which is just a desktop Inspiron) at 2400 MHz. Thankfully this passed 4 full passes.

Memtest86 2400 Mhz Results
Memtest86 Oloy Kit on i3-7100 at 2400 MHz


Since this test passed fine, I thought it could be an issue with the memory controller on my Ryzen PC. I ran this memory at 2666 MHz on my Ryzen desktop and it passed a couple of full tests just fine.

Memtest86 2666 Mhz Results
Memtest86 Oloy Kit on Ryzen 3700x at 2666 MHz


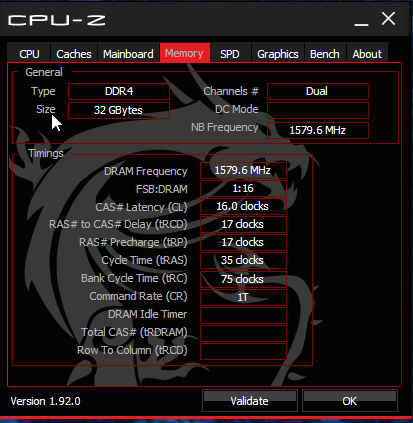
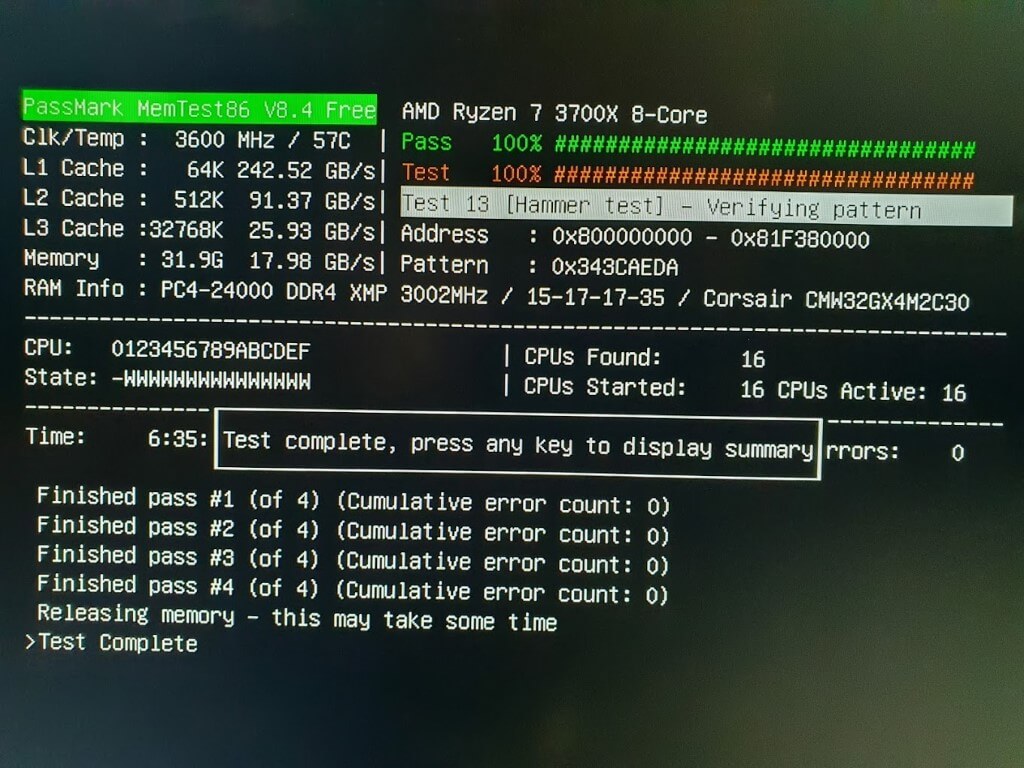
Here’s a test with my Corsair 32 GB DDR4 3000 MHz memory kit running at 3200 MHz to confirm the memory controller on my Ryzen can run at 3200 MHz. This kit has tighter timings than the Oloy kit, even overclocked to 3200 MHz.

CPU-Z Corsair Timings

Memtest86 Corsair 3200 Mhz Results
Memtest86 Corsair Kit on Ryzen 3700x at 3200 MHz


RGB lighting options

The Amazon listing states compatibility with various motherboard RGB controllers including Asus, MSI, Gigabyte and ASRock. Since my motherboard is MSI, I can only test with this software.

The software options with MSI Mysic Light are pretty limited, but it appears to support all the functions here. Some of them are demoed below.

This is the initial configuration - “rainbow mode”

RGB Demo Image

Here are a few of the options (Image links to YouTube)

RGB Demo

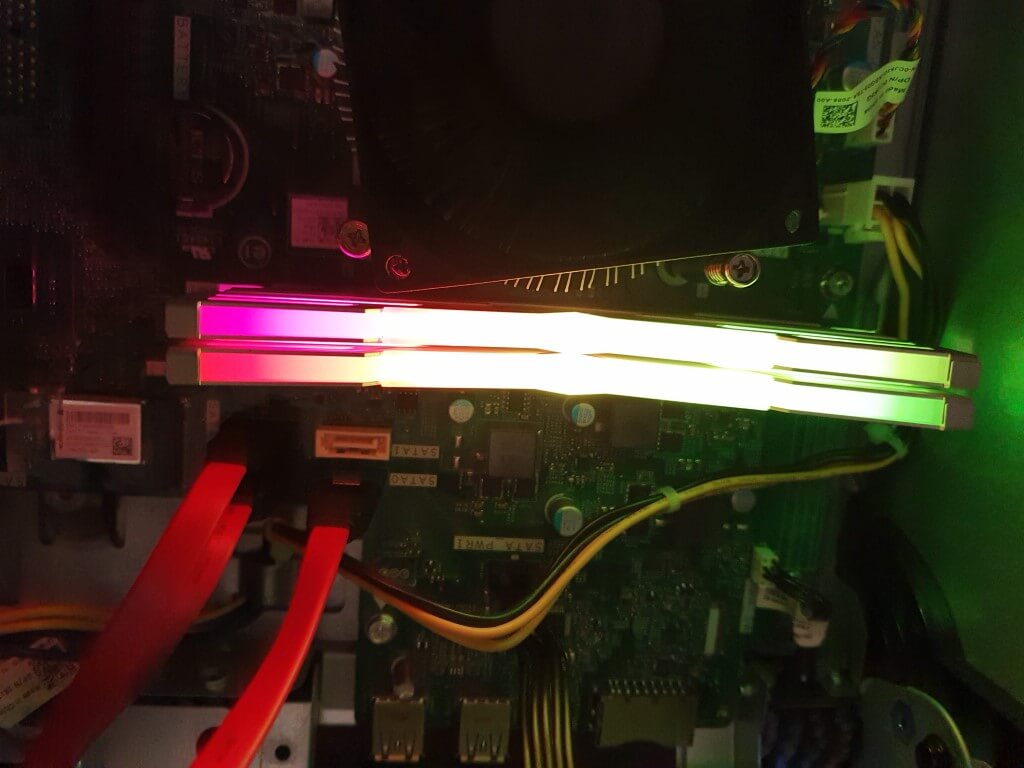
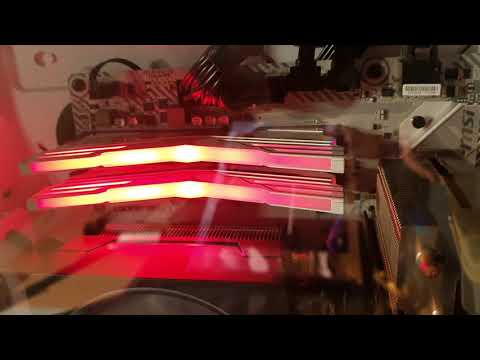
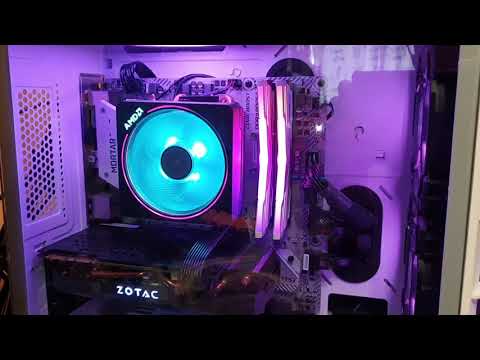
And here’s how the RAM looks in my system (Image links to YouTube)

In System Demo

Compatibility

I have tested the kit in my AMD B450 system with a Ryzen 3700x, CPU at stock speed, memory at the manufacturer supplied 3200 MHz XMP profile. Most of the above performance and reliability tests were in this system at these settings, so you can therefore expect this kit to operate the same in similar configurations. I might just have a bad kit causing the single memory error in memtest or it might be a sign that this RAM should not be rated for these speeds.

I have also tested in my home lab “server” PC - A Dell Inspiron 3668. This is running an i5 7400 at stock settings and therefore memory speed is limited to 2400 MHz. This system is only rated for up to 16 GB of memory, but since these high capacity modules weren’t available at the systems launch date, higher than 16 GB has not been validated by Dell. The system does POST and detect all 64 GB with this kit.

Conclusion

For a cheap memory kit from an unknown manufacturer this ticks some of the boxes for me. It almost operates as advertised, looks okay and passed my overnight burn in test (at a lower than advertised speed.) I wouldn’t expect anything in the way of overclocking this kit! If you’re going to run the RAM at it’s rated speed, I’d make sure to run a memtest pass to make sure there aren’t any horrific errors! If you’re worried and want reliable RAM at 3200 Mhz then it might be worth the extra 25% or so to get piece of mind. A comparable kit from Corsair was £245 at the time of purchase.

Since my use case was to run this RAM at 2400 MHz, I literally wanted the cheapest 64 GB kit that I could get. Even 2400 MHz kits from Crucial were £220+ at the time of writing. This kit performs fine at 2400 MHz and for the price it’s fine. I’ve been running this kit in my “server” running many virtual machines with no issues for the last week. Since my use case is in this machine, I won’t be sending it back for this issue.

If you want to buy this kit on Amazon, click here this is an affiliate link which will give me a small kick back. This review is not sponsored or affiliated with OLOy. I purchased the kit myself.

Written with StackEdit.

Saturday, 17 October 2020

Multicast packets dropped on OpenWRT VLANs

Multicast issue on OpenWRT.md

Multicast issue on OpenWRT

Issue

After setting up my hacked switches with VLANs, I wanted to create a pfSense cluster for more resilient internet access. pfSense uses CARP (closely related to VRRP) which uses multicast to detect when a router or interface goes down. When a router is in CARP master mode, it constantly sends out multicast packets to 224.0.0.18. If another router is in backup mode and cannot see the packets arriving from the master, it will attempt to become the master node.

The issue I was seeing was that the multicast packets weren’t arriving and therefore both nodes came up as master on all but one of the CARP IPs. The OpenWRT configuration I had initially only passed multicast on VLAN id 1, all multicast packets bound for VLAN id 1 were echoed to all ports on both switches. All of the multicast packets for the other VLANs were dropped.

Here is my original /etc/config/network configuration file:

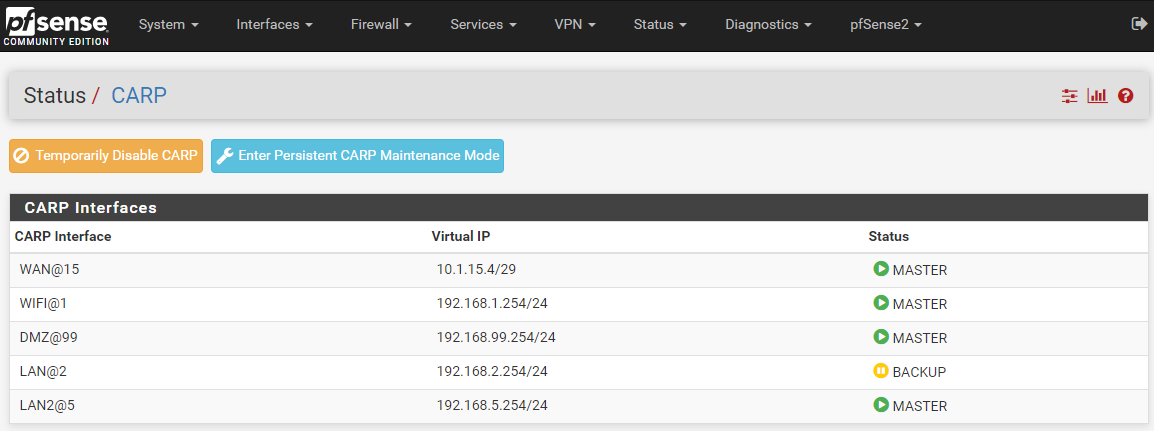
Here’s how the CARP interfaces look. The only working network is LAN which is on VLAN id 1

Primary
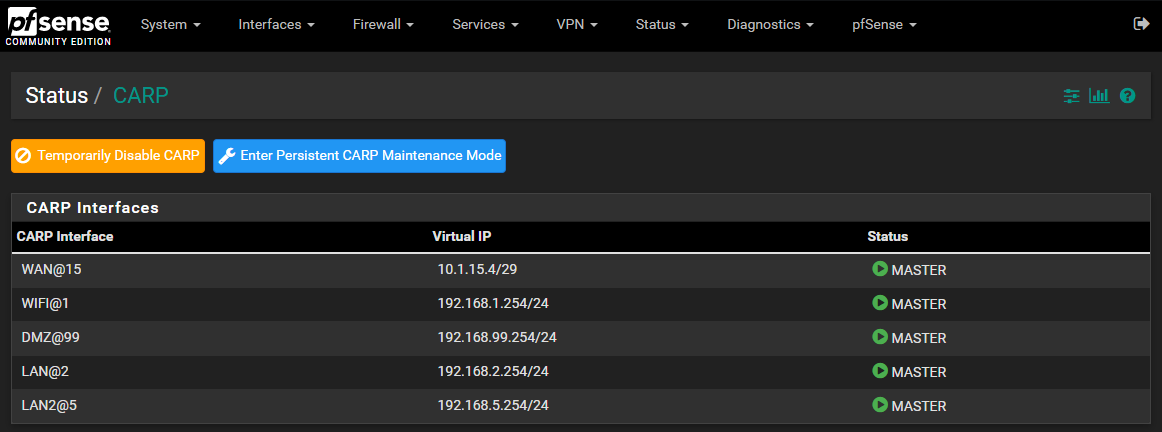
Master CARP

Secondary

Backup CARP

It’s important to know that the VLANs all work and pass regular unicast and broadcast traffic just fine. Only the multicast CARP packets are not getting through.

Troubleshooting Steps

Packet capture on pfSense

Attempting to capture CARP on any of the affected VLANs shows no packets arriving.
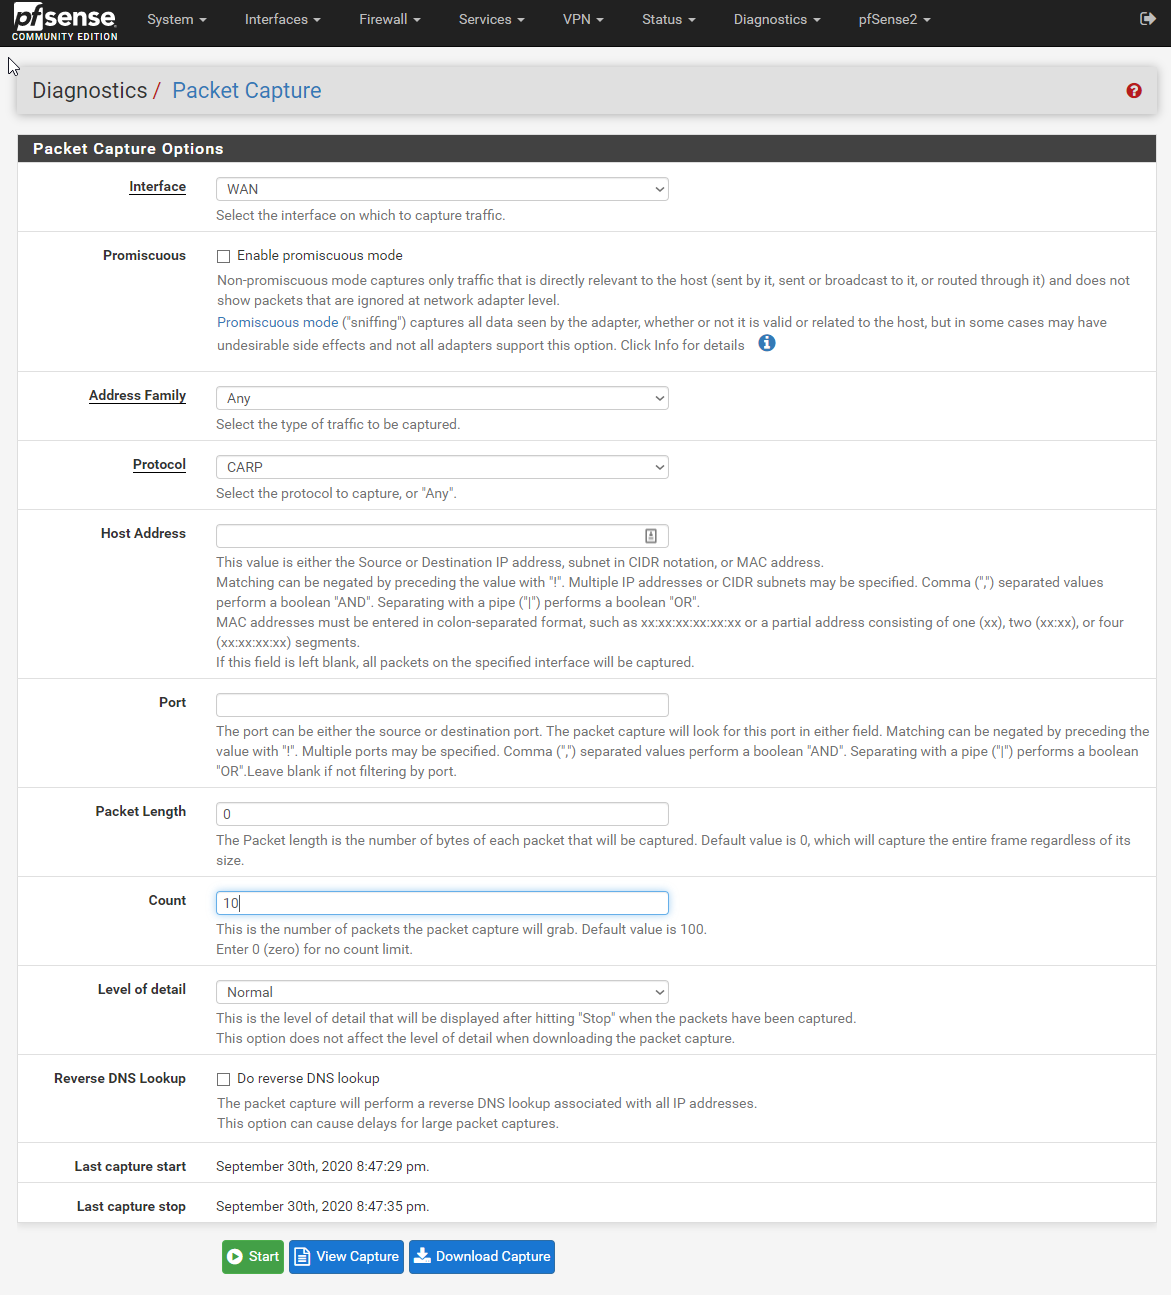
CARP Packet Capture from pfSense

Nothing!

Nothing captured

tcpdump on the switch

Shows CARP packets arriving on the port destined for affected VLANs (Two IP ranges here are coming in on an untagged port on VLAN 9.) Also notice the CARP packets from VLAN id 1 are being echoed onto this port.

tcpdump -i eth1 -c 10 -n -e -T carp carp
tcpdump: verbose output suppressed, use -v or -vv for full protocol decode
listening on eth1, link-type EN10MB (Ethernet), capture size 262144 bytes
20:34:39.400955 00:00:5e:00:01:02 > 01:00:5e:00:00:12, ethertype 802.1Q (0x8100), length 74: vlan 1, p 0, ethertype IPv4, 192.168.2.1 > 224.0.0.18: CARPv2-advertise 36: vhid=2 advbase=1 advskew=0 authlen=7 counter=3809067134136217446
20:34:39.401219 00:00:5e:00:01:01 > 01:00:5e:00:00:12, ethertype 802.1Q (0x8100), length 74: vlan 9, p 0, ethertype IPv4, 192.168.1.1 > 224.0.0.18: CARPv2-advertise 36: vhid=1 advbase=1 advskew=0 authlen=7 counter=13620309968023688989
20:34:39.401370 00:00:5e:00:01:0f > 01:00:5e:00:00:12, ethertype 802.1Q (0x8100), length 74: vlan 9, p 0, ethertype IPv4, 10.1.15.2 > 224.0.0.18: CARPv2-advertise 36: vhid=15 advbase=1 advskew=0 authlen=7 counter=13306912573729581052
20:34:40.415665 00:00:5e:00:01:02 > 01:00:5e:00:00:12, ethertype 802.1Q (0x8100), length 74: vlan 1, p 0, ethertype IPv4, 192.168.2.1 > 224.0.0.18: CARPv2-advertise 36: vhid=2 advbase=1 advskew=0 authlen=7 counter=3809067134136217446
20:34:40.415871 00:00:5e:00:01:0f > 01:00:5e:00:00:12, ethertype 802.1Q (0x8100), length 74: vlan 9, p 0, ethertype IPv4, 10.1.15.2 > 224.0.0.18: CARPv2-advertise 36: vhid=15 advbase=1 advskew=0 authlen=7 counter=13306912573729581052
20:34:40.416211 00:00:5e:00:01:01 > 01:00:5e:00:00:12, ethertype 802.1Q (0x8100), length 74: vlan 9, p 0, ethertype IPv4, 192.168.1.1 > 224.0.0.18: CARPv2-advertise 36: vhid=1 advbase=1 advskew=0 authlen=7 counter=13620309968023688989
20:34:41.419605 00:00:5e:00:01:02 > 01:00:5e:00:00:12, ethertype 802.1Q (0x8100), length 74: vlan 1, p 0, ethertype IPv4, 192.168.2.1 > 224.0.0.18: CARPv2-advertise 36: vhid=2 advbase=1 advskew=0 authlen=7 counter=3809067134136217446
20:34:41.419810 00:00:5e:00:01:01 > 01:00:5e:00:00:12, ethertype 802.1Q (0x8100), length 74: vlan 9, p 0, ethertype IPv4, 192.168.1.1 > 224.0.0.18: CARPv2-advertise 36: vhid=1 advbase=1 advskew=0 authlen=7 counter=13620309968023688989
20:34:41.419956 00:00:5e:00:01:0f > 01:00:5e:00:00:12, ethertype 802.1Q (0x8100), length 74: vlan 9, p 0, ethertype IPv4, 10.1.15.2 > 224.0.0.18: CARPv2-advertise 36: vhid=15 advbase=1 advskew=0 authlen=7 counter=13306912573729581052
20:34:42.429564 00:00:5e:00:01:02 > 01:00:5e:00:00:12, ethertype 802.1Q (0x8100), length 74: vlan 1, p 0, ethertype IPv4, 192.168.2.1 > 224.0.0.18: CARPv2-advertise 36: vhid=2 advbase=1 advskew=0 authlen=7 counter=3809067134136217446
10 packets captured
12 packets received by filter
0 packets dropped by kernel
4 packets dropped by interface

tcpdump on a linux endpoint

Shows CARP packets only for VLAN 1, this Linux machine is on an untagged port on VLAN 9.

# tcpdump -i eth0 -c 10 -n -e -T carp carp
tcpdump: verbose output suppressed, use -v or -vv for full protocol decode
listening on eth0, link-type EN10MB (Ethernet), capture size 262144 bytes
20:37:24.422703 00:00:5e:00:01:02 > 01:00:5e:00:00:12, ethertype 802.1Q (0x8100), length 74: vlan 1, p 0, ethertype IPv4, 192.168.2.1 > 224.0.0.18: CARPv2-advertise 36: vhid=2 advbase=1 advskew=0 authlen=7 counter=3809067134136217446
20:37:25.438853 00:00:5e:00:01:02 > 01:00:5e:00:00:12, ethertype 802.1Q (0x8100), length 74: vlan 1, p 0, ethertype IPv4, 192.168.2.1 > 224.0.0.18: CARPv2-advertise 36: vhid=2 advbase=1 advskew=0 authlen=7 counter=3809067134136217446
20:37:26.458870 00:00:5e:00:01:02 > 01:00:5e:00:00:12, ethertype 802.1Q (0x8100), length 74: vlan 1, p 0, ethertype IPv4, 192.168.2.1 > 224.0.0.18: CARPv2-advertise 36: vhid=2 advbase=1 advskew=0 authlen=7 counter=3809067134136217446
20:37:27.522734 00:00:5e:00:01:02 > 01:00:5e:00:00:12, ethertype 802.1Q (0x8100), length 74: vlan 1, p 0, ethertype IPv4, 192.168.2.1 > 224.0.0.18: CARPv2-advertise 36: vhid=2 advbase=1 advskew=0 authlen=7 counter=3809067134136217446
20:37:28.560403 00:00:5e:00:01:02 > 01:00:5e:00:00:12, ethertype 802.1Q (0x8100), length 74: vlan 1, p 0, ethertype IPv4, 192.168.2.1 > 224.0.0.18: CARPv2-advertise 36: vhid=2 advbase=1 advskew=0 authlen=7 counter=3809067134136217446
20:37:29.625900 00:00:5e:00:01:02 > 01:00:5e:00:00:12, ethertype 802.1Q (0x8100), length 74: vlan 1, p 0, ethertype IPv4, 192.168.2.1 > 224.0.0.18: CARPv2-advertise 36: vhid=2 advbase=1 advskew=0 authlen=7 counter=3809067134136217446
20:37:30.635363 00:00:5e:00:01:02 > 01:00:5e:00:00:12, ethertype 802.1Q (0x8100), length 74: vlan 1, p 0, ethertype IPv4, 192.168.2.1 > 224.0.0.18: CARPv2-advertise 36: vhid=2 advbase=1 advskew=0 authlen=7 counter=3809067134136217446
20:37:31.645144 00:00:5e:00:01:02 > 01:00:5e:00:00:12, ethertype 802.1Q (0x8100), length 74: vlan 1, p 0, ethertype IPv4, 192.168.2.1 > 224.0.0.18: CARPv2-advertise 36: vhid=2 advbase=1 advskew=0 authlen=7 counter=3809067134136217446
20:37:32.667945 00:00:5e:00:01:02 > 01:00:5e:00:00:12, ethertype 802.1Q (0x8100), length 74: vlan 1, p 0, ethertype IPv4, 192.168.2.1 > 224.0.0.18: CARPv2-advertise 36: vhid=2 advbase=1 advskew=0 authlen=7 counter=3809067134136217446
20:37:33.717977 00:00:5e:00:01:02 > 01:00:5e:00:00:12, ethertype 802.1Q (0x8100), length 74: vlan 1, p 0, ethertype IPv4, 192.168.2.1 > 224.0.0.18: CARPv2-advertise 36: vhid=2 advbase=1 advskew=0 authlen=7 counter=3809067134136217446
10 packets captured
10 packets received by filter
0 packets dropped by kernel

Resolution

I noticed on the switch that the bridge interface was configured only on VLAN id 1 since it’s member adapters were all fixed to vid='1'. My fix was to create a bridge interface and eth0-3 vlan interfaces in each VLAN that I wanted the multicast packets to work on.

The changed parts in /etc/config/network are the new bridge interfaces:

config interface 'lan2'
    option type 'bridge'
    option force_link '0'
    option igmp_snooping '1'
    option ipv6 '0'
    list ifname 'vlan_eth0_2'
    list ifname 'vlan_eth1_2'
    list ifname 'vlan_eth2_2'
    list ifname 'vlan_eth3_2'
    option ip6assign '0'
    list pppoerelay ''

And the new vlan_ethX_xx interfaces:

config device 'vlan_eth0_2'
    option type '8021q'
    option ifname 'eth0'
    option name 'vlan_eth0_2'
    option mtu '1500'
    option vid '2'

config device 'vlan_eth1_2'
        option type '8021q'
        option ifname 'eth1'
        option name 'vlan_eth1_2'
        option mtu '1500'
        option vid '2'

config device 'vlan_eth2_2'
        option type '8021q'
        option ifname 'eth2'
        option name 'vlan_eth2_2'
        option mtu '1500'
        option vid '2'

config device 'vlan_eth3_2'
        option type '8021q'
        option ifname 'eth3'
        option name 'vlan_eth3_2'
        option mtu '1500'
        option vid '2'

I think the issue is due to the bridge interface being only on vlan id 1 and having multicast snooping enabled. I tried many other changes, like bridging the bare eth0-3 interfaces, but most changes either locked me out of the switch configuration interface or made no difference.

Here is my /etc/config/network configuration file now. It looks a mess, but it works and since I didn’t want to make huge changes to the config and lock myself out (again,) it’s left like this. There is for sure a better way to do this, but these changes are good enough for me!

Recieving packets on pfSense now

Packets arriving on the right interfaces now. Only multicast packets for the relevant VLAN are captured, I believe because VMware is stripping the other VLANs from the Port Group.
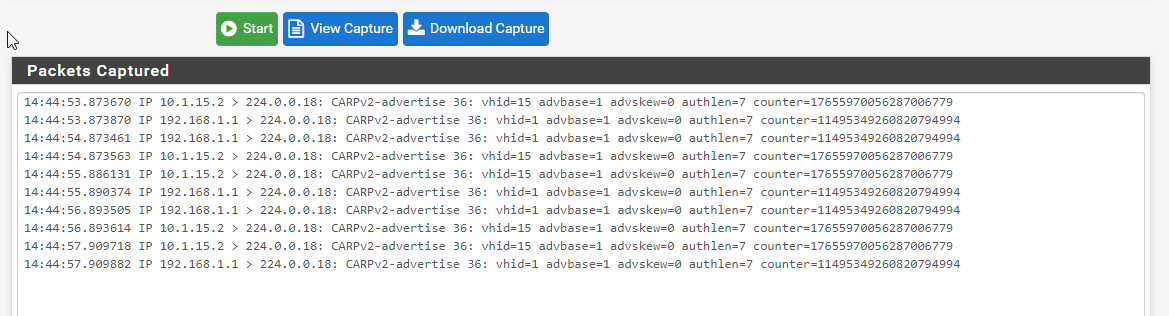
CARP Packet Capture from pfSense working

tcpdump on the switch now

All CARP packets for all VLANs arriving at the switch port shown earlier. All CARP packets from all vlans are echoed on all ports.

# tcpdump -i eth1 -c 10 -n -e -T carp carp
tcpdump: verbose output suppressed, use -v or -vv for full protocol decode
listening on eth1, link-type EN10MB (Ethernet), capture size 262144 bytes
20:04:38.379521 00:00:5e:00:01:63 > 01:00:5e:00:00:12, ethertype 802.1Q (0x8100), length 74: vlan 15, p 0, ethertype IPv4, 192.168.99.1 > 224.0.0.18: CARPv2-advertise 36: vhid=99 advbase=1 advskew=0 authlen=7 counter=4683731516847153633
20:04:38.379922 00:00:5e:00:01:05 > 01:00:5e:00:00:12, ethertype 802.1Q (0x8100), length 74: vlan 2, p 0, ethertype IPv4, 192.168.5.1 > 224.0.0.18: CARPv2-advertise 36: vhid=5 advbase=1 advskew=0 authlen=7 counter=9456878584255914769
20:04:38.380439 00:00:5e:00:01:02 > 01:00:5e:00:00:12, ethertype 802.1Q (0x8100), length 74: vlan 1, p 0, ethertype IPv4, 192.168.2.1 > 224.0.0.18: CARPv2-advertise 36: vhid=2 advbase=1 advskew=0 authlen=7 counter=3809067134136217446
20:04:38.380625 00:00:5e:00:01:01 > 01:00:5e:00:00:12, ethertype 802.1Q (0x8100), length 74: vlan 9, p 0, ethertype IPv4, 192.168.1.1 > 224.0.0.18: CARPv2-advertise 36: vhid=1 advbase=1 advskew=0 authlen=7 counter=13620309968023688989
20:04:38.380912 00:00:5e:00:01:0f > 01:00:5e:00:00:12, ethertype 802.1Q (0x8100), length 74: vlan 9, p 0, ethertype IPv4, 10.1.15.2 > 224.0.0.18: CARPv2-advertise 36: vhid=15 advbase=1 advskew=0 authlen=7 counter=13306912573729581052
20:04:39.389533 00:00:5e:00:01:02 > 01:00:5e:00:00:12, ethertype 802.1Q (0x8100), length 74: vlan 1, p 0, ethertype IPv4, 192.168.2.1 > 224.0.0.18: CARPv2-advertise 36: vhid=2 advbase=1 advskew=0 authlen=7 counter=3809067134136217446
20:04:39.389852 00:00:5e:00:01:05 > 01:00:5e:00:00:12, ethertype 802.1Q (0x8100), length 74: vlan 2, p 0, ethertype IPv4, 192.168.5.1 > 224.0.0.18: CARPv2-advertise 36: vhid=5 advbase=1 advskew=0 authlen=7 counter=9456878584255914769
20:04:39.390086 00:00:5e:00:01:63 > 01:00:5e:00:00:12, ethertype 802.1Q (0x8100), length 74: vlan 15, p 0, ethertype IPv4, 192.168.99.1 > 224.0.0.18: CARPv2-advertise 36: vhid=99 advbase=1 advskew=0 authlen=7 counter=4683731516847153633
20:04:39.390316 00:00:5e:00:01:0f > 01:00:5e:00:00:12, ethertype 802.1Q (0x8100), length 74: vlan 9, p 0, ethertype IPv4, 10.1.15.2 > 224.0.0.18: CARPv2-advertise 36: vhid=15 advbase=1 advskew=0 authlen=7 counter=13306912573729581052
20:04:39.390533 00:00:5e:00:01:01 > 01:00:5e:00:00:12, ethertype 802.1Q (0x8100), length 74: vlan 9, p 0, ethertype IPv4, 192.168.1.1 > 224.0.0.18: CARPv2-advertise 36: vhid=1 advbase=1 advskew=0 authlen=7 counter=13620309968023688989

tcpdump on a linux endpoint now

tcpdump from a linux machine now shows carp packets from all VLANs on it’s physical port. Worth mentioning that the port is configured untagged on VLAN 15.

# tcpdump -i eth0 -c 10 -n -e -T carp carp
tcpdump: verbose output suppressed, use -v or -vv for full protocol decode
listening on eth0, link-type EN10MB (Ethernet), capture size 262144 bytes
18:15:14.122660 00:00:5e:00:01:63 > 01:00:5e:00:00:12, ethertype IPv4 (0x0800), length 70: 192.168.99.1 > 224.0.0.18: CARPv2-advertise 36: vhid=99 advbase=1 advskew=0 authlen=7 counter=4683731516847153633
18:15:14.122965 00:00:5e:00:01:02 > 01:00:5e:00:00:12, ethertype 802.1Q (0x8100), length 74: vlan 1, p 0, ethertype IPv4, 192.168.2.1 > 224.0.0.18: CARPv2-advertise 36: vhid=2 advbase=1 advskew=0 authlen=7 counter=3809067134136217446
18:15:14.123263 00:00:5e:00:01:05 > 01:00:5e:00:00:12, ethertype 802.1Q (0x8100), length 74: vlan 2, p 0, ethertype IPv4, 192.168.5.1 > 224.0.0.18: CARPv2-advertise 36: vhid=5 advbase=1 advskew=0 authlen=7 counter=9456878584255914769
18:15:14.123316 00:00:5e:00:01:0f > 01:00:5e:00:00:12, ethertype 802.1Q (0x8100), length 74: vlan 9, p 0, ethertype IPv4, 10.1.15.2 > 224.0.0.18: CARPv2-advertise 36: vhid=15 advbase=1 advskew=0 authlen=7 counter=13306912573729581052
18:15:14.123878 00:00:5e:00:01:01 > 01:00:5e:00:00:12, ethertype 802.1Q (0x8100), length 74: vlan 9, p 0, ethertype IPv4, 192.168.1.1 > 224.0.0.18: CARPv2-advertise 36: vhid=1 advbase=1 advskew=0 authlen=7 counter=13620309968023688989
18:15:15.134075 00:00:5e:00:01:05 > 01:00:5e:00:00:12, ethertype 802.1Q (0x8100), length 74: vlan 2, p 0, ethertype IPv4, 192.168.5.1 > 224.0.0.18: CARPv2-advertise 36: vhid=5 advbase=1 advskew=0 authlen=7 counter=9456878584255914769
18:15:15.134351 00:00:5e:00:01:02 > 01:00:5e:00:00:12, ethertype 802.1Q (0x8100), length 74: vlan 1, p 0, ethertype IPv4, 192.168.2.1 > 224.0.0.18: CARPv2-advertise 36: vhid=2 advbase=1 advskew=0 authlen=7 counter=3809067134136217446
18:15:15.134627 00:00:5e:00:01:63 > 01:00:5e:00:00:12, ethertype IPv4 (0x0800), length 70: 192.168.99.1 > 224.0.0.18: CARPv2-advertise 36: vhid=99 advbase=1 advskew=0 authlen=7 counter=4683731516847153633
18:15:15.134823 00:00:5e:00:01:01 > 01:00:5e:00:00:12, ethertype 802.1Q (0x8100), length 74: vlan 9, p 0, ethertype IPv4, 192.168.1.1 > 224.0.0.18: CARPv2-advertise 36: vhid=1 advbase=1 advskew=0 authlen=7 counter=13620309968023688989
18:15:15.134831 00:00:5e:00:01:0f > 01:00:5e:00:00:12, ethertype 802.1Q (0x8100), length 74: vlan 9, p 0, ethertype IPv4, 10.1.15.2 > 224.0.0.18: CARPv2-advertise 36: vhid=15 advbase=1 advskew=0 authlen=7 counter=13306912573729581052
10 packets captured
10 packets received by filter
0 packets dropped by kernel
3 packets dropped by interface

Wireshark from windows inside a VMware virtual machine only shows carp packets on the vlan that it’s port group is configured to. Presumably VMware is stripping irrelevant VLANs. To show CARP traffic in Wireshark, select a VRRP packet, right click, click decode as and choose CARP from the list.
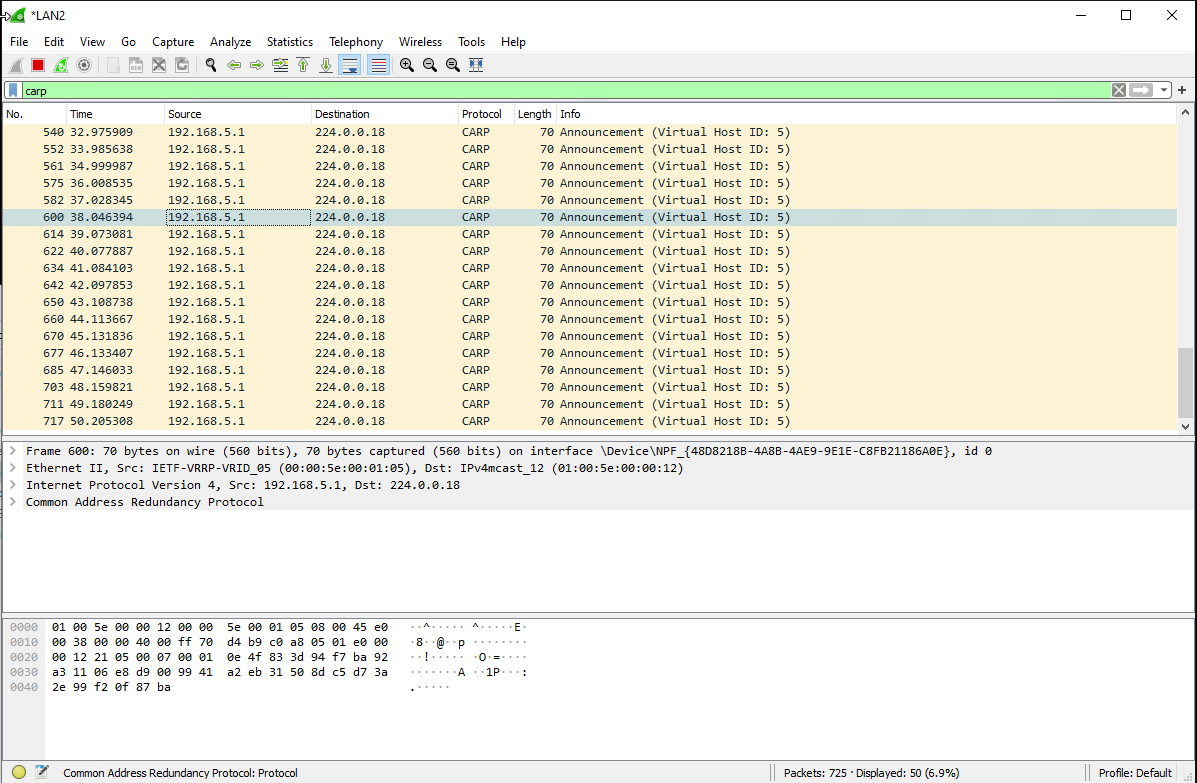
Wireshark Windows

The CARP interfaces all now show Master/Backup correctly. Failover is also working as expected.
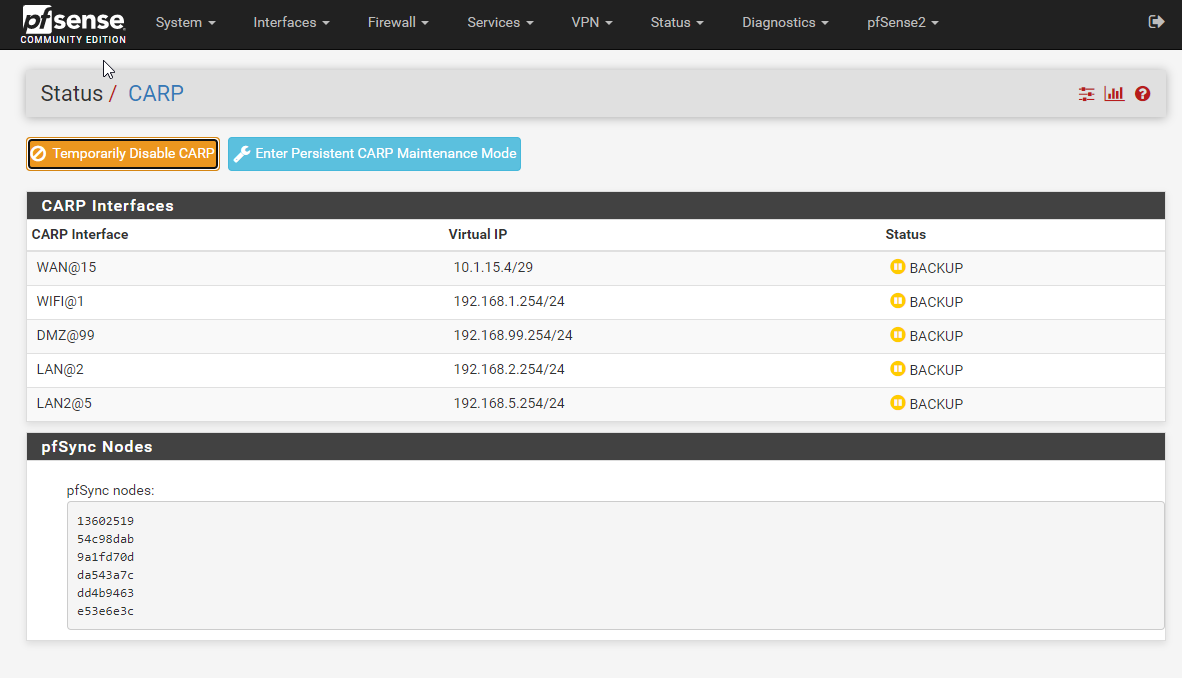
Backup CARP

Written with StackEdit.
Saturday, 10 October 2020

RDP File Signing

RDP File Signing.md

Removing unknown publisher errors from RDP connection files

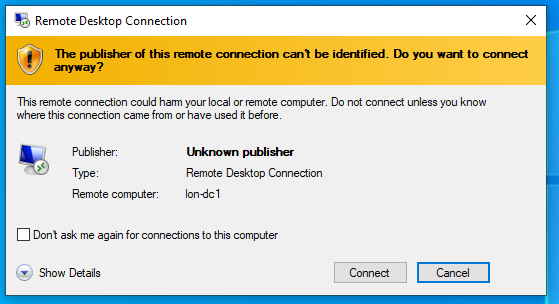
Ever seen this error or had it reported by a customer?

The publisher of this remote connection can’t be identified. Do you want to connect anyway?

With a publisher name of Unknown publisher

Unknown RDP Publisher

Getting rid of this is a 2 step process, first sign the RDP file, then set your clients to trust the signing certificate. Unfortunately this is only possible through a policy setting so the client machine needs to be domain joined or you must edit the local policy of the client.

Signing the RDP File

Signing the RDP file is done with the rdpsign tool, I found this built in on Server 2012, Windows 10 and Server 2019 so it looks like it’s there across the board. I don’t think the certificate requires anything special except for the Digital Signature key usage. I tested this with both a public wildcard certificate issued by Let’s Encrypt and with an AD Certificate Services issued “Code Signing” certificate. Presumably this would work with a self-signed certificate since the thumbprint is pinned later in group policy.

The /sha256 switch appears to be missing in earlier versions (2012, non-R2), but I used the /sha1 switch in it’s place and it accepted a sha256 certificate.

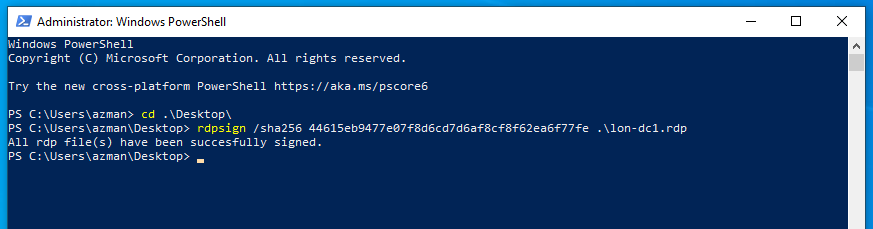
Run the command as follows

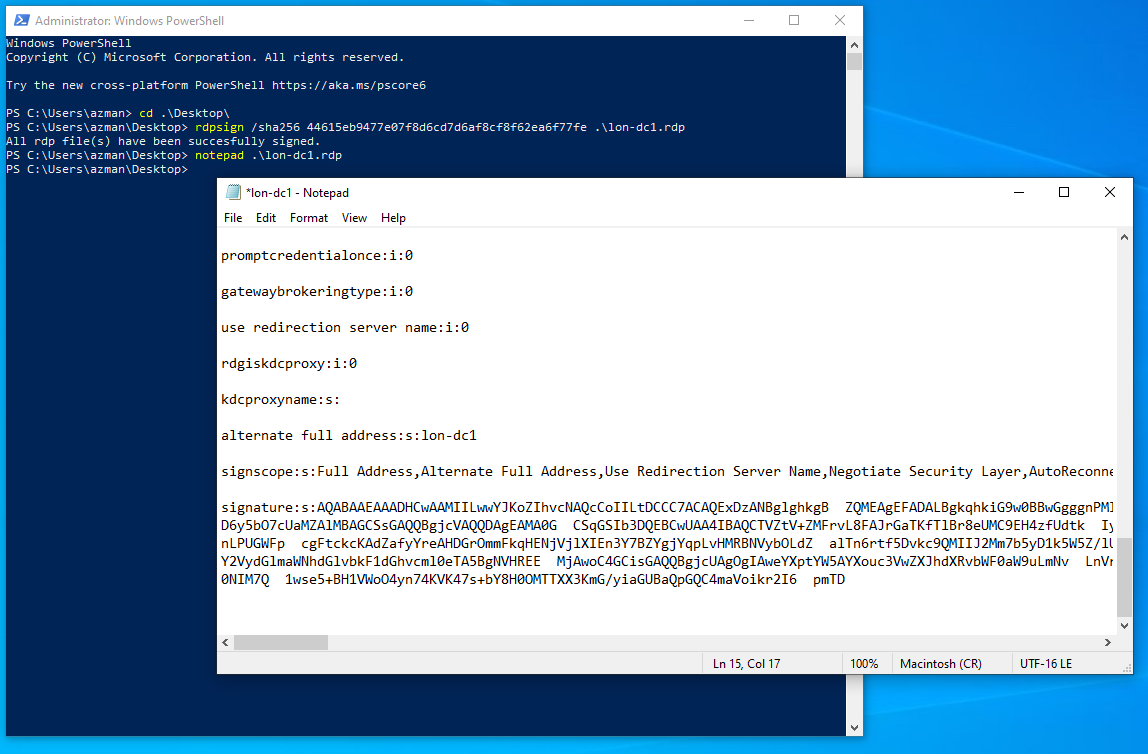
rdpsign.exe /sha256 <certificate thumbprint> filename.rdp

Example output from rdpsign

Once signed, if you open the .rdp file with notepad, you’ll see a signature block at the bottom of the file. Modifying any of the signscope elements of the file will cause the original unknown publisher warning to appear.

Example signed RDP file

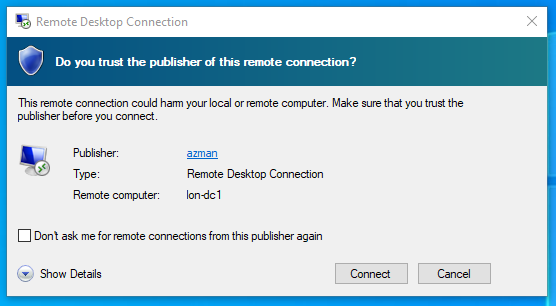
Now that the file is signed, the first step is complete, but now there is just a different warning asking if you trust the publisher. The publisher listed is the subject name of the certificate used.

Example signed publisher warning

Setting the SHA1 hash in policy

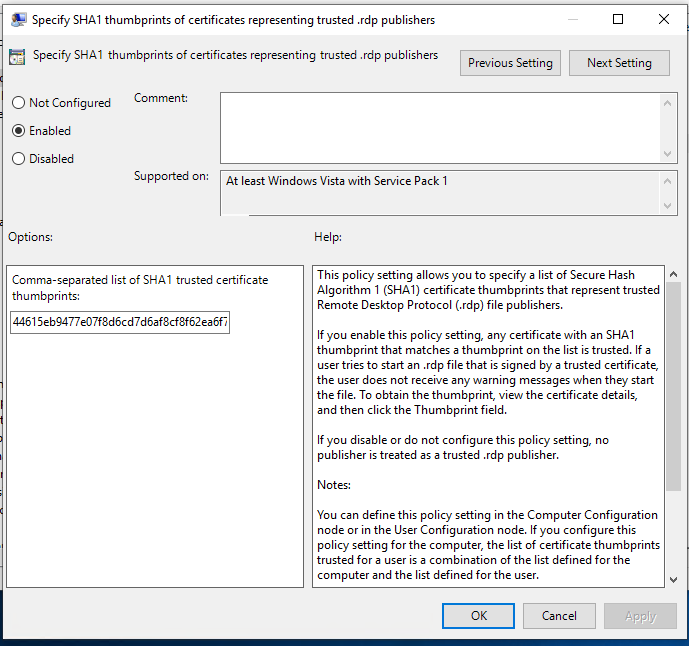
To actually make the warning go away, the Specify SHA1 thumbprints of certificates representing trusted .rdp publishers setting in policy needs to be changed. In group policy the setting is as follows, the list is comma separated and there is an equivalent setting in the user policy.

Computer Configuration\Administrative Templates\Windows Components\Remote Desktop Services\Remote Desktop Connection Client

Here it is in a GPO

Policy location

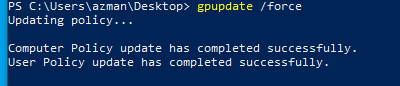
Once the policy is set, update group policy on the client and reopen the .rdp file.

gpupdate output

And now there is no warning!

no warning

Written with StackEdit.
Nutanix CE 2.0 on ESXi AOS Upgrade Hangs

AOS Upgrade on ESXi from 6.5.2 to 6.5.3.6 hangs. Issue I have tried to upgrade my Nutanix CE 2.0 based on ESXi to a newer AOS version for ...